|
|
|
|
| Apache Tuscany > Home > SCA Overview > SCA Java > Java SCA Documentation Menu > Getting Started with Tuscany (using Tuscany Eclipse Plugin 1.1) | User List | Dev List | Issue Tracker |
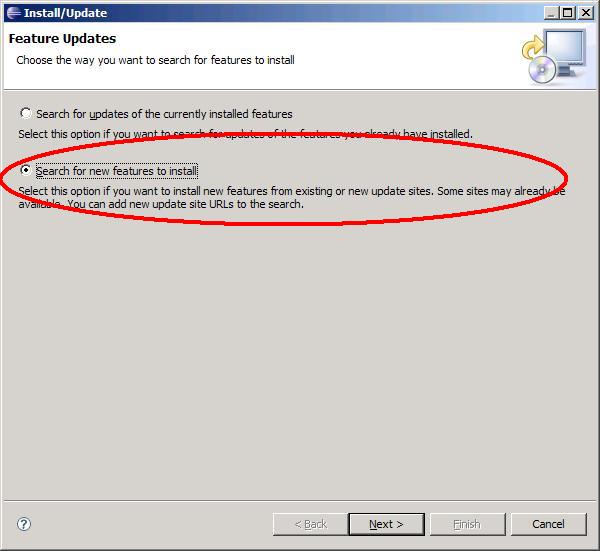
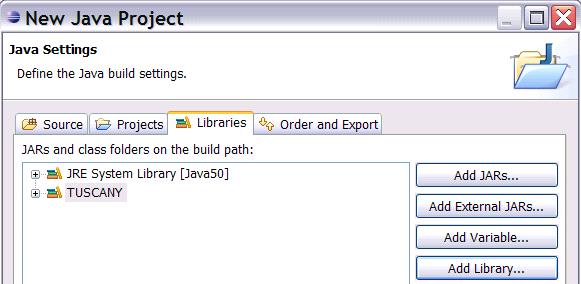
Ready, Set, Go - Getting started with TuscanyInstall the Tuscany Eclipse PluginThe first thing you do is to start Eclipse and go to Help -> Software Updates -> Find and Install,
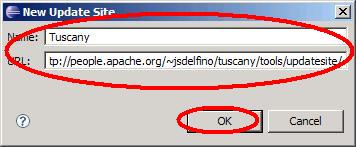
On the next dialog, click on "New Remote Site..." to create a new site entry. Give it a name such as
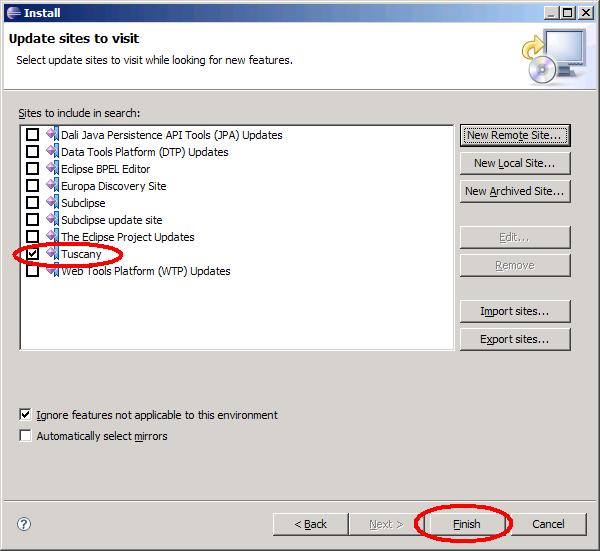
Make sure the "Remote Site" that was just created is selected, and click "Finish"
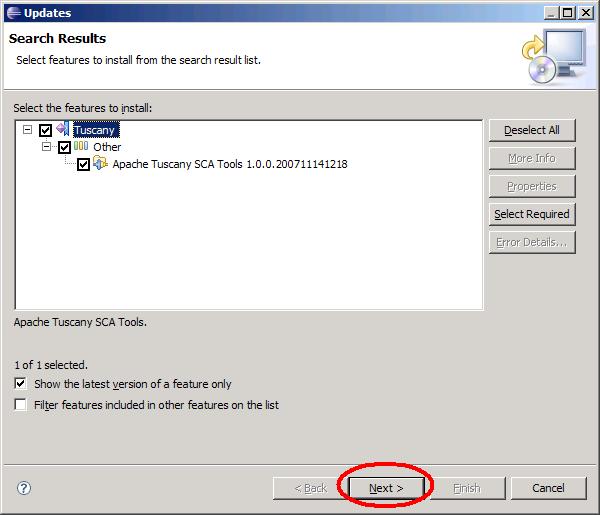
Select the "Apache Tuscany SCA Tools" and click "Next", and then, on the next dialog, click "Finish"
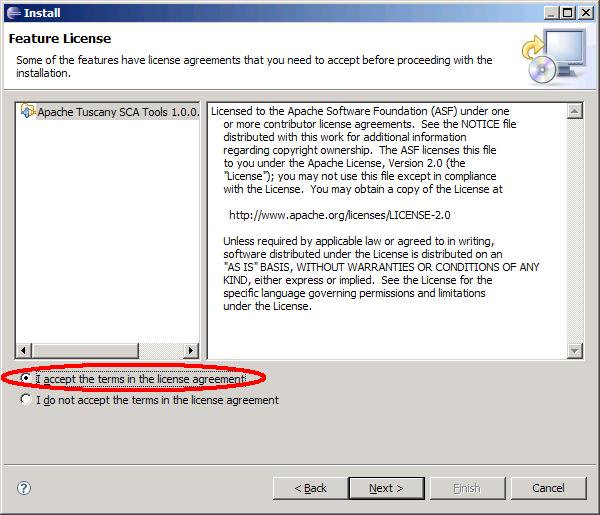
Accept the "Plugin License"
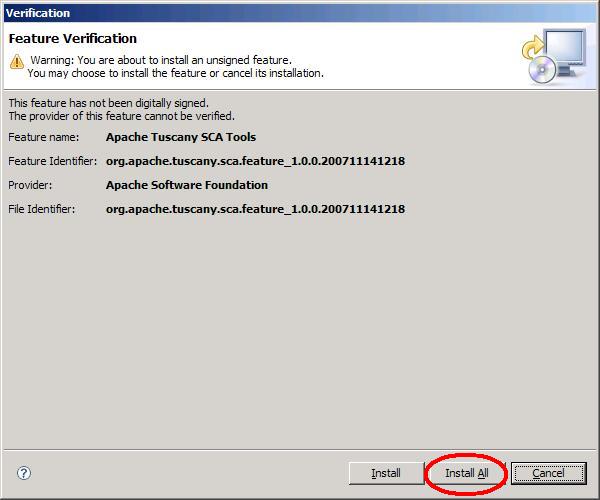
and next click on "Install All"
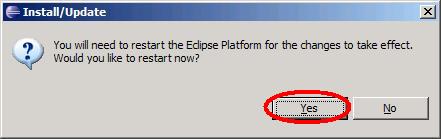
When asked to "restart eclipse", click the "yes" button.
Create your 1st Composite Service ApplicationThe following shows the composition diagram for the composite service application you are about
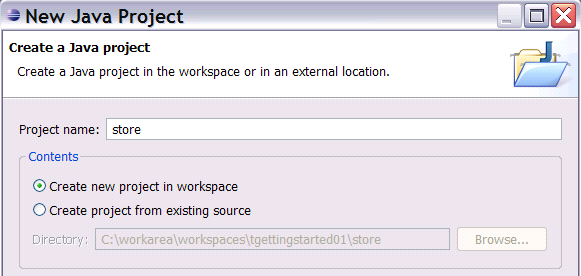
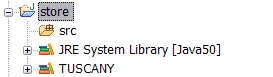
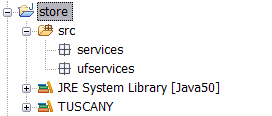
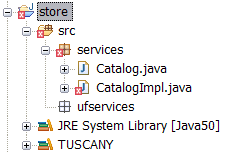
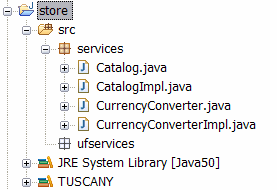
The composite service application you will create is a composition of four services. The composed Create a Java ProjectIn this step you create a Java Project in Eclipse to hold the composite service application. Construct ServicesFirst you create two package folders into which later in this step you place service implementations. Next you enter "services" as the package Name, and press the Finish button to complete the CatalogIn this step you create the Catalog service interface and implementation. package services; import org.osoa.sca.annotations.Remotable; @Remotable public interface Catalog { String[] get(); } Select the "services" package again. Select the New Java Class button The Java editor will open on the new created Java class. Replace the content of the editor by package services; import java.util.ArrayList; import java.util.List; import org.osoa.sca.annotations.Init; import org.osoa.sca.annotations.Property; import org.osoa.sca.annotations.Reference; public class CatalogImpl implements Catalog { @Property public String currencyCode = "USD"; @Reference public CurrencyConverter currencyConverter; private List<String> catalog = new ArrayList<String>(); @Init public void init() { String currencySymbol = currencyConverter.getCurrencySymbol(currencyCode); catalog.add("Apple - " + currencySymbol + currencyConverter.getConversion("USD", currencyCode, 2.99f)); catalog.add("Orange - " + currencySymbol + currencyConverter.getConversion("USD", currencyCode, 3.55f)); catalog.add("Pear - " + currencySymbol + currencyConverter.getConversion("USD", currencyCode, 1.55f)); } public String[] get() { String[] catalogArray = new String[catalog.size()]; catalog.toArray(catalogArray); return catalogArray; } } After completing these steps the content of the "store" project will look as follows. CurrencyConverterIn this step you create the CurrencyConverter service interface and implementation. package services; import org.osoa.sca.annotations.Remotable; @Remotable public interface CurrencyConverter { public float getConversion(String fromCurrenycCode, String toCurrencyCode, float amount); public String getCurrencySymbol(String currencyCode); } Next create a Java class in the "services" package named "CurrencyConverterImpl" and copy-paste package services; public class CurrencyConverterImpl implements CurrencyConverter { public float getConversion(String fromCurrencyCode, String toCurrencyCode, float amount) { if (toCurrencyCode.equals("USD")) return amount; else if (toCurrencyCode.equals("EUR")) return amount*0.7256f; return 0; } public String getCurrencySymbol(String currencyCode) { if (currencyCode.equals("USD")) return "$"; else if (currencyCode.equals("EUR")) return "€"; return "?"; } } After completing these steps the content of the "store" project will look as follows.
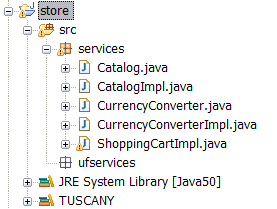
ShoppingCartIn this step you create the ShoppingCart service implementation. You follow the same steps that you learned previously to create the implementation. Create a Java class in the "services" package named "ShoppingCartImpl" and copy-paste the package services; import java.util.Date; import java.util.HashMap; import java.util.Map; import java.util.UUID; import org.apache.tuscany.sca.binding.feed.collection.Collection; import org.apache.tuscany.sca.binding.feed.collection.NotFoundException; import com.sun.syndication.feed.atom.Content; import com.sun.syndication.feed.atom.Entry; import com.sun.syndication.feed.atom.Feed; import com.sun.syndication.feed.atom.Link; public class ShoppingCartImpl implements Collection { // needs to change to instance var once conversation scope works private static Map<String, Entry> cart = new HashMap<String, Entry>(); public Feed getFeed() { Feed feed = new Feed(); feed.setTitle("shopping cart"); Content subtitle = new Content(); subtitle.setValue("Total : " + getTotal()); feed.setSubtitle(subtitle); feed.getEntries().addAll(cart.values()); return feed; } public Entry get(String id) throws NotFoundException { return cart.get(id); } public Entry post(Entry entry) { String id = "cart-" + UUID.randomUUID().toString(); entry.setId(id); Link link = new Link(); link.setRel("edit"); link.setHref("" + id); entry.getOtherLinks().add(link); link = new Link(); link.setRel("alternate"); link.setHref("" + id); entry.getAlternateLinks().add(link); entry.setCreated(new Date()); cart.put(id, entry); return entry; } public void put(String id, Entry entry) throws NotFoundException { entry.setUpdated(new Date()); cart.put(id, entry); } public void delete(String id) throws NotFoundException { if (id.equals("")) cart.clear(); else cart.remove(id); } private String getTotal() { float total = 0; String symbol = ""; if (!cart.isEmpty()) { Entry entry = cart.values().iterator().next(); String item = ((Content)entry.getContents().get(0)).getValue(); symbol = item.substring(item.indexOf("-")+2, item.indexOf("-")+3); } for (Entry entry : cart.values()) { String item = ((Content)entry.getContents().get(0)).getValue(); total += Float.valueOf(item.substring(item.indexOf("-")+3)); } return symbol + String.valueOf(total); } } Note: Since the Tuscany conversational support is not ready yet the cart is realized through a hack. After completing these steps the content of the "store" project will look as follows.
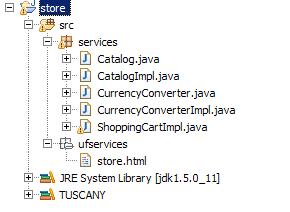
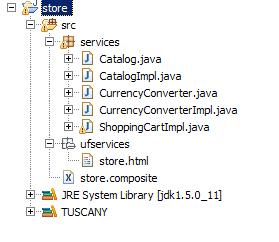
StoreIn this step you create the user facing Store service that will run in a Web browser and provide the Select the "ufservices" package. Right click to get the context menu, select New, and then File. In The Text editor will open on the new created html file. Replace the content of the editor by copy-paste <html> <head> <title>Store</TITLE> <script type="text/javascript" src="store.js"></script> <script language="JavaScript"> //@Reference var catalog = new Reference("catalog"); //@Reference var shoppingCart = new Reference("shoppingCart"); function catalog_getResponse(items) { var catalog = ""; for (var i=0; i<items.length; i++) catalog += '<input name="items" type="checkbox" value="' + items[i] + '">' + items[i]+ ' <br>'; document.getElementById('catalog').innerHTML=catalog; } function shoppingCart_getResponse(feed) { if (feed != null) { var entries = feed.getElementsByTagName("entry"); var list = ""; for (var i=0; i<entries.length; i++) { var item = entries[i].getElementsByTagName("content")[0].firstChild.nodeValue; list += item + ' <br>'; } document.getElementById("shoppingCart").innerHTML = list; document.getElementById('total').innerHTML = feed.getElementsByTagName("subtitle")[0].firstChild.nodeValue; } } function shoppingCart_postResponse(entry) { shoppingCart.get("", shoppingCart_getResponse); } function addToCart() { var items = document.catalogForm.items; var j = 0; for (var i=0; i<items.length; i++) if (items[i].checked) { var entry = '<entry xmlns="http://www.w3.org/2005/Atom"><title>cart-item</title><content type="text">'+items[i].value+'</content></entry>' shoppingCart.post(entry, shoppingCart_postResponse); items[i].checked = false; } } function checkoutCart() { document.getElementById('store').innerHTML='<h2>' + 'Thanks for Shopping With Us!</h2>'+ '<h2>Your Order</h2>'+ '<form name="orderForm" action="store.html">'+ document.getElementById('shoppingCart').innerHTML+ '<br>'+ document.getElementById('total').innerHTML+ '<br>'+ '<br>'+ '<input type="submit" value="Continue Shopping">'+ '</form>'; shoppingCart.del("", null); } function deleteCart() { shoppingCart.del("", null); document.getElementById('shoppingCart').innerHTML = ""; document.getElementById('total').innerHTML = ""; } catalog.get(catalog_getResponse); shoppingCart.get("", shoppingCart_getResponse); </script> </head> <body> <h1>Store</h1> <div id="store"> <h2>Catalog</h2> <form name="catalogForm"> <div id="catalog" ></div> <br> <input type="button" onClick="addToCart()" value="Add to Cart"> </form> <br> <h2>Your Shopping Cart</h2> <form name="shoppingCartForm"> <div id="shoppingCart"></div> <br> <div id="total"></div> <br> <input type="button" onClick="checkoutCart()" value="Checkout"> <input type="button" onClick="deleteCart()" value="Empty"> <a href="../ShoppingCart/">(feed)</a> </form> </div> </body> </html> After completing these steps the content of the "store" project will look as follows. Compose ServicesNow that you have all the required service implementations you compose them together to provide Select the "src" folder of the "store" project. Right click to get the context menu, select New, and The Text editor will open on the new created composite file. Replace the content of the editor by <?xml version="1.0" encoding="UTF-8"?> <composite xmlns="http://www.osoa.org/xmlns/sca/1.0" xmlns:t="http://tuscany.apache.org/xmlns/sca/1.0" xmlns:s="http://store" name="store"> <component name="store"> <t:implementation.widget location="ufservices/store.html"/> <service name="Widget"> <t:binding.http/> </service> <reference name="catalog" target="Catalog"> <t:binding.jsonrpc/> </reference> <reference name="shoppingCart" target="ShoppingCart"> <t:binding.atom/> </reference> </component> <component name="Catalog"> <implementation.java class="services.CatalogImpl"/> <property name="currencyCode">USD</property> <service name="Catalog"> <t:binding.jsonrpc/> </service> <reference name="currencyConverter" target="CurrencyConverter"/> </component> <component name="ShoppingCart"> <implementation.java class="services.ShoppingCartImpl"/> <service name="Collection"> <t:binding.atom/> </service> </component> <component name="CurrencyConverter"> <implementation.java class="services.CurrencyConverterImpl"/> </component> </composite> After completing these steps the content of the "store" project will look as follows.
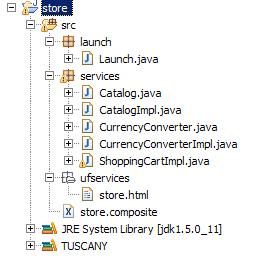
Launch ServicesIn this step you create the code to launch the Tuscany runtime with the new store composite Select the "store" project and click on the New Java Package button package creation dialog. Use the dialog to create a new package named "launch". The Java editor will open on the new created Java class. Replace the content of the editor by package launch; import org.apache.tuscany.sca.host.embedded.SCADomain; public class Launch { public static void main(String[] args) throws Exception { System.out.println("Starting ..."); SCADomain scaDomain = SCADomain.newInstance("store.composite"); System.out.println("store.composite ready for big business !!!"); System.out.println(); System.in.read(); scaDomain.close(); } } After completing these steps the content of the "store" project will look as follows.
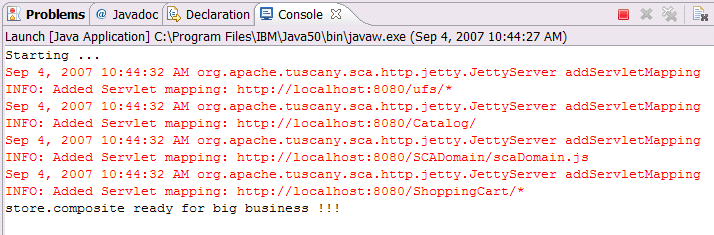
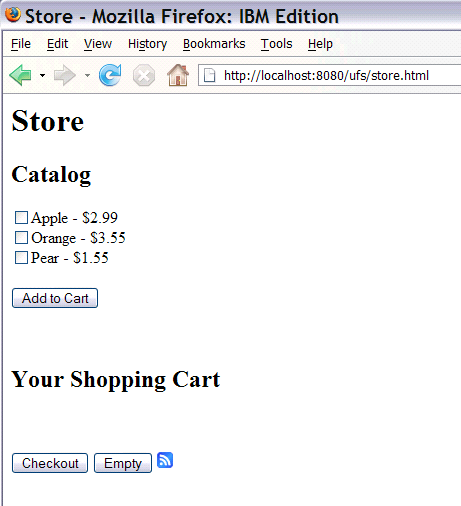
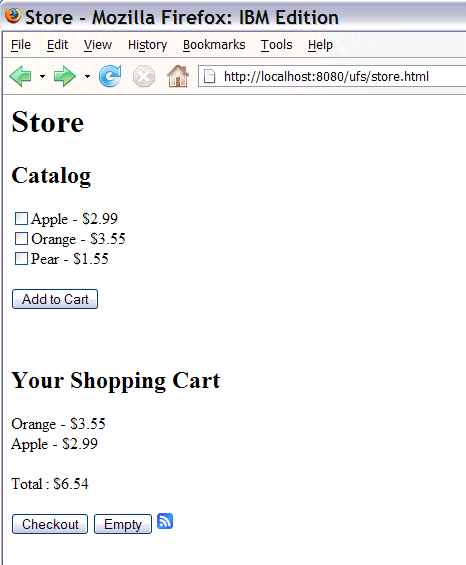
Use ServicesIn this step you launch and use the store composite service application you created. First select the "Launch" class in the "launch" package of your "store" project. Right click to get the The Eclipse console will show the following messages. Next Launch your Web browser and enter the following address: http://localhost:8080/store/store.html You get to the Store user facing service of the composite service application.
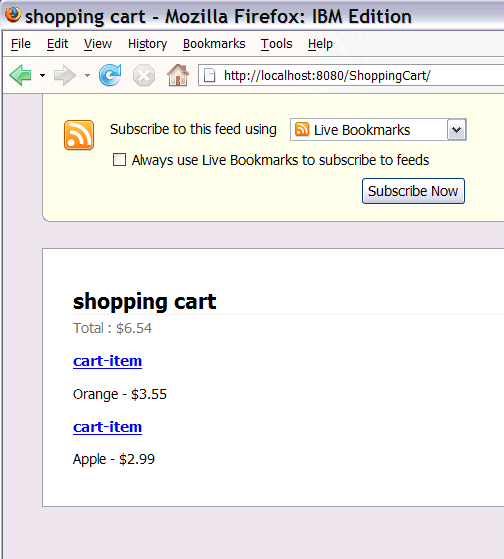
You can select items from the Catalog and add them to your Shopping Cart. Note: When adding items for the first time you will be asked for userid and password by the Since the ShoppingCart service is bound using the ATOM binding, you can also look at the Use the browser back button to get back to the Store page.
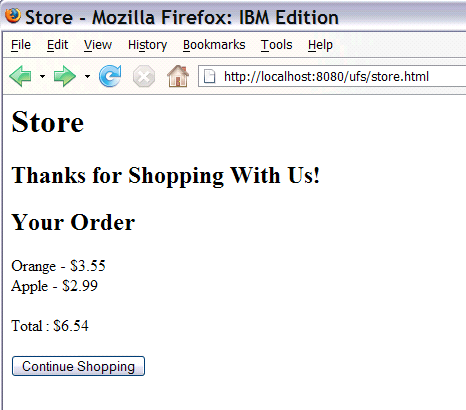
And then you can Checkout to complete your order.
|