Copyright © 2023 The Apache Software Foundation
License and Disclaimer
The ASF licenses this documentation to you under the Apache License, Version 2.0 (the "License"); you may not use this documentation except in compliance with the License. You may obtain a copy of the License at
Unless required by applicable law or agreed to in writing, this documentation and its contents are distributed under the License on an "AS IS" BASIS, WITHOUT WARRANTIES OR CONDITIONS OF ANY KIND, either express or implied. See the License for the specific language governing permissions and limitations under the License.
Trademarks
All terms mentioned in the text that are known to be trademarks or service marks have been appropriately capitalized. Use of such terms in this book should not be regarded as affecting the validity of the the trademark or service mark.
1. Apache UIMA Ruta Overview
1.1. What is Apache UIMA Ruta?
Apache UIMA Ruta™ is a rule-based script language supported by Eclipse-based tooling. The language is designed to enable rapid development of text processing applications within Apache UIMA™. A special focus lies on the intuitive and flexible domain specific language for defining patterns of annotations. Writing rules for information extraction or other text processing applications is a tedious process. The Eclipse-based tooling for UIMA Ruta, called the Apache UIMA Ruta Workbench, was created to support the user and to facilitate every step when writing UIMA Ruta rules. Both the Ruta rule language and the UIMA Ruta Workbench integrate smoothly with Apache UIMA.
1.2. Getting started
This section gives a short roadmap how to read the documentation and gives some recommendations how to start developing UIMA Ruta-based applications. This documentation assumes that the reader knows about the core concepts of Apache UIMA. Knowledge of the meaning and usage of the terms “CAS”, “Feature Structure”, “Annotation”, “Type”, “Type System” and “Analysis Engine” is required. Please refer to the documentation of Apache UIMA for an introduction.
Unexperienced users that want to learn about UIMA Ruta can start with the next two sections: Section 1.3 gives a short overview of the core ideas and features of the UIMA Ruta language and Workbench. This section introduces the main concepts of the UIMA Ruta language. It explains how UIMA Ruta rules are composed and applied, and discusses the advantages of the UIMA Ruta system. The following Section 1.4 approaches the UIMA Ruta language using a different perspective. Here, the language is introduced by examples. The first example starts with explaining how a simple rule looks like, and each following example extends the syntax or semantics of the UIMA Ruta language. After the consultation of these two sections, the reader is expected to have gained enough knowledge to start writing her first UIMA Ruta-based application.
The UIMA Ruta Workbench was created to support the user and to facilitate the development process. It is strongly recommended to use this Eclipse-based IDE since it, for example, automatically configures the component descriptors and provides editing support like syntax checking. Section 3.1 describes how the UIMA Ruta Workbench is installed. UIMA Ruta rules can also be applied on CAS without using the UIMA Ruta Workbench. Section 4.1 contains examples how to execute UIMA Ruta rules in plain java. A good way to get started with UIMA Ruta is to play around with an exemplary UIMA Ruta project, e.g., “ExampleProject” in the example-projects of the UIMA Ruta source release. This UIMA Ruta project contains some simple rules for processing citation metadata.
1.3. Core Concepts
The UIMA Ruta language is an imperative rule language extended with scripting elements. A UIMA Ruta rule defines a pattern of annotations with additional conditions. If this pattern applies, then the actions of the rule are performed on the matched annotations. A rule is composed of a sequence of rule elements and a rule element essentially consist of four parts: A matching condition, an optional quantifier, a list of conditions and a list of actions. The matching condition is typically a type of an annotation by which the rule element matches on the covered text of one of those annotations. The quantifier specifies, whether it is necessary that the rule element successfully matches and how often the rule element may match. The list of conditions specifies additional constraints that the matched text or annotations need to fulfill. The list of actions defines the consequences of the rule and often creates new annotations or modifies existing annotations. They are only applied if all rule elements of the rule have successfully matched. Examples for UIMA Ruta rules can be found in Section 1.4.
When UIMA Ruta rules are applied on a document, respectively on a CAS, then they are always grouped in a script file. However, a UIMA Ruta script file does not only contain rules, but also other statements. First of all, each script file starts with a package declaration followed by a list of optional imports. Then, common statements like rules, type declarations or blocks build the body and functionality of a script. Section 4.1 gives an example, how UIMA Ruta scripts can be applied in plain Java. UIMA Ruta script files are naturally organized in UIMA Ruta projects, which is a concept of the UIMA Ruta Workbench. The structure of a UIMA Ruta project is described in Section 3.3
The inference of UIMA Ruta rules, that is the approach how the rules are applied, can be described as imperative depth-first matching. In contrast to similar rule-based systems, UIMA Ruta rules are applied in the order they are defined in the script. The imperative execution of the matching rules may have disadvantages, but also many advantages like an increased rate of development or an easier explanation. The second main property of the UIMA Ruta inference is the depth-first matching. When a rule matches on a pattern of annotations, then an alternative is always tracked until it has matched or failed before the next alternative is considered. The behavior of a rule may change, if it has already matched on an early alternative and thus has performed an action, which influences some constraints of the rule. Examples, how UIMA Ruta rules are applied, are given in Section 1.4.
The UIMA Ruta language provides the possibility to approach an annotation problem in different ways. Let us distinguish some approaches as an example. It is common in the UIMA Ruta language to create many annotations of different types. These annotations are probably not the targeted annotation of the domain, but can be helpful to incrementally approximate the annotation of interest. This enables the user to work “bottom-up” and “top-down”. In the former approach, the rules add incrementally more complex annotations using simple ones until the target annotation can be created. In the latter approach, the rules get more specific while partitioning the document in smaller segments, which result in the targeted annotation, eventually. By using many “helper”-annotations, the engineering task becomes easier and more comprehensive. The UIMA Ruta language provides distinctive language elements for different tasks. There are, for example, actions that are able to create new annotations, actions that are able to remove annotations and actions that are able to modify the offsets of annotations. This enables, amongst other things, a transformation-based approach. The user starts by creating general rules that are able to annotate most of the text fragments of interest. Then, instead of making these rules more complex by adding more conditions for situations where they fail, additional rules are defined that correct the mistakes of the general rules, e.g., by deleting false positive annotations. Section 1.4 provides some examples how UIMA Ruta rules can be engineered.
To write rules manually is a tedious and error-prone process. The UIMA Ruta Workbench was developed to facilitate writing rules by providing as much tooling support as possible. This includes, for example, syntax checking and auto completion, which make the development less error-prone. The user can annotate documents and use these documents as unit tests for test-driven development or quality maintenance. Sometimes, it is necessary to debug the rules because they do not match as expected. In this case, the explanation perspective provides views that explain every detail of the matching process. Finally, the UIMA Ruta language can also be used by the tooling, for example, by the “Query” view. Here, UIMA Ruta rules can be used as query statements in order to investigate annotated documents.
UIMA Ruta smoothly integrates with Apache UIMA. First of all, the UIMA Ruta rules are applied using a generic Analysis Engine and thus UIMA Ruta scripts can easily be added to Apache UIMA pipelines. UIMA Ruta also provides the functionality to import and use other UIMA components like Analysis Engines and Type Systems. UIMA Ruta rules can refer to every type defined in an imported type system, and the UIMA Ruta Workbench generates a type system descriptor file containing all types that were defined in a script file. Any Analysis Engine can be executed by rules as long as their implementation is available in the classpath. Therefore, functionality outsourced in an arbitrary Analysis Engine can be added and used within UIMA Ruta.
1.4. Learning by Example
This section gives an introduction to the UIMA Ruta language by explaining the rule syntax and inference with some simplified examples. It is recommended to use the UIMA Ruta Workbench to write UIMA Ruta rules in order to gain advantages like syntax checking. A short description how to install the UIMA Ruta Workbench is given here. The following examples make use of the annotations added by the default seeding of the UIMA Ruta Analysis Engine. Their meaning is explained along with the examples.
The first example consists of a declaration of a type followed by a simple rule. Type declarations always start with the keyword “DECLARE” followed by the short name of the new type. The namespace of the type is equal to the package declaration of the script file. If there is no package declaration, then the types declared in the script file have no namespace. There is also the possibility to create more complex types with features or specific parent types, but this will be neglected for now. In the example, a simple annotation type with the short name “Animal” is defined. After the declaration of the type, a rule with one rule element is given. UIMA Ruta rules in general can consist of a sequence of rule elements. Simple rule elements themselves consist of four parts: A matching condition, an optional quantifier, an optional list of conditions and an optional list of actions. The rule element in the following example has a matching condition “W”, an annotation type standing for normal words. Statements like declarations and rules always end with a semicolon.
DECLARE Animal;
W{REGEXP("dog") -> MARK(Animal)};
The rule element also contains one condition and one action, both surrounded by curly parentheses. In order to distinguish conditions from actions they are separated by “→”. The condition “REGEXP("dog")” indicates that the matched word must match the regular expression “dog”. If the matching condition and the additional regular expression are fulfilled, then the action is executed, which creates a new annotation of the type “Animal” with the same offsets as the matched token. The default seeder does actually not add annotations of the type “W”, but annotations of the types “SW” and “CW” for small written words and capitalized words, which both have the parent type “W”.
There is also the possibility to add implicit actions and conditions, which have no explicit name, but consist only of an expression. In the part of the conditions, boolean expressions and feature match expression can be applied, and in the part of the actions, type expressions and feature assignment expression can be added. The following example contains one implicit condition and one implicit action. The additional condition is a boolean expression (boolean variable), which is set to “true”, and therefore is always fulfills the condition. The “MARK” action was replaced by a type expression, which refer to the type “Animal”. The following rule shows, therefore, the same behavior as the rule in the last example.
DECLARE Animal;
BOOLEAN active = true;
W{REGEXP("dog"), active -> Animal};
There is also a special kind of rules, which follow a different syntax and semantic, and enables a simplified creation of annotations based on regular expression. The following rule, for example, creates an “Animal” annotation for each occurrence of “dog” or “cat”.
DECLARE Animal;
"dog|cat" -> Animal;
Since it is tedious to create Animal annotations by matching on different regular expression, we apply an external dictionary in the next example. The first line defines a word list named “AnimalsList”, which is located in the resource folder (the file “Animals.txt” contains one animal name in each line). After the declaration of the type, a rule uses this word list to find all occurrences of animals in the complete document.
WORDLIST AnimalsList = 'Animals.txt';
DECLARE Animal;
Document{-> MARKFAST(Animal, AnimalsList)};
The matching condition of the rule element refers to the complete document, or more specific to the annotation of the type “DocumentAnnotation”, which covers the whole document. The action “MARKFAST” of this rule element creates an annotation of the type “Animal” for each found entry of the dictionary “AnimalsList”.
The next example introduces rules with more than one rule element, whereby one of them is a composed rule element. The following rule tries to annotate occurrences of animals separated by commas, e.g., “dog, cat, bird”.
DECLARE AnimalEnum;
(Animal COMMA)+{-> MARK(AnimalEnum,1,2)} Animal;
The rule consists of two rule elements, with “(Animal COMMA)+{→ MARK(AnimalEnum,1,2)}” being the first rule element and “Animal” the second one. Let us take a closer look at the first rule element. This rule element is actually composed of two normal rule elements, that are “Animal” and “COMMA”, and contains a greedy quantifier and one action. This rule element, therefore, matches on one Animal annotation and a following comma. This is repeated until one of the inner rule elements does not match anymore. Then, there has to be another Animal annotation afterwards, specified by the second rule element of the rule. In this case, the rule matches and its action is executed: The MARK action creates a new annotation of the type “AnimalEnum”. However, in contrast to the previous examples, this action also contains two numbers. These numbers refer to the rule elements that should be used to calculate the span of the created annotation. The numbers “1, 2” state that the new annotation should start with the first rule element, the composed one, and should end with the second rule element.
Let us make the composed rule element more complex. The following rule also matches on lists of animals, which are separated by semicolon. A disjunctive rule element is therefore added, indicated by the symbol “|”, which matches on annotations of the type “COMMA” or “SEMICOLON”.
(Animal (COMMA | SEMICOLON))+{-> MARK(AnimalEnum,1,2)} Animal;There two more special symbols that can be used to link rule elements.
If the symbol “|” is replaced by the symbol & in the last example, then the token after the animal need to be a comma and a semicolon, which is of course not possible.
Another symbol with a special meaning is “%”, which cannot only be used within a composed rule element (parentheses). This symbol can be interpreted as a global “and”: It links several rules, which only fire, if all rules have successfully matched.
In the following example, an annotation of the type “FoundIt” is created, if the document contains two periods in a row and two commas in a row:
PERIOD PERIOD % COMMA COMMA{-> FoundIt};There is a “wild card” (“#”) rule element, which can be used to skip some text or annotations until the next rule element is able to match.
DECLARE Sentence;
PERIOD #{-> MARK(Sentence)} PERIOD;
This rule annotates everything between two “PERIOD” annotations with the type “Sentence”. Please note that the resulting annotations is automatically trimmed using the current filtering settings. Conditions at wild card rule elements should by avoided and only be used by advanced users.
Another special rule element is called “optional” (“_”). Sometimes, an annotation should be created on a text position if it is not followed by an annotation of a specific property. In contrast to normal rule elements with optional quantifier, the optional rule element does not need to match at all.
W ANY{-PARTOF(NUM)};
W _{-PARTOF(NUM)};
The two rules in this example specify the same pattern: A word that is not followed by a number. The difference between the rules shows itself at the border of the matching window, e.g., at the end of the document. If the document contains only a single word, the first rule will not match successfully because the second rule element already fails at its matching condition. The second rule, however, will successfully match due to the optional rule element.
Rule elements can contain more then one condition. The rule in the next example tries to identify headlines, which are bold, underlined and end with a colon.
DECLARE Headline;
Paragraph{CONTAINS(Bold, 90, 100, true),
    CONTAINS(Underlined, 90, 100, true), ENDSWITH(COLON)
    -> MARK(Headline)};
The matching condition of this rule element is given with the type “Paragraph”, thus the rule takes a look at all Paragraph annotations. The rule matches only if the three conditions, separated by commas, are fulfilled. The first condition “CONTAINS(Bold, 90, 100, true)” states that 90%-100% of the matched paragraph annotation should also be annotated with annotations of the type “Bold”. The boolean parameter “true” indicates that amount of Bold annotations should be calculated relatively to the matched annotation. The two numbers “90,100” are, therefore, interpreted as percent amounts. The exact calculation of the coverage is dependent on the tokenization of the document and is neglected for now. The second condition “CONTAINS(Underlined, 90, 100, true)” consequently states that the paragraph should also contain at least 90% of annotations of the type “underlined”. The third condition “ENDSWITH(COLON)” finally forces the Paragraph annotation to end with a colon. It is only fulfilled, if there is an annotation of the type “COLON”, which has an end offset equal to the end offset of the matched Paragraph annotation.
The readability and maintenance of rules does not increase, if more conditions are added. One of the strengths of the UIMA Ruta language is that it provides different approaches to solve an annotation task. The next two examples introduce actions for transformation-based rules.
Headline{-CONTAINS(W) -> UNMARK(Headline)};This rule consists of one condition and one action. The condition “-CONTAINS(W)” is negated (indicated by the character “-”), and is therefore only fulfilled, if there are no annotations of the type “W” within the bound of the matched Headline annotation. The action “UNMARK(Headline)” removes the matched Headline annotation. Put into simple words, headlines that contain no words at all are not headlines.
The next rule does not remove an annotation, but changes its offsets dependent on the context.
Headline{-> SHIFT(Headline, 1, 2)} COLON;Here, the action “SHIFT(Headline, 1, 2)” expands the matched Headline annotation to the next colon, if that Headline annotation is followed by a COLON annotation.
UIMA Ruta rules can contain arbitrary conditions and actions, which is illustrated by the next example.
DECLARE Month, Year, Date;
ANY{INLIST(MonthsList) -> MARK(Month), MARK(Date,1,3)}
    PERIOD? NUM{REGEXP(".{2,4}") -> MARK(Year)};
This rule consists of three rule elements. The first one matches on every token, which has a covered text that occurs in a word lists named “MonthsList”. The second rule element is optional and does not need to be fulfilled, which is indicated by the quantifier “?”. The last rule element matches on numbers that fulfill the regular expression “REGEXP(".{2,4}"” and are therefore at least two characters to a maximum of four characters long. If this rule successfully matches on a text passage, then its three actions are executed: An annotation of the type “Month” is created for the first rule element, an annotation of the type “Year” is created for the last rule element and an annotation of the type “Date” is created for the span of all three rule elements. If the word list contains the correct entries, then this rule matches on strings like “Dec. 2004”, “July 85” or “11.2008” and creates the corresponding annotations.
After introducing the composition of rule elements, the default matching strategy is examined. The two rules in the next example create an annotation for a sequence of arbitrary tokens with the only difference of one condition.
DECLARE Text1, Text2;
ANY+{ -> MARK(Text1)};
ANY+{-PARTOF(Text2) -> MARK(Text2)};
The first rule matches on each occurrence of an arbitrary token and continues this until the end of the document is reached. This is caused by the greedy quantifier “+”. Note that this rule considers each occurrence of a token and is therefore executed for each token resulting many overlapping annotations. This behavior is illustrated with an example: When applied on the document “Peter works for Frank”, the rule creates four annotations with the covered texts “Peter works for Frank”, “works for Frank”, “for Frank” and “Frank”. The rule first tries to match on the token “Peter” and continues its matching. Then, it tries to match on the token “works” and continues its matching, and so on.
In this example, the second rule only returns one annotation, which covers the complete document. This is caused by the additional condition “-PARTOF(Text2)”. The PARTOF condition is fulfilled, if the matched annotation is located within an annotation of the given type, or put in simple words, if the matched annotation is part of an annotation of the type “Text2”. When applied on the document “Peter works for Frank”, the rule matches on the first token “Peter”, continues its match and creates an annotation of the type “Text2” for the complete document. Then it tries to match on the second token “works”, but fails, because this token is already part of an Text2 annotation.
UIMA Ruta rules can not only be used to create or modify annotations, but also to create features for annotations. The next example defines and assigns a relation of employment, by storing the given annotations as feature values.
DECLARE Annotation EmplRelation
    (Employee employeeRef, Employer employerRef);
Sentence{CONTAINS(EmploymentIndicator) -> CREATE(EmplRelation,
    "employeeRef" = Employee, "employerRef" = Employer)};
The first statement of this example is a declaration that defines a new type of annotation named “EmplRelation”. This annotation has two features: One feature with the name “employeeRef” of the type “Employee” and one feature with the name “employerRef” of the type “Employer”. If the parent type is Annotation, then it can be omitted resulting in the following declaration:
DECLARE EmplRelation (Employee employeeRef, Employer employerRef);The second statement of the example, which is a simple rule, creates one annotation of the type “EmplRelation” for each Sentence annotation that contains at least one annotation of the type “EmploymentIndicator”. Additionally to creating an annotation, the CREATE action also assigns an annotation of the “Employee”, which needs to be located within the span of the matched sentence, to the feature “employeeRef” and an Employer annotation to the feature “employerRef”. The annotations mentioned in this example need to be present in advance.
In order to refer to annotations and, for example, assigning them to some features, special kinds of local and global variables can be utilized. Local variables for annotations do not need to be defined by are specified by a label at a rule element. This label can be utilized for referring to the matched annotation of this rule element within the current rule match alone. The following example illustrate some simple use cases using local variables:
DECLARE Annotation EmplRelation
   (Employee employeeRef, Employer employerRef);
e1:Employer # EmploymentIndicator # e2:Employee)
    {-> EmplRelation, EmplRelation.employeeRef=e2,
        EmplRelation.employerRef=e1};
Global variables for annotations are declared like other variables and are able to store annotations across rules as illustrated by the next example:
DECLARE MentionedAfter(Annotation first);
ANNOTATION firstPerson;
# p:Person{-> firstPerson = p};
Entity{-> MentionedAfter, MentionedAfter.first = firstPerson};
The first line declares a new type that are utilized afterwards.
The second line defines a variable named firstPerson which can store one annotation.
A variable able to hold several annotations is defined with ANNOTATIONLIST.
The next line assigns the first occurrence of Person annotation to the annotation variable firstPerson.
The last line creates an annotation of the type MentionedAfter and assigns the value of the variable firstPerson to the feature first of the created annotation.
Expressions for annotations can be extended by a feature match and also conditions. This does also apply for type expressions that represent annotations. This functionality is illustrated with a simple example:
Sentence{-> CREATE(EmplRelation, "employeeRef" =
    Employee.ct=="Peter"{ENDSWITH(Sentence)})};
Here, an annotation of the type EmplRelation is created for each sentence.
The feature employeeRef is filled with one Employee annotation.
This annotation is specified by its type Employee.
The first annotation of this type within the matched sentence, which covers the text “Peter” and also ends with a Sentence annotation, is selected.
Sometimes, an annotation which was just created by an action should be assigned to a feature. This can be achieved by referring to the annotation given its type like it was shown in the first example with “EmplRelation”. However, this can cause problems in situations, e.g. where several annotation of a type are present at a specific span. Local variables using labels can also be used directly at actions, which create or modify actions. The action will assign the new annotation the the label variable, which can then be utilized by following actions as shown in the following example:
W.ct=="Peter"{-> e:Employee, CREATE(EmplRelation, "employeeRef" = e)};In the last examples, the values of features were defined as annotation types. However, also primitive types can be used, as will be shown in the next example, together with a short introduction of variables.
DECLARE Annotation MoneyAmount(STRING currency, INT amount);
INT moneyAmount;
STRING moneyCurrency;
NUM{PARSE(moneyAmount)} SPECIAL{REGEXP("€") -> MATCHEDTEXT(moneyCurrency),
    CREATE(MoneyAmount, 1, 2, "amount" = moneyAmount,
        "currency" = moneyCurrency)};
First, a new annotation with the name “MoneyAmount” and two features are defined, one string feature and one integer feature. Then, two UIMA Ruta variables are declared, one integer variable and one string variable. The rule matches on a number, whose value is stored in the variable “moneyAmount”, followed by a special token that needs to be equal to the string “€”. Then, the covered text of the special annotation is stored in the string variable “moneyCurrency” and annotation of the type “MoneyAmount” spanning over both rule elements is created. Additionally, the variables are assigned as feature values.
Using feature expression for conditions and action, can reduce the complexity of a rule. The first rule in the following example set the value of the feature “currency” of the annotation of the type “MoneyAmount” to “Euro”, if it was “€” before. The second rule creates an annotation of the type “LessThan” for all annotations of the type “MoneyAmount”, if their amount is less than 100 and the currency is “Euro”.
DECLARE LessThan;
MoneyAmount.currency=="€"{-> MoneyAmount.currency="Euro"};
MoneyAmount{(MoneyAmount.amount<=100),
    MoneyAmount.currency=="Euro" -> LessThan};
UIMA Ruta script files with many rules can quickly confuse the reader. The UIMA Ruta language, therefore, allows to import other script files in order to increase the modularity of a project or to create rule libraries. The next example imports the rules together with all known types of another script file and executes that script file.
SCRIPT uima.ruta.example.SecondaryScript;
Document{-> CALL(SecondaryScript)};
The script file with the name “SecondaryScript.ruta”, which is located in the package “uima/ruta/example”, is imported and executed by the CALL action on the complete document. The script needs to be located in the folder specified by the parameter scriptPaths, or in a corresponding package in the classpath. It is also possible to import script files of other UIMA Ruta projects, e.g., by adapting the configuration parameters of the UIMA Ruta Analysis Engine or by setting a project reference in the project properties of a UIMA Ruta project.
For simple rules that match on the complete document and only specify actions, a simplified syntax exists that omits the matching parts:
SCRIPT uima.ruta.example.SecondaryScript;
CALL(SecondaryScript);
The types of important annotations of the application are often defined in a separate type system. The next example shows how to import those types.
TYPESYSTEM my.package.NamedEntityTypeSystem;
Person{PARTOF(Organization) -> UNMARK(Person)};
The type system descriptor file with the name “NamedEntityTypeSystem.xml” located in the package “my/package” is imported. The descriptor needs to be located in a folder specified by the parameter descriptorPaths.
It is sometimes easier to express functionality with control structures known by programming languages rather than to engineer all functionality only with matching rules. The UIMA Ruta language provides the BLOCK element for some of these use cases. The UIMA Ruta BLOCK element starts with the keyword “BLOCK” followed by its name in parentheses. The name of a block has two purposes: On the one hand, it is easier to distinguish the block, if they have different names, e.g., in the explain perspective of the UIMA Ruta Workbench. On the other hand, the name can be used to execute this block using the CALL action. Hereby, it is possible to access only specific sets of rules of other script files, or to implement a recursive call of rules. After the name of the block, a single rule element is given, which has curly parentheses, even if no conditions or actions are specified. Then, the body of the block is framed by curly brackets.
BLOCK(English) Document{FEATURE("language", "en")} {
    // rules for english documents
}
BLOCK(German) Document{FEATURE("language", "de")} {
    // rules for german documents
}
This example contains two simple BLOCK statements. The rules defined within the block are only executed, if the condition in the head of the block is fulfilled. The rules of the first block are only considered if the feature “language” of the document annotation has the value “en”. Following this, the rules of the second block are only considered for German documents.
The rule element of the block definition can also refer to other annotation types than “Document”. While the last example implemented something similar to an if-statement, the next example provides a show case for something similar to a for-each-statement.
DECLARE SentenceWithNoLeadingNP;
BLOCK(ForEach) Sentence{} {
    Document{-STARTSWITH(NP) -> MARK(SentenceWithNoLeadingNP)};
}
Here, the rule in the block statement is performed for each occurrence of an annotation of the type “Sentence”. The rule within the block matches on the complete document, which is the current sentence in the context of the block statement. As a consequence, this example creates an annotation of the type “SentenceWithNoLeadingNP” for each sentence that does not start with a NP annotation.
There are two more language constructs (-> and <-) that allow to apply rules within a certain context.
These rules are added to an arbitrary rule element and are called inlined rules.
The first example interprets the inlined rules as actions.
They are executed if the surrounding rule was able to match, which makes this one very similar to the block statement.
DECLARE SentenceWithNoLeadingNP;
Sentence{}->{
    Document{-STARTSWITH(NP) -> SentenceWithNoLeadingNP};
};
The second one (<-`) interprets the inlined rules as conditions. The surrounding rule can only match if at least one inlined rule was successfully applied. In the following example, a sentence is annotated with the type SentenceWithNPNP, if there are two successive NP annotations within this sentence.
DECLARE SentenceWithNPNP;
Sentence{-> SentenceWithNPNP}<-{
    NP NP;
};
A rule element may be extended with several inlined rule block as condition or action. If there a more than one inlined rule blocks as condition, each needs to contain at least one rule that was successfully applied. In the following example, the rule will one match if the sentence contains a number followed by a another number and a period followed by a comma, independently from their location within the sentence:
Sentence<-{NUM NUM;}<-{PERIOD COMMA;};Let us take a closer look on what exactly the UIMA Ruta rules match. The following rule matches on a word followed by another word:
W W;To be more precise, this rule matches on all documents like Apache UIMA, ApacheUIMA, Apache <b>UIMA</b>`.
There are two main reasons for this: First of all, it depends on how the available annotations are defined.
The default seeder for the initial annotations creates an annotation for all characters until an upper case character occurs.
Thus, the string “ApacheUIMA” consists of two tokens.
However, more important, the UIMA Ruta language provides a concept of visibility of the annotations.
By default, all annotations of the types “SPACE”, “NBSP”, “BREAK” and “MARKUP” (whitespace and XML elements) are filtered and not visible.
This holds of course for their covered text, too.
The rule elements skip all positions of the document where those annotations occur.
The rule in the last example matches on all examples.
Without the default filtering settings, with all annotations set to visible, the rule matches only on the document “ApacheUIMA” since it is the only one that contains two word annotations without any whitespace between them.
The filtering setting can also be modified by the UIMA Ruta rules themselves. The next example provides rules that extend and limit the amount of visible text of the document.
Sentence;
Document{-> RETAINTYPE(SPACE)};
Sentence;
Document{-> FILTERTYPE(CW)};
Sentence;
Document{-> RETAINTYPE, FILTERTYPE};
The first rule matches on sentences, which do not start with any filtered type. Sentences that start with whitespace or markup, for example, are not considered. The next rule retains all text that is covered by annotations of the type “SPACE” meaning that the rule elements are now sensible to whitespaces. The following rule will, therefore, match on sentences that start with whitespaces. The third rule now filters the type “CW” with the consequence that all capitalized words are invisible. If the following rule now wants to match on sentences, then this is only possible for Sentence annotations that do not start with a capitalized word. The last rule finally resets the filtering setting to the default configuration in the UIMA Ruta Analysis Engine.
The next example gives a showcase for importing external Analysis Engines and for modifying the documents by creating a new view called “modified”. Additional Analysis Engines can be imported with the keyword “ENGINE” followed by the name of the descriptor. These imported Analysis Engines can be executed with the actions “CALL” or “EXEC”. If the executed Analysis Engine adds, removes or modifies annotations, then their types need to be mentioned when calling the descriptor, or else these annotations will not be correctly processed by the following UIMA Ruta rules.
ENGINE utils.Modifier;
Date{-> DEL};
MoneyAmount{-> REPLACE("<MoneyAmount/>")};
Document{-> COLOR(Headline, "green")};
Document{-> EXEC(Modifier)};
In this example, we first import an Analysis Engine defined by the descriptor “Modifier.xml” located in the folder “utils”.
The descriptor needs to be located in the folder specified by the parameter descriptorPaths.
The first rule deletes all text covered by annotations of the type “Date”.
The second rule replaces the text of all annotations of the type “MoneyAmount” with the string <MoneyAmount/>.
The third rule remembers to set the background color of text in Headline annotation to green.
The last rule finally performs all of these changes in an additional view called “modified”, which is specified in the configuration parameters of the analysis engine. Section 1.5.4 and Section 2.17 provide a more detailed description.
In the last example, a descriptor file was loaded in order to import and apply an external analysis engine. Analysis engines can also be loaded using uimaFIT, whereas the given class name has to be present in the classpath. In the UIMA Ruta Workbench, you can add a dependency to a java project, which contains the implementation, to the UIMA Ruta project. The following example loads an analysis engine without an descriptor and applies it on the document. The additional list of types states that the annotations of those types created by the analysis engine should be available to the following Ruta rules.
UIMAFIT my.package.impl.MyAnalysisEngine;
Document{-> EXEC(MyAnalysisEngine, {MyType1, MyType2})};
1.5. UIMA Analysis Engines
This section gives an overview of the UIMA Analysis Engines shipped with UIMA Ruta. The most important one is “RutaEngine”, a generic analysis engine, which is able to interpret and execute script files. The other analysis engines provide support for some additional functionality or add certain types of annotations.
1.5.1. Ruta Engine
This generic Analysis Engine is the most important one for the UIMA Ruta language since it is responsible for applying the UIMA Ruta rules on a CAS. Its functionality is configured by the configuration parameters, which, for example, specify the rule file that should be executed. In the UIMA Ruta Workbench, a basic template named “BasicEngine.xml” is given in the descriptor folder of a UIMA Ruta project and correctly configured descriptors typically named “MyScriptEngine.xml” are generated in the descriptor folder corresponding to the package namespace of the script file. The available configuration parameters of the UIMA Ruta Analysis Engine are described in the following.
Configuration Parameters
The configuration parameters of the UIMA Ruta Analysis Engine can be subdivided into three different groups: parameters for the setup of the environment (mainScript to additionalExtensions), parameters that change the behavior of the analysis engine (reloadScript to simpleGreedyForComposed) and parameters for creating additional information how the rules were executed (debug to createdBy). First, a short overview of the configuration parameters is given in Table 1. Afterwards, all parameters are described in detail with examples.
To change the value of any configuration parameter within a UIMA Ruta script, the CONFIGURE action (see Section 2.8.8) can be used. For changing behavior of dynamicAnchoring the DYNAMICANCHORING action (see Section 2.8.11) is recommended.
| Name | Short description | Type |
|---|---|---|
Name with complete namespace of the script which will be interpreted and executed by the analysis engine. |
Single String |
|
Script (list of rules) to be applied. |
Single String |
|
This parameter specifies the name of the non-existing script if the parameter 'rules' is used. |
Single String |
|
Encoding of all UIMA Ruta script files. |
Single String |
|
List of absolute locations, which contain the necessary script files like the main script. |
Multi String |
|
List of absolute locations, which contain the necessary descriptor files like type systems. |
Multi String |
|
List of absolute locations, which contain the necessary resource files like word lists. |
Multi String |
|
Optional list of names with complete namespace of additional scripts, which can be referred to. |
Multi String |
|
Optional list of names with complete namespace of additional analysis engines, which can be called by UIMA Ruta rules. |
Multi String |
|
Optional list of class names with complete namespace of additional uimaFIT analysis engines, which can be called by UIMA Ruta rules. |
Multi String |
|
List of factory classes for additional extensions of the UIMA Ruta language like proprietary conditions. |
Multi String |
|
Option to initialize the rule script each time the analysis engine processes a CAS. |
Single Boolean |
|
List of class names that provide additional annotations before the rules are executed. |
Multi String |
|
List of complete type names of annotations that are invisible by default. |
Multi String |
|
Option to remove all inference annotations after execution of the rule script. |
Single Boolean |
|
Option to select annotation types that should be indexed internally in ruta. |
Multi String |
|
Option to skip annotation types in the internal indexing. |
Multi String |
|
Option to index only mentioned types internally in ruta. |
Single Boolean |
|
Option to index types additionally to the mentioned ones internally in ruta. |
Multi String |
|
Option to select annotation types that should be reindexed internally in ruta. |
Multi String |
|
Option to skip annotation types in the internal reindexing. |
Multi String |
|
Option to reindex only mentioned types internally in ruta. |
Single Boolean |
|
Option to reindex types additionally to the mentioned ones internally in ruta. |
Multi String |
|
Mode how internal indexing should be applied. |
Single String |
|
Option to validate the internal indexing. |
Single String |
|
Option to define empty text positions as invisible. |
Single Boolean |
|
Option to extend the datapath by the descriptorPaths |
Single Boolean |
|
Option to restrict short type names resolution to those in the declared typesystems. |
Single Boolean |
|
Option to ignore types even if they are available in the typesystem/CAS. |
Single String |
|
Option to allow rule matches to start at any rule element. |
Single Boolean |
|
Option to decrease the memory consumption when processing a large CAS. |
Single Boolean |
|
Option to activate a different inferencer for composed rule elements. |
Single Boolean |
|
Option to add debug information to the CAS. |
Single Boolean |
|
Option to add information about the rule matches to the CAS. |
Single Boolean |
|
Option to add all debug information to the indexes. |
Single Boolean |
|
List of rule ids. If provided, then debug information is only created for those rules. |
Multi String |
|
Option to add profile information to the CAS. |
Single Boolean |
|
Option to add statistics of conditions and actions to the CAS. |
Single Boolean |
|
Option to add additional information, which rule created an annotation. |
Single Boolean |
|
String array with names of variables. Is used in combination with varValues. |
Multi String |
|
String array with values of variables. Is used in combination with varNames. |
Multi String |
|
Remove whitespaces when loading dictionaries. |
Single Boolean |
|
String/token to be used to split columns in CSV tables. |
Single String |
|
List of factory classes for additional inference visitors. |
Multi String |
|
Maximum amount of allowed matches of a single rule. |
Single Integer |
|
Maximum amount of allowed matches of a single rule element. |
Single Integer |
mainScript
This parameter specifies the rule file that will be executed by the analysis engine and is, therefore, one of the most important ones. The exact name of the script is given by the complete namespace of the file, which corresponds to its location relative to the given parameter scriptPaths. The single names of packages (or folders) are separated by periods. An exemplary value for this parameter could be "org.apache.uima.Main", whereas "Main" specifies the file containing the rules and "org.apache.uima" its package. In this case, the analysis engine loads the script file "Main.ruta", which is located in the folder structure "org/apache/uima/". This parameter has no default value and has to be provided, although it is not specified as mandatory.
rules
A String parameter representing the rule that should be applied by the analysis engine. If set, it replaces the content of file specified by the mainScript parameter.
rulesScriptName
This parameter specifies the name of the non-existing script if the rules parameter is used. The default value is 'Anonymous'.
scriptEncoding
This parameter specifies the encoding of the rule files. Its default value is "UTF-8".
scriptPaths
The parameter scriptPaths refers to a list of String values, which specify the possible locations of script files. The given locations are absolute paths. A typical value for this parameter is, for example, "C:/Ruta/MyProject/script/". If the parameter mainScript is set to org.apache.uima.Main, then the absolute path of the script file has to be "C:/Ruta/MyProject/script/org/apache/uima/Main.ruta". This parameter can contain multiple values, as the main script can refer to multiple projects similar to a class path in Java.
descriptorPaths
This parameter specifies the possible locations for descriptors like analysis engines or type systems, similar to the parameter scriptPaths for the script files. A typical value for this parameter is for example "C:/Ruta/MyProject/descriptor/". The relative values of the parameter additionalEngines are resolved to these absolute locations. This parameter can contain multiple values, as the main script can refer to multiple projects similar to a class path in Java.
resourcePaths
This parameter specifies the possible locations of additional resources like word lists or CSV tables. The string values have to contain absolute locations, for example, "C:/Ruta/MyProject/resources/".
additionalScripts
The optional parameter additionalScripts is defined as a list of string values and contains script files, which are additionally loaded by the analysis engine. These script files are specified by their complete namespace, exactly like the value of the parameter mainScript and can be refered to by language elements, e.g., by executing the containing rules. An exemplary value of this parameter is "org.apache.uima.SecondaryScript". In this example, the main script could import this script file by the declaration "SCRIPT org.apache.uima.SecondaryScript;" and then could execute it with the rule "Document{→ CALL(SecondaryScript)};". This optional list can be used as a replacement of global imports in the script file.
additionalEngines
This optional parameter contains a list of additional analysis engines, which can be executed by the UIMA Ruta rules. The single values are given by the name of the analysis engine with their complete namespace and have to be located relative to one value of the parameter descriptorPaths, the location where the analysis engine searches for the descriptor file. An example for one value of the parameter is "utils.HtmlAnnotator", which points to the descriptor "HtmlAnnotator.xml" in the folder "utils". This optional list can be used as a replacement of global imports in the script file.
additionalUimafitEngines
This optional parameter contains a list of additional analysis engines, which can be executed by the UIMA Ruta rules. The single values are given by the name of the implementation with the complete namespace and have to be present int he classpath of the application. An example for one value of the parameter is "org.apache.uima.ruta.engine.HtmlAnnotator", which points to the "HtmlAnnotator" class. This optional list can be used as a replacement of global imports in the script file.
additionalExtensions
This parameter specifies optional extensions of the UIMA Ruta language. The elements of the string list have to implement the interface "org.apache.uima.ruta.extensions.IRutaExtension". With these extensions, application-specific conditions and actions can be added to the set of provided ones.
reloadScript
This boolean parameter indicates whether the script or resource files should be reloaded when processing a CAS. The default value is set to false. In this case, the script files are loaded when the analysis engine is initialized. If script files or resource files are extended, e.g., a dictionary is filled yet when a collection of documents are processed, then the parameter is needed to be set to true in order to include the changes.
seeders
This list of string values refers to implementations of the interface "org.apache.uima.ruta.seed.RutaAnnotationSeeder", which can be used to automatically add annotations to the CAS. The default value of the parameter is a single seeder, namely "org.apache.uima.ruta.seed.TextSeeder" that adds annotations for token classes like CW, NUM and SEMICOLON, but not MARKUP. Remember that additional annotations can also be added with an additional engine that is executed by a UIMA Ruta rule.
defaultFilteredTypes
This parameter specifies a list of types, which are filtered by default when executing a script file. Using the default values of this parameter, whitespaces, line breaks and markup elements are not visible to Ruta rules. The visibility of annotations and, therefore, the covered text can be changed using the actions FILTERTYPE and RETAINTYPE.
removeBasics
This parameter specifies whether the inference annotations created by the analysis engine should be removed after processing the CAS. The default value is set to false.
indexOnly
This parameter specifies the annotation types which should be indexed for ruta’s internal annotations. All annotation types that are relevant need to be listed here. The value of this parameter needs only be adapted for performance and memory optimization in pipelines that contains several ruta analysis engines. Default value is uima.tcas.Annotation
indexSkipTypes
This parameter specifies annotation types that should not be indexed at all. These types normally include annotations that provide no meaningful semantics for text processing, e.g., types concerning ruta debug information.
indexOnlyMentionedTypes
If this parameter is activated, then only annotations of types are internally indexed that are mentioned with in the rules. This optimization of the internal indexing can improve the speed and reduce the memory footprint. However, several features of the rule matching require the indexing of types that are not mentioned in the rules, e.g., literal rule matches, wildcards and actions like MARKFAST, MARKTABLE, TRIE. Default value is false.
indexAdditionally
This parameter specifies annotation types that should be index additionally to types mentioned in the rules. This parameter is only used if the parameter 'indexOnlyMentionedTypes' is activated.
reindexOnly
This parameter specifies the annotation types which should be reindexed for ruta’s internal annotations All annotation types that changed since the last call of a ruta script need to be listed here. The value of this parameter needs only be adapted for performance optimization in pipelines that contains several ruta analysis engines. Default value is uima.tcas.Annotation
reindexSkipTypes
This parameter specifies annotation types that should not be reindexed. These types normally include annotations that are added once and are not changed in the following pipeline, e.g., Tokens or TokenSeed (like CW).
reindexOnlyMentionedTypes
If this parameter is activated, then only annotations of types are internally reindexed at beginning that are mentioned with in the rules. This parameter overrides the values of the parameter 'reindexOnly' with the types that are mentioned in the rules. Default value is false.
reindexAdditionally
This parameter specifies annotation types that should be reindexed additionally to types mentioned in the rules. This parameter is only used if the parameter 'reindexOnlyMentionedTypes' is activated.
indexUpdateMode
This parameter specifies the mode for updating the internal indexing in RutaBasic annotations. This is a technical parameter for optimizing the runtime performance/speed of RutaEngines. Available modes are: COMPLETE, ADDITIVE, SAFE_ADDITIVE, NONE. Default value is ADDITIVE.
validateInternalIndexing
Option to validate the internal indexing in RutaBasic with the current CAS after the indexing and reindexing is performed. Annotations that are not correctly indexing in RutaBasics cause Exceptions. Annotations of types listed in parameter 'indexSkipTypes' and 'reindexSkipTypes' are ignored. Default value is false.
emptyIsInvisible
This parameter determines positions as invisible if the internal indexing of the corresponding RutaBasic annotation is empty. Default value is true.
modifyDataPath
This parameter specifies whether the datapath of the ResourceManager is extended by the values of the configuration parameter descriptorPaths.
The default value is set to false.
strictImports
This parameter specifies whether short type names should be resolved against the typesystems declared in the script (true) or at runtime in the CAS typesystem (false). The default value is set to false.
typeIgnorePattern
An optional pattern (regular expression) which defined types that should be ignored. These types will not be resolved even if strictImports is set to false. This parameter can be used to ignore complete namespaces of type that could contain ambiguous short names.
dynamicAnchoring
If this parameter is set to true, then the Ruta rules are not forced to start to match with the first rule element. Rather, the rule element referring to the most rare type is chosen. This option can be utilized to optimize the performance. Please mind that the matching result can vary in some cases when greedy rule elements are applied. The default value is set to false.
lowMemoryProfile
This parameter specifies whether the memory consumption should be reduced. This parameter should be set to true for very large CAS documents (e.g., > 500k tokens), but it also reduces the performance. The default value is set to false.
simpleGreedyForComposed
This parameter specifies whether a different inference strategy for composed rule elements should be applied. This option is only necessary when the composed rule element is expected to match very often, e.g., a rule element like (ANY ANY)+. The default value of this parameter is set to false.
debug
If this parameter is set to true, then additional information about the execution of a rule script is added to the CAS. The actual information is specified by the following parameters. The default value of this parameter is set to false.
debugWithMatches
This parameter specifies whether the match information (covered text) of the rules should be stored in the CAS. The default value of this parameter is set to false.
debugAddToIndexes
This parameter specifies whether all debug annotation should be added to the indexes. By default this parameter is deactivated and only the root script apply is added.
debugOnlyFor
This parameter specifies a list of rule-ids that enumerate the rule for which debug information should be created. No specific ids are given by default.
profile
If this parameter is set to true, then additional information about the runtime of applied rules is added to the CAS. The default value of this parameter is set to false.
statistics
If this parameter is set to true, then additional information about the runtime of UIMA Ruta language elements like conditions and actions is added to the CAS. The default value of this parameter is set to false.
createdBy
If this parameter is set to true, then additional information about what annotation was created by which rule is added to the CAS. The default value of this parameter is set to false.
varNames
This parameter specifies the names of variables and is used in combination with the parameter varValues, which contains the values of the corresponding variables. The n-th entry of this string array specifies the variable of the n-th entry of the string array of the parameter varValues. If the variables is defined in the root of a script, then the name of the variable suffices. If the variable is defined in a BLOCK or imported script, then the the name must contain the namespaces of the blocks as a prefix, e.g., InnerBlock.varName or OtherScript.SomeBlock.varName.
varValues
This parameter specifies the values of variables as string values in an string array.
It is used in combination with the parameter varNames, which contains the names of the corresponding variables.
The n-th entry of this string array specifies the value of the n-th entry of the string array of the parameter varNames.
The values for list variables are separated by the character ,.
Thus, the usage of commas is not allowed if the variable is a list.
dictRemoveWS
If this parameter is set to true, then whitespaces are removed when dictionaries are loaded. The default is set to "true".
csvSeparator
If this parameter is set to any String value then this String/token is used to split columns in CSV tables. The default is set to ';'.
1.5.2. Annotation Writer
This Analysis Engine can be utilized to write the covered text of annotations in a text file, whereas each covered text is put into a new line. If the Analysis engine, for example, is configured for the type “uima.example.Person”, then all covered texts of all Person annotations are stored in a text file, one person in each line. A descriptor file for this Analysis Engine is located in the folder “descriptor/utils” of a UIMA Ruta project.
Configuration Parameters
Output
This string parameter specifies the absolute path of the resulting file named “output.txt”. However, if an annotation of the type “org.apache.uima.examples.SourceDocumentInformation” is given, then the value of this parameter is interpreted to be relative to the URI stored in the annotation and the name of the file will be adapted to the name of the source file. If this functionality is activated in the preferences, then the UIMA Ruta Workbench adds the SourceDocumentInformation annotation when the user launches a script file. The default value of this parameter is “/../output/”.
1.5.3. Plain Text Annotator
This Analysis Engines adds annotations for lines and paragraphs. A descriptor file for this Analysis Engine is located in the folder “descriptor/utils” of a UIMA Ruta project. There are no configuration parameters.
1.5.4. Modifier
The Modifier Analysis Engine can be used to create an additional view, which contains all textual modifications and HTML highlightings that were specified by the executed rules. This Analysis Engine can be applied, e.g., for anonymization where all annotations of persons are replaced by the string “Person”. Furthermore, the content of the new view can optionally be stored in a new HTML file. A descriptor file for this Analysis Engine is located in the folder “descriptor/utils” of a UIMA Ruta project.
Configuration Parameters
styleMap
This string parameter specifies the name of the style map file created by the Style Map Creator Analysis Engine, which stores the colors for additional highlightings in the modified view.
descriptorPaths
This parameter can contain multiple string values and specifies the absolute paths where the style map file can be found.
outputLocation
This optional string parameter specifies the absolute path of the resulting file named “output.modified.html”. However, if an annotation of the type “org.apache.uima.examples.SourceDocumentInformation” is given, then the value of this parameter is interpreted to be relative to the URI stored in the annotation and the name of the file will be adapted to the name of the source file. If this functionality is activated in the preferences, then the UIMA Ruta Workbench adds the SourceDocumentInformation annotation when the user launches a script file. The default value of this parameter is empty. In this case no additional html file will be created.
1.5.5. HTML Annotator
This Analysis Engine provides support for HTML files by adding annotations for the HTML elements.
Using the default values, the HTML Annotator creates annotations for each HTML element spanning the content of the element, whereas the most common elements are represented by own types.
The document This text is <b>bold</b>., for example, would be annotated with an annotation of the type “org.apache.uima.ruta.type.html.B” for the word “bold”.
The HTML annotator can be configured in order to include the start and end elements in the created annotations.
A descriptor file for this Analysis Engine is located in the folder “descriptor/utils” of a UIMA Ruta project.
1.5.6. HTML Converter
This Analysis Engine is able to convert html content from a source view into a plain string representation stored in an output view.
Especially, the Analysis Engine transfers annotations under consideration of the changed document text and annotation offsets in the new view.
The copy process also sets features, however, features of type annotation are currently not supported.
Note that if an annotation would have the same start and end positions in the new view, i.e., if it would be mapped to an annotation of length 0, it is not moved to the new view.
The HTML Converter also supports heuristic and explicit conversion patterns which default to html4 decoding, e.g., , <, etc.
Concepts like tables or lists are not supported.
Note that in general it is suggested to run an html cleaner before any further processing to avoid problems with malformed html.
A descriptor file for this Analysis Engine is located in the folder “descriptor/utils” of a UIMA Ruta project.
Configuration Parameters
outputView
This string parameter specifies the name of the new view. The default value is “plaintext”.
newlineInducingTags
This string array parameter sets the names of the html tags that create linebreaks in the output view. The default is “br, p, div, ul, ol, dl, li, h1, …, h6, blockquote”.
replaceLinebreaks
This boolean parameter determines if linebreaks inside the text nodes are kept or removed. The default behavior is “true”.
replaceLinebreaks
This string parameter determines the character sequence that replaces a linebreak. The default behavior is the empty string.
conversionPolicy
This string parameter determines the conversion policy used, either "heuristic", "explicit", or "none". When the value is "explicit", the parameters “conversionPatterns” and optionally “conversionReplacements” are considered.
The "heuristic" conversion policy uses simple regular expressions to decode html4 entities such as . The default behavior is "heuristic".
conversionPatterns
This string array parameter can be used to apply custom conversions.
It defaults to a list of commonly used codes, e.g., , which are converted using html 4 entity unescaping.
However, explicit conversion strings can also be passed via the parameter “conversionReplacements”.
Remember to enable explicit conversion via “conversionPolicy” first.
conversionReplacements
This string array parameter corresponds to “conversionPatterns” such that “conversionPatterns[i]” will be replaced by “conversionReplacements[i]”; replacements should be shorter than the source pattern. Per default, the replacement strings are computed using Html4 decoding. Remember to enable explicit conversion via “conversionPolicy” first.
skipWhitespaces
This boolean parameter determines if the converter should skip whitespaces. Html documents often contains whitespaces for indentation and formatting, which should not be reproduced in the converted plain text document. If the parameter is set to false, then the whitespaces are not removed. This behavior is useful, if not Html documents are converted, but XMl files. The default value is true.
processAll
If this boolean parameter is set to true, then the tags of the complete document is processed and not only those within the body tag.
newlineInducingTagRegExp
This string parameter contains a regular expression for HTML/XML elements. If the pattern matches, then the element will introduce a new line break similar to the element of the parameter “newlineInducingTags”.
gapInducingTags
This string array parameter sets the names of the html tags that create additional text in the output view. The actual string of the gap is defined by the parameter “gapText”.
1.5.7. Style Map Creator
This Analysis Engine can be utilized to create style map information, which is needed by the Modifier Analysis Engine in order to create highlighting for some annotations. Style map information can be created using the COLOR action. A descriptor file for this Analysis Engine is located in the folder “descriptor/utils” of a UIMA Ruta project.
1.5.8. Cutter
This Analysis Engine is able to cut the document of the CAS. Only the text covered by annotations of the specified type will be retained and all other parts of the documents will be removed. The offsets of annotations in the index will be updated, but not feature structures nested as feature values.
1.5.9. View Writer
This Analysis Engine is able to serialize the processed CAS to an XMI file whereas the the source and destination view can be specified A descriptor file for this Analysis Engine is located in the folder “descriptor/utils” of a UIMA Ruta project.
Configuration Parameters
output
This string parameter specifies the absolute path of the resulting file named “output.xmi”. However, if an annotation of the type “org.apache.uima.examples.SourceDocumentInformation” is given, then the value of this parameter is interpreted to be relative to the URI stored in the annotation and the name of the file will be adapted to the name of the source file. If this functionality is activated in the preferences, then the UIMA Ruta Workbench adds the SourceDocumentInformation annotation when the user launches a script file.
1.5.10. XMI Writer
This Analysis Engine is able to serialize the processed CAS to an XMI file. One use case for the XMI Writer is, for example, a rule-based sort, which stores the processed XMI files in different folder, dependent on the execution of the rules, e.g., whether a pattern of annotations occurs or not. A descriptor file for this Analysis Engine is located in the folder “descriptor/utils” of a UIMA Ruta project.
Configuration Parameters
Output
This string parameter specifies the absolute path of the resulting file named “output.xmi”. However, if an annotation of the type “org.apache.uima.examples.SourceDocumentInformation” is given, then the value of this parameter is interpreted to be relative to the URI stored in the annotation and the name of the file will be adapted to the name of the source file. If this functionality is activated in the preferences, then the UIMA Ruta Workbench adds the SourceDocumentInformation annotation when the user launches a script file. The default value is “/../output/”
2. Apache UIMA Ruta Language
This chapter provides a complete description of the Apache UIMA Ruta language.
2.1. Syntax
UIMA Ruta defines its own language for writing rules and rule scripts. This section gives a formal overview of its syntax.
Structure: The overall structure of a UIMA Ruta script is defined by the following syntax.
Script              -> PackageDeclaration? GlobalStatements Statements
PackageDeclaration  -> "PACKAGE" DottedIdentifier ";"
GlobalStatments     -> GlobalStatement*
GlobalStatment      -> ("SCRIPT" | "ENGINE")
                       DottedIdentifier2 ";"
                       | UimafitImport | ImportStatement
UimafitImport       -> "UIMAFIT" DottedIdentifier2
                      ("(" DottedIdentifier2
                      (COMMA DottedIdentifier2)+ ")")?;
Statements          -> Statement*
Statement           -> Declaration | VariableDeclaration
                        | BlockDeclaration | SimpleStatement ";"
Comments are excluded from the syntax definition. Comments start with "//" and always go to the end of the line.
Syntax of import statements:
ImportStatement  -> (ImportType | ImportPackage | ImportTypeSystem) ";"
ImportType       -> "IMPORT" Type ("FROM" Typesystem)?
                    ("AS" Alias)?
ImportPackage    -> "IMPORT" "PAKAGE" Package ("FROM" Typesystem)?
                    ("AS" Alias)?
ImportTypeSystem -> "IMPORT" "PACKAGE" "*" "FROM" TypeSystem ("AS" Alias)?
                    | "IMPORT" "*" "FROM" Typesystem
                    | "TYPESYSTEM" Typesystem
Type             -> DottedIdentifier
Package          -> DottedIdentifier
TypeSystem       -> DottedIdentifier2
Alias            -> Identifier
Example beginning of a UIMA Ruta file:
PACKAGE uima.ruta.example;

// import the types of this type system
// (located in the descriptor folder -> types folder)
IMPORT * FROM types.BibtexTypeSystem;

SCRIPT uima.ruta.example.Author;
SCRIPT uima.ruta.example.Title;
SCRIPT uima.ruta.example.Year;
Syntax of declarations:
Declaration -> "DECLARE" (AnnotationType)? Identifier ("," Identifier )*
               | "DECLARE" AnnotationType? Identifier ( "("
               FeatureDeclaration ")" )?
FeatureDeclaration  -> ( (AnnotationType | "STRING" | "INT" | "FLOAT"
                       "DOUBLE" | "BOOLEAN") Identifier) )+
VariableDeclaration -> (("TYPE" Identifier ("," Identifier)*
                                                   ("=" AnnotationType)?)
                     | ("STRING" Identifier ("," Identifier)*
                                                 ("=" StringExpression)?)
                     | (("INT" | "DOUBLE" | "FLOAT") Identifier
                               ("," Identifier)* ("=" NumberExpression)?)
                     | ("BOOLEAN" Identifier ("," Identifier)*
                                                ("=" BooleanExpression)?)
                     | ("ANNOTATION" Identifier("="AnnotationExpression)?)
                     | ("WORDLIST" Identifier ("=" WordListExpression
                                                | StringExpression)?)
                     | ("WORDTABLE" Identifier ("=" WordTableExpression
                                                | StringExpression)?)
                     | ("TYPELIST" Identifier ("=" TypeListExpression)?)
                     | ("STRINGLIST" Identifier
                                             ("=" StringListExpression)?)
                     | (("INTLIST" | "DOUBLELIST" | "FLOATLIST")
                                  Identifier ("=" NumberListExpression)?)
                     | ("BOOLEANLIST" Identifier
                                           ("=" BooleanListExpression)?))
                     | ("ANNOTATIONLIST" Identifier
                                         ("=" AnnotationListExpression)?)
AnnotationType      ->  BasicAnnotationType | declaredAnnotationType
BasicAnnotationType ->  ('COLON'| 'SW' | 'MARKUP' | 'PERIOD' | 'CW'| 'NUM'
                      | 'QUESTION' | 'SPECIAL' | 'CAP' | 'COMMA'
                      | 'EXCLAMATION' | 'SEMICOLON' | 'NBSP'| 'AMP' | '_'
                      | 'SENTENCEEND' | 'W' | 'PM' | 'ANY' | 'ALL'
                      | 'SPACE' | 'BREAK')
BlockDeclaration    -> "BLOCK" "(" Identifier ")" RuleElementWithCA
                                                       "{" Statements "}"
actionDeclaration   -> "ACTION" Identifier "(" ("VAR"? VarType
                       Identifier)? ("," "VAR"? VarType Identifier)*")"
                      "=" Action ( "," Action)* ";"
conditionDeclaration-> "CONDITION" Identifier "(" ("VAR"? VarType
                       Identifier)? ("," "VAR"? VarType Identifier)*")"
                      "=" Condition ( "," Condition)* ";"
Syntax of statements and rule elements:
SimpleStatement        -> SimpleRule | RegExpRule | ConjunctRules
                          | DocumentActionRule
SimpleRule             -> RuleElements ";"
RegExpRule             -> StringExpression "->" GroupAssignment
                          ("," GroupAssignment)* ";"
ConjunctRules          -> RuleElements ("%" RuleElements)+ ";"
DocumentActionRule     -> Actions ";"
GroupAssignment        -> TypeExpression
                        | NumberEpxression "=" TypeExpression
RuleElements           -> RuleElement+
RuleElement            -> (Identifier ":")? "@"?
                        RuleElementType | RuleElementLiteral
                        | RuleElementComposed | RuleElementWildCard
                        | RuleElementOptional
RuleElementType        ->  AnnotationTypeExpr OptionalRuleElementPart
RuleElementWithCA      ->  AnnotationTypeExpr ("{" Conditions?
                           Actions? "}")?
AnnotationTypeExpr     -> (TypeExpression | AnnotationExpression
						   TypeListExpression | AnnotationListExpression)
                          (Operator)? Expression ("{" Conditions "}")?
FeatureMatchExpression -> TypeExpression ( "." Feature)+
                          ( Operator (Expression | "null"))?
RuleElementLiteral     ->  SimpleStringExpression OptionalRuleElementPart
RuleElementComposed    -> "(" RuleElement ("&" RuleElement)+ ")"
                          | "(" RuleElement ("|" RuleElement)+ ")"
                          | "(" RuleElements ")"
                          OptionalRuleElementPart
OptionalRuleElementPart-> QuantifierPart? ("{" Conditions?  Actions? "}")?
                          InlinedRules?
InlinedRules           ->  ("<-" "{" SimpleStatement+ "}")*
                           ("->"  "{" SimpleStatement+ "}")*
RuleElementWildCard    -> "#"("{" Conditions?  Actions? }")? InlinedRules?
RuleElementOptional    -> "_"("{" Conditions?  Actions? }")? InlinedRules?
QuantifierPart         -> "*" | "*?" | "+" | "+?" | "?" | "??"
                        | "[" NumberExpression "," NumberExpression "]"
                        | "[" NumberExpression "," NumberExpression "]?"
Conditions             -> Condition ( "," Condition )*
Actions                -> "->" (Identifier ":")? Action
                         ( "," (Identifier ":")? Action)*
Since each condition and each action has its own syntax, conditions and actions are described in their own section. For conditions see Section 2.7 , for actions see Section 2.8. The syntax of expressions is explained in Section 2.6.
It is also possible to use specific expression as implicit conditions or action additionally to the set of available conditions and actions.
Condition -> BooleanExpression | FeatureMatchExpression
Action    -> TypeExpression | FeatureAssignmentExpression
              | VariableAssignmentExpression
Identifier:
DottedIdentifier    ->  Identifier ("." Identifier)*
DottedIdentifier2   ->  Identifier (("."|"-") Identifier)*
Identifier          ->  letter (letter|digit)*
2.2. Rule elements and their matching order
If not specified otherwise, then the UIMA Ruta rules normally start the matching process with their first rule element. The first rule element searches for possible positions for its matching condition and then will advise the next rule element to continue the matching process. For that reason, writing rules that contain a first rule element with an optional quantifier is discouraged and will result in ignoring the optional attribute of the quantifier.
The starting rule element can also be manually specified by adding “@” directly in front of the matching condition. In the following example, the rule first searches for capitalized words (CW) and then checks whether there is a period in front of the matched word.
PERIOD @CW;This functionality can also be used for rules that start with an optional rule element by manually specifying a later rule element to start the matching process.
The choice of the starting rule element can greatly influence the performance speed of the rule execution. This circumstance is illustrated with the following example that contains two rules, whereas already an annotation of the type “LastToken” was added to the last token of the document:
ANY LastToken;
ANY @LastToken;
The first rule matches on each token of the document and checks whether the next annotation is the last token of the document. This will result in many index operations because all tokens of the document are considered. The second rule, however, matches on the last token and then checks if there is any token in front of it. This rule, therefore, considers only one token.
The UIMA Ruta language provides also a concept for automatically selecting the starting rule element called dynamic anchoring. Here, a simple heuristic concerning the position of the rule element and the involved types is applied in order to identify the favorable rule element. This functionality can be activated in the configuration parameters of the analysis engine or directly in the script file with the DYNAMICANCHORING action.
A list of rule elements normally specifies a sequential pattern.
The rule is able to match if the first rule element successfully matches and then the following rule element at the position after the match of the first rule element, and so on.
There are three language constructs that break up that sequential matching: &, “|” and “%”.
A composed rule element where all inner rule elements are linked by the symbol &
matches only if all inner rule elements successfully match at the given position.
A composed rule element with inner rule elements linked by the symbol “|” matches if one of the inner rule element successfully matches.
These composed rule elements therefore specify a conjunction (“and”) and a disjunction (“or”) of its rule element at the given position.
The symbol “%” specifies a different use case.
Here, rules themselves are linked and they are only able to fire if each one of the linked rules successfully matched.
In contrast to &, this linkage of rule elements does not introduce constraints for the matched positions.
In the following, a few examples of these three language constructs are given.
(Token.posTag=="DET" & Lemma.value=="the");This rule is fulfilled, if there is a token whose feature “posTag” has the value “DET” and an annotation of the type “Lemma” whose feature “value” has the value “the”. Both rule elements need to be fulfilled at the same position.
NUM (W{REGEXP("Peter") -> Name} & (ANY CW{PARTOF(Name)}));This rule matches on a number and then validates if the next word is “Peter” and if next but one token is capitalized and part of an annotation of the type “Name”. If all rule elements successfully matched, then a new annotation of the type “Name” will be created covering the largest match of the linked rule elements. In this example, the new annotation covers also the token after the word “Peter” even if the actions was specified at the rule element with the smaller match.
((W{REGEXP("Peter")} CW) | ("Mr" PERIOD CW)){-> Name};In this example, an annotation of the type “Name” will be created for the token “Peter” followed by a capitalized word or the word “Mr” followed by a period and a capitalized word.
(Animal ((COMMA | "and") Animal)+){-> AnimalEnum};This rule annotates enumerations of animal annotations whereas each animal annotation is separated by either a comma or the word “and”.
BLOCK(forEach) Sentence{}{
  CW NUM % SW NUM{-> MARK(Found, 1, 2)};
}
Here, annotations of the type “Found” are created if a sentence contains a capitalized word followed by a number and a small written word followed by a number regardless of where these annotations occur in the sentence.
2.3. Basic annotations and tokens
The UIMA Ruta system uses a JFlex lexer to initially create a seed of basic token annotations. These tokens build a hierarchy shown in Figure 1. The “ALL” (green) annotation is the root of the hierarchy. ALL and the red marked annotation types are abstract. This means that they are actually not created by the lexer. An overview of these abstract types can be found in Table 2. The leafs of the hierarchy (blue) are created by the lexer. Each leaf is an own type, but also inherits the types of the abstract annotation types further up in the hierarchy. The leaf types are described in more detail in Table 3. Each text unit within an input document belongs to exactly one of these annotation types.
| Annotation | Parent | Description |
|---|---|---|
ALL |
- |
parent type of all tokens |
ANY |
ALL |
all tokens except for markup |
W |
ANY |
all kinds of words |
PM |
ANY |
all kinds of punctuation marks |
WS |
ANY |
all kinds of white spaces |
SENTENCEEND |
PM |
all kinds of punctuation marks that indicate the end of a sentence |
| Annotation | Parent | Description | Example |
|---|---|---|---|
MARKUP |
ALL |
HTML and XML elements |
|
NBSP |
SPACE |
non breaking space |
` ` |
AMP |
ANY |
ampersand expression |
|
BREAK |
WS |
line break |
|
SPACE |
WS |
spaces |
` ` |
COLON |
PM |
colon |
|
COMMA |
PM |
comma |
|
PERIOD |
SENTENCEEND |
period |
|
EXCLAMATION |
SENTENCEEND |
exclamation mark |
|
SEMICOLON |
PM |
semicolon |
|
QUESTION |
SENTENCEEND |
question mark |
|
SW |
W |
lower case work |
|
CW |
W |
work starting with one capitalized letter |
|
CAP |
W |
word only containing capitalized letters |
|
NUM |
ANY |
sequence of digits |
|
SPECIAL |
ANY |
all other tokens and symbols |
|
2.4. Quantifiers
2.4.1. * Star Greedy
The Star Greedy quantifier matches on any amount of annotations and evaluates always true. Please mind that a rule element with a Star Greedy quantifier needs to match on different annotations as the next rule element. Examples:
Input:    small Big Big Big small
Rule:     CW*
Matched:  Big Big Big
Matched:  Big Big
Matched:  Big
2.4.2. *? Star Reluctant
The Star Reluctant quantifier matches on any amount of annotations and evaluates always true, but stops to match on new annotations, when the next rule element matches and evaluates true on this annotation. Examples:
Input:    123 456 small small Big
Rule:     W*? CW
Matched:  small small Big
Matched:  small Big
Matched:  Big
The last match “Big” can be problematic using different types if the rule starts matching with the first rule element.
2.4.3. + Plus Greedy
The Plus Greedy quantifier needs to match on at least one annotation. Please mind that a rule element after a rule element with a Plus Greedy quantifier matches and evaluates on different conditions. Examples:
Input:    123 456 small small Big
Rule:     SW+
Matched:  small small
Matched:  small
2.4.4. +? Plus Reluctant
The Plus Reluctant quantifier has to match on at least one annotation in order to evaluate true, but stops when the next rule element is able to match on this annotation. Examples:
Input:    123 456 small small Big
Rule:     W+? CW
Matched:  small small Big
Matched:  small Big
2.4.5. ? Question Greedy
The Question Greedy quantifier matches optionally on an annotation and therefore always evaluates true. Examples:
Input:    123 456 small Big small Big
Rule:     SW CW? SW
Matched:  small Big small
2.4.6. ?? Question Reluctant
The Question Reluctant quantifier matches optionally on an annotation, if the next rule element does not match on the same annotation and therefore always evaluates true. Examples:
Input:    123 456 small Big small Big
Rule:     SW CW?? SW
Matched:  small Big small
2.4.7. [x,y] Min Max Greedy
The Min Max Greedy quantifier has to match at least x and at most y annotations of its rule element to evaluate true. Examples:
Input:    123 456 small Big small Big
Rule:     SW CW[1,2] SW
Matched:  small Big small
2.4.8. [x,y]? Min Max Reluctant
The Min Max Greedy quantifier has to match at least x and at most y annotations of its rule element to evaluate true, but stops to match on additional annotations, if the next rule element is able to match on this annotation. Examples:
Input:    123 456 small Big Big Big small Big
Rule:     SW CW[2,100]? SW
Matched:  small Big Big Big small
2.5. Declarations
There are three different kinds of declarations in the UIMA Ruta system: Declarations of types with optional feature definitions, declarations of variables and declarations for importing external resources, further UIMA Ruta scripts and UIMA components such as type systems and analysis engines.
2.5.1. Types
Type declarations define new kinds of annotation types and optionally their features.
DECLARE SimpleType1, SimpleType2; // <- two new types with the parent
                                  // type "Annotation"
DECLARE ParentType NewType (SomeType feature1, INT feature2);
  // a new type "NewType" with parent type "ParentType" and two features
Attention: Types with features need a parent type in their declarations. If no special parent type is requested, just use type Annotation as default parent type.
2.5.2. Variables
Variable declarations define new variables. There are 12 kinds of variables:
-
Type variable: A variable that represents an annotation type.
-
Type list variable: A variable that represents a list of annotation types.
-
Integer variable: A variable that represents an integer.
-
Integer list variable: A variable that represents a list of integers.
-
Float variable: A variable that represents a floating-point number.
-
Float list variable: A variable that represents a list of floating-point numbers in single precision.
-
Double variable: A variable that represents a floating-point number.
-
Double list variable: A variable that represents a list of floating-point numbers in double precision.
-
String variable: A variable that represents a string.
-
String list: A variable that represents a list of strings.
-
Boolean variable: A variable that represents a boolean.
-
Boolean list variable: A variable that represents a list of booleans.
-
Annotation variable: A variable that represents an annotation.
-
Annotation list variable: A variable that represents a list of annotations.
TYPE newTypeVariable;
TYPELIST newTypeList;
INT newIntegerVariable;
INTLIST newIntList;
FLOAT newFloatVariable;
FLOATLIST newFloatList;
DOUBLE newDoubleVariable;
DOUBLELIST newDoubleList;
STRING newStringVariable;
STRINGLIST newStringList;
BOOLEAN newBooleanVariable;
BOOLEANLIST newBooleanList;
ANNOTATION newAnnotationVariable;
ANNOTATIONLIST newAnnotationList;
2.5.3. Resources
There are two kinds of resource declarations that make external resources available in the UIMA Ruta system:
-
List: A list represents a normal text file with an entry per line or a compiled tree of a word list.
-
Table: A table represents a comma separated file.
WORDLIST listName = 'someWordList.txt';
WORDTABLE tableName = 'someTable.csv';
2.5.4. Scripts
Additional scripts can be imported and reused with the CALL action. The types of the imported rules are also available so that it is not necessary to import the Type System of the additional rule script.
SCRIPT my.package.AnotherScript; // "AnotherScript.ruta" in the
                     //package "my.package"
Document{->CALL(AnotherScript)}; // <- rule executes "AnotherScript.ruta"
2.5.5. Components
There are three kinds of UIMA components that can be imported in a UIMA Ruta script:
-
Type System (IMPORT or TYPESYSTEM): includes the types defined in an external type system. You can select which types or packages to import from a type system and how to alias them. If use IMPORT statements, consider enabling strictImports.
-
Analysis Engine (ENGINE): loads the given descriptor and creates an external analysis engine. The descriptor must be located in the descriptor paths. The type system needed for the analysis engine has to be imported separately. Please mind the filtering setting when calling an external analysis engine.
-
Analysis Engine (UIMAFIT): loads the given class and creates an external analysis engine. Please mind that the implementation of the analysis engine needs to be available. The type system needed for the analysis engine has to be imported separately. Please mind the filtering setting when calling an external analysis engine.
// Imports all the types from "ExternalTypeSystem.xml"
TYPESYSTEM my.package.ExternalTypeSystem;
IMPORT * FROM my.package.ExternalTypeSystem;

// Import my.package.SomeType from "ExternalTypeSystem.xml"
IMPORT my.package.SomeType FROM my.package.ExternalTypeSystem;

// Import my.package.SomeType from the typesystem available to
// the CAS at runtime. This can be useful when typesystems are
// loaded by uimaFIT
IMPORT my.package.SomeType;

// Import my.package.SomeType from "ExternalTypeSystem.xml"
// and alias it to T1
IMPORT my.package.SomeType FROM my.package.ExternalTypeSystem AS T1;

// Import all types in my.package from "ExternalTypeSystem.xml"
IMPORT PACKAGE my.package FROM my.package.ExternalTypeSystem;

// Import package my.package from "ExternalTypeSystem.xml"
// and alias it to p1 (p1.SomeType can now be used)
IMPORT PACKAGE my.package FROM my.package.ExternalTypeSystem AS p1;

// Import all packages from "ExternalTypeSystem.xml" and alias them to p2
IMPORT PACKAGE * FROM my.package.ExternalTypeSystem AS p2;ENGINE my.package.ExternalEngine; // <- "ExternalEngine.xml" in the
// "my.package" package (in the descriptor folder)
UIMAFIT my.implementation.AnotherEngine;
Document{->RETAINTYPE(SPACE,BREAK),CALL(ExternalEngine)};
// calls ExternalEngine, but retains white spaces
Document{-> EXEC(AnotherEngine, {SomeType})};2.6. Expressions
UIMA Ruta provides six different kinds of expressions. These are type expressions, annotations expressions, number expressions, string expressions, boolean expressions and list expressions.
Definition:
RutaExpression  ->   TypeExpression | AnnotationExpression
                     | StringExpression | BooleanExpression
                     | NumberExpression | ListExpression
2.6.1. Type Expressions
UIMA Ruta provides several kinds of type expressions.
TypeExpression  ->  AnnotationType | TypeVariable
| AnnotationExpression.typeDECLARE Author; // Author defines a type, therefore it is
// a type expression
TYPE typeVar; // type variable typeVar is a type expression
Document{->ASSIGN(typeVar, Author)};e:Entity{-> e.type}; // the dot notation type refers to the type
// of the anotation stored in the label a. In this example,
// this type expression refers to the type Entity or a specific
// subtype of Entity.2.6.2. Annotation Expressions
UIMA Ruta provides several kinds of annotation expressions.
AnnotationExpression  ->  AnnotationVariable | LabelExpression
| TypeExpression | FeatureExpressionANNOTATION anno; // a variable declaration for storing an annotation.
e:Entity; // label expression e stored the annotation matched by the
// rule element with the matching condition Entity.
er:EmplRelation{-> er.employer = Employer}; // the type expression
// Employer implicitly refers to annotations of the
// type Employer in the context of the EmplRelation match.
e:EmplRelation.employer; // this feature expression represents the
// annotation stored in the feature employer.2.6.3. Number Expressions
UIMA Ruta provides several possibilities to define number expressions. As expected, every number expression evaluates to a number. UIMA Ruta supports integer and floating-point numbers. A floating-point number can be in single or in double precision. To get a complete overview, have a look at the following syntax definition of number expressions.
NumberExpression         -> AdditiveExpression
AdditiveExpression       -> MultiplicativeExpression ( ( "+" | "-" )
                            MultiplicativeExpression )*
MultiplicativeExpression -> SimpleNumberExpression ( ( "*" | "/" | "%" )
                            SimpleNumberExpression )*
                            | ( "EXP" | "LOGN" | "SIN" | "COS" | "TAN" )
                            "(" NumberExpression ")"
SimpleNumberExpression   -> "-"? ( DecimalLiteral | FloatingPointLiteral
                            | NumberVariable) | "(" NumberExpression ")"
DecimalLiteral        -> ('0' | '1'..'9' Digit*) IntegerTypeSuffix?
IntegerTypeSuffix     ->  ('l'|'L')
FloatingPointLiteral  -> Digit+ '.' Digit* Exponent? FloatTypeSuffix?
                         |   '.' Digit+ Exponent? FloatTypeSuffix?
                         |   Digit+ Exponent FloatTypeSuffix?
                         |   Digit+ Exponent? FloatTypeSuffix
FloatTypeSuffix       ->  ('f'|'F'|'d'|'D')
Exponent              -> ('e'|'E') ('+'|'-')? Digit+
Digit                 -> ('0'..'9')
For more information on number variables, see Section 2.5.2 .
98     // a integer number literal
104   // a integer number literal
170.02   // a floating-point number literal
1.0845 // a floating-point number literal
INT intVar1;
INT intVar2;
...
Document{->ASSIGN(intVar1, 12 * intVar1 - SIN(intVar2))};2.6.4. String Expressions
There are two kinds of string expressions in UIMA Ruta.
-
String literals: String literals are defined by any sequence of characters within quotation marks.
-
String variables (see Section 2.5.2 )
StringExpression   ->   SimpleStringExpression
SimpleStringExpression  ->  StringLiteral ("+" StringExpression)*
| StringVariableSTRING strVar; // define string variable
// add prefix "strLiteral" to variable strVar
Document{->ASSIGN(strVar, "strLiteral" + strVar)};2.6.5. Boolean Expressions
UIMA Ruta provides several possibilities to define boolean expressions. As expected, every boolean expression evaluates to either true or false. To get a complete overview, have a look at the following syntax definition of boolean expressions.
BooleanExpression          ->  ComposedBooleanExpression
                               | SimpleBooleanExpression
ComposedBooleanExpression  ->  BooleanCompare | BooleanTypeExpression
                               | BooleanNumberExpression | BooleanFunction
SimpleBooleanExpression     ->  BooleanLiteral | BooleanVariable
BooleanCompare           ->  SimpleBooleanExpression ( "==" | "!=" )
                               BooleanExpression
BooleanTypeExpression    ->  TypeExpression ( "==" | "!=" ) TypeExpression
BooleanNumberExpression  ->  "(" NumberExpression ( "<" | "<=" | ">"
                               | ">=" | "==" | "!=" ) NumberExpression ")"
BooleanFunction   ->  XOR "(" BooleanExpression "," BooleanExpression ")"
BooleanLiteral    ->  "true" | "false"
Boolean variables are defined in Section 2.5.2 .
Document{->ASSIGN(boolVar, false)};The boolean literal 'false' is assigned to boolean variable boolVar.
Document{->ASSIGN(boolVar, typeVar == Author)};If the type variable typeVar represents annotation type Author, the boolean type expression evaluates to true, otherwise it evaluates to false. The result is assigned to boolean variable boolVar.
Document{->ASSIGN(boolVar, (intVar == 10))};This rule shows a boolean number expression. If the value in variable intVar is equal to 10, the boolean number expression evaluates to true, otherwise it evaluates to false. The result is assigned to boolean variable boolVar. The brackets surrounding the number expression are necessary.
Document{->ASSIGN(booleanVar1, booleanVar2 == (10 > intVar))};This rule shows a more complex boolean expression. If the value in variable intVar is equal to 10, the boolean number expression evaluates to true, otherwise it evaluates to false. The result of this evaluation is compared to booleanVar2. The end result is assigned to boolean variable boolVar1. Realize that the syntax definition defines exactly this order. It is not possible to have the boolean number expression on the left side of the complex number expression.
2.6.6. List Expressions
List expression are a rather simple kind of expression.
ListExpression  ->   WordListExpression | WordTableExpression
                     | TypeListExpression | AnnotationListExpression
                     | NumberListExpression | StringListExpression
                     | BooleanListExpression
WordListExpression     ->  RessourceLiteral | WordListVariable
WordTableExpression    ->  RessourceLiteral | WordTableVariable
TypeListExpression     ->  TypeListVariable
                           | "{" TypeExpression ("," TypeExpression)* "}"
NumberListExpression   ->  IntListVariable | FloatListVariable
                           | DoubleListVariable
                           | "{" NumberExpression
                              ("," NumberExpression)* "}"
StringListExpression   ->  StringListVariable
                           | "{" StringExpression
                              ("," StringExpression)* "}"
BooleanListExpression  ->  BooleanListVariable
                           | "{" BooleanExpression
                              ("," BooleanExpression)* "}"
AnnotationListExpression  ->  AnnotationListVariable
                           | "{" AnnotationExpression
                              ("," AnnotationExpression)* "}"
A ResourceLiteral is something like 'folder/file.txt' (Attention: Use single quotes).
List variables are defined in Section 2.5.2.
2.6.7. Feature Expressions
Feature expression can be used in different situations, e.g., for restricting the match of a rule element, as an implicit condition or as an implicit action.
FeatureExpression           -> TypeExpression "." DottedIdentifier
FeatureMatchExpression      -> FeatureExpression
                               ("==" | "!=" | "<=" | "<" | ">=" | ">")
                               Expression
FeatureAssignmentExpression -> FeatureExpression "=" Expression
Ruta allows the access of two special attributes of an annotation with the feature notation: The covered text of an annotation can be accessed as a string expression and the type of an annotation can be accessed as an type expression.
The covered text of an annotation can be referred to with "coveredText" or "ct". The latter one is an abbreviation and returns the covered text of an annotation only if the type of the annotation does not define a feature with the name "ct". The following example creates an annotation of the type TypeA for each word with the covered text "A".
W.ct == "A" {-> TypeA};The type of an annotation can be referred to with "type". The following example creates an annotation of the type TypeA for each pair of ANY annotation.
(a1:ANY a2:ANY){a1.type == a2.type -> TypeA};2.7. Conditions
2.7.1. AFTER
The AFTER condition evaluates true, if the matched annotation starts after the beginning of an arbitrary annotation of the passed type. If a list of types is passed, this has to be true for at least one of them.
AFTER(Type|TypeListExpression)CW{AFTER(SW)};Here, the rule matches on a capitalized word, if there is any small written word previously.
2.7.2. AND
The AND condition is a composed condition and evaluates true, if all contained conditions evaluate true.
AND(Condition1,...,ConditionN)Paragraph{AND(PARTOF(Headline),CONTAINS(Keyword))
->MARK(ImportantHeadline)};In this example, a paragraph is annotated with an ImportantHeadline annotation, if it is part of a Headline and contains a Keyword annotation.
2.7.3. BEFORE
The BEFORE condition evaluates true, if the matched annotation starts before the beginning of an arbitrary annotation of the passed type. If a list of types is passed, this has to be true for at least one of them.
BEFORE(Type|TypeListExpression)CW{BEFORE(SW)};Here, the rule matches on a capitalized word, if there is any small written word afterwards.
2.7.4. CONTAINS
The CONTAINS condition evaluates true on a matched annotation, if the frequency of the passed type lies within an optionally passed interval. The limits of the passed interval are per default interpreted as absolute numeral values. By passing a further boolean parameter set to true the limits are interpreted as percental values. If no interval parameters are passed at all, then the condition checks whether the matched annotation contains at least one occurrence of the passed type.
CONTAINS(Type(,NumberExpression,NumberExpression(,BooleanExpression)?)?)Paragraph{CONTAINS(Keyword)->MARK(KeywordParagraph)};A Paragraph is annotated with a KeywordParagraph annotation, if it contains a Keyword annotation.
Paragraph{CONTAINS(Keyword,2,4)->MARK(KeywordParagraph)};A Paragraph is annotated with a KeywordParagraph annotation, if it contains between two and four Keyword annotations.
Paragraph{CONTAINS(Keyword,50,100,true)->MARK(KeywordParagraph)};A Paragraph is annotated with a KeywordParagraph annotation, if it contains between 50% and 100% Keyword annotations. This is calculated based on the tokens of the Paragraph. If the Paragraph contains six basic annotations (see Section 2.3), two of them are part of one Keyword annotation, and if one basic annotation is also annotated with a Keyword annotation, then the percentage of the contained Keywords is 50%.
2.7.5. CONTEXTCOUNT
The CONTEXTCOUNT condition numbers all occurrences of the matched type within the context of a passed type’s annotation consecutively, thus assigning an index to each occurrence. Additionally it stores the index of the matched annotation in a numerical variable if one is passed. The condition evaluates true if the index of the matched annotation is within a passed interval. If no interval is passed, the condition always evaluates true.
CONTEXTCOUNT(Type(,NumberExpression,NumberExpression)?(,Variable)?)Keyword{CONTEXTCOUNT(Paragraph,2,3,var)
->MARK(SecondOrThirdKeywordInParagraph)};Here, the position of the matched Keyword annotation within a Paragraph annotation is calculated and stored in the variable 'var'. If the counted value lies within the interval [2,3], then the matched Keyword is annotated with the SecondOrThirdKeywordInParagraph annotation.
2.7.6. COUNT
The COUNT condition can be used in two different ways. In the first case (see first definition), it counts the number of annotations of the passed type within the window of the matched annotation and stores the amount in a numerical variable, if such a variable is passed. The condition evaluates true if the counted amount is within a specified interval. If no interval is passed, the condition always evaluates true. In the second case (see second definition), it counts the number of occurrences of the passed VariableExpression (second parameter) within the passed list (first parameter) and stores the amount in a numerical variable, if such a variable is passed. Again, the condition evaluates true if the counted amount is within a specified interval. If no interval is passed, the condition always evaluates true.
COUNT(Type(,NumberExpression,NumberExpression)?(,NumberVariable)?)COUNT(ListExpression,VariableExpression
(,NumberExpression,NumberExpression)?(,NumberVariable)?)Paragraph{COUNT(Keyword,1,10,var)->MARK(KeywordParagraph)};Here, the amount of Keyword annotations within a Paragraph is calculated and stored in the variable 'var'. If one to ten Keywords were counted, the paragraph is marked with a KeywordParagraph annotation.
Paragraph{COUNT(list,"author",5,7,var)};Here, the number of occurrences of STRING "author" within the STRINGLIST 'list' is counted and stored in the variable 'var'. If "author" occurs five to seven times within 'list', the condition evaluates true.
2.7.7. CURRENTCOUNT
The CURRENTCOUNT condition numbers all occurrences of the matched type within the whole document consecutively, thus assigning an index to each occurrence. Additionally, it stores the index of the matched annotation in a numerical variable, if one is passed. The condition evaluates true if the index of the matched annotation is within a specified interval. If no interval is passed, the condition always evaluates true.
CURRENTCOUNT(Type(,NumberExpression,NumberExpression)?(,Variable)?)Paragraph{CURRENTCOUNT(Keyword,3,3,var)->MARK(ParagraphWithThirdKeyword)};Here, the Paragraph, which contains the third Keyword of the whole document, is annotated with the ParagraphWithThirdKeyword annotation. The index is stored in the variable 'var'.
2.7.8. ENDSWITH
The ENDSWITH condition evaluates true, if an annotation of the given type ends exactly at the same position as the matched annotation. If a list of types is passed, this has to be true for at least one of them.
ENDSWITH(Type|TypeListExpression)Paragraph{ENDSWITH(SW)};Here, the rule matches on a Paragraph annotation, if it ends with a small written word.
2.7.9. FEATURE
The FEATURE condition compares a feature of the matched annotation with the second argument.
FEATURE(StringExpression,Expression)Document{FEATURE("language",targetLanguage)}This rule matches, if the feature named 'language' of the document annotation equals the value of the variable 'targetLanguage'.
2.7.10. IF
The IF condition evaluates true, if the contained boolean expression evaluates true.
IF(BooleanExpression)Paragraph{IF(keywordAmount > 5)->MARK(KeywordParagraph)};A Paragraph annotation is annotated with a KeywordParagraph annotation, if the value of the variable 'keywordAmount' is greater than five.
2.7.11. INLIST
The INLIST condition is fulfilled, if the matched annotation is listed in a given word or string list. If an optional agrument is given, then the value of the argument is used instead of the covered text of the matched annotation
INLIST(WordList(,StringExpression)?)INLIST(StringList(,StringExpression)?)Keyword{INLIST(SpecialKeywordList)->MARK(SpecialKeyword)};A Keyword is annotated with the type SpecialKeyword, if the text of the Keyword annotation is listed in the word list or string list SpecialKeywordList.
Token{INLIST(MyLemmaList, Token.lemma)->MARK(SpecialLemma)};This rule creates an annotation of the type SpecialLemma for each token that provides a feature value of the feature "lemma" that is present in the string list or word list MyLemmaList.
2.7.12. IS
The IS condition evaluates true, if there is an annotation of the given type with the same beginning and ending offsets as the matched annotation. If a list of types is given, the condition evaluates true, if at least one of them fulfills the former condition.
IS(Type|TypeListExpression)Author{IS(Englishman)->MARK(EnglishAuthor)};If an Author annotation is also annotated with an Englishman annotation, it is annotated with an EnglishAuthor annotation.
2.7.13. LAST
The LAST condition evaluates true, if the type of the last token within the window of the matched annotation is of the given type.
LAST(TypeExpression)Document{LAST(CW)};This rule fires, if the last token of the document is a capitalized word.
2.7.14. MOFN
The MOFN condition is a composed condition. It evaluates true if the number of containing conditions evaluating true is within a given interval.
MOFN(NumberExpression,NumberExpression,Condition1,...,ConditionN)Paragraph{MOFN(1,1,PARTOF(Headline),CONTAINS(Keyword))
->MARK(HeadlineXORKeywords)};A Paragraph is marked as a HeadlineXORKeywords, if the matched text is either part of a Headline annotation or contains Keyword annotations.
2.7.15. NEAR
The NEAR condition is fulfilled, if the distance of the matched annotation to an annotation of the given type is within a given interval. The direction is defined by a boolean parameter, whose default value is set to true, therefore searching forward. By default this condition works on an unfiltered index. An optional fifth boolean parameter can be set to true to get the condition being evaluated on a filtered index.
NEAR(TypeExpression,NumberExpression,NumberExpression
(,BooleanExpression(,BooleanExpression)?)?)Paragraph{NEAR(Headline,0,10,false)->MARK(NoHeadline)};A Paragraph that starts at most ten tokens after a Headline annotation is annotated with the NoHeadline annotation.
2.7.16. NOT
The NOT condition negates the result of its contained condition.
"-"ConditionParagraph{-PARTOF(Headline)->MARK(Headline)};A Paragraph that is not part of a Headline annotation so far is annotated with a Headline annotation.
2.7.17. OR
The OR Condition is a composed condition and evaluates true, if at least one contained condition is evaluated true.
OR(Condition1,...,ConditionN)Paragraph{OR(PARTOF(Headline),CONTAINS(Keyword))
->MARK(ImportantParagraph)};In this example a Paragraph is annotated with the ImportantParagraph annotation, if it is a Headline or contains Keyword annotations.
2.7.18. PARSE
The PARSE condition is fulfilled, if the text covered by the matched annotation or the text defined by a optional first argument can be transformed into a value of the given variable’s type. If this is possible, the parsed value is additionally assigned to the passed variable. For numeric values, this conditions delegates to the NumberFormat of the locale given by the optional last argument. Therefore, this condition parses the string “2,3” for the locale “en” to the value 23.
PARSE((stringExpression,)? variable(, stringExpression)?)NUM{PARSE(var,"de")};
n:NUM{PARSE(n.ct,var,"de")};If the variable 'var' is of an appropriate numeric type for the locale "de", the value of NUM is parsed and subsequently stored in 'var'.
2.7.19. PARTOF
The PARTOF condition is fulfilled, if the matched annotation is part of an annotation of the given type. However, it is not necessary that the matched annotation is smaller than the annotation of the given type. Use the (much slower) PARTOFNEQ condition instead, if this is needed. If a type list is given, the condition evaluates true, if the former described condition for a single type is fulfilled for at least one of the types in the list.
PARTOF(Type|TypeListExpression)Paragraph{PARTOF(Headline) -> MARK(ImportantParagraph)};A Paragraph is an ImportantParagraph, if the matched text is part of a Headline annotation.
2.7.20. PARTOFNEQ
The PARTOFNEQ condition is fulfilled if the matched annotation is part of (smaller than and inside of) an annotation of the given type. If also annotations of the same size should be acceptable, use the PARTOF condition. If a type list is given, the condition evaluates true if the former described condition is fulfilled for at least one of the types in the list.
PARTOFNEQ(Type|TypeListExpression)W{PARTOFNEQ(Headline) -> MARK(ImportantWord)};A word is an “ImportantWord”, if it is part of a headline.
2.7.21. POSITION
The POSITION condition is fulfilled, if the matched type is the k-th occurrence of this type within the window of an annotation of the passed type, whereby k is defined by the value of the passed NumberExpression. If the additional boolean paramter is set to false, then k counts the occurrences of of the minimal annotations.
POSITION(Type,NumberExpression(,BooleanExpression)?)Keyword{POSITION(Paragraph,2)->MARK(SecondKeyword)};The second Keyword in a Paragraph is annotated with the type SecondKeyword.
Keyword{POSITION(Paragraph,2,false)->MARK(SecondKeyword)};A Keyword in a Paragraph is annotated with the type SecondKeyword, if it starts at the same offset as the second (visible) RutaBasic annotation, which normally corresponds to the tokens.
2.7.22. REGEXP
The REGEXP condition is fulfilled, if the given pattern matches on the matched annotation. However, if a string variable is given as the first argument, then the pattern is evaluated on the value of the variable. For more details on the syntax of regular expressions, take a look at the Java API. By default the REGEXP condition is case-sensitive. To change this, add an optional boolean parameter, which is set to true. The regular expression is initialized with the flags DOTALL and MULTILINE, and if the optional parameter is set to true, then additionally with the flags CASE_INSENSITIVE and UNICODE_CASE.
REGEXP((StringVariable,)? StringExpression(,BooleanExpression)?)Keyword{REGEXP("..")->MARK(SmallKeyword)};A Keyword that only consists of two chars is annotated with a SmallKeyword annotation.
2.7.23. SCORE
The SCORE condition evaluates the heuristic score of the matched annotation. This score is set or changed by the MARK action. The condition is fulfilled, if the score of the matched annotation is in a given interval. Optionally, the score can be stored in a variable.
SCORE(NumberExpression,NumberExpression(,Variable)?)MaybeHeadline{SCORE(40,100)->MARK(Headline)};An annotation of the type MaybeHeadline is annotated with Headline, if its score is between 40 and 100.
2.7.24. SIZE
The SIZE contition counts the number of elements in the given list. By default, this condition always evaluates true. When an interval is passed, it evaluates true, if the counted number of list elements is within the interval. The counted number can be stored in an optionally passed numeral variable.
SIZE(ListExpression(,NumberExpression,NumberExpression)?(,Variable)?)Document{SIZE(list,4,10,var)};This rule fires, if the given list contains between 4 and 10 elements. Additionally, the exact amount is stored in the variable “var”.
2.7.25. STARTSWITH
The STARTSWITH condition evaluates true, if an annotation of the given type starts exactly at the same position as the matched annotation. If a type list is given, the condition evaluates true, if the former is true for at least one of the given types in the list.
STARTSWITH(Type|TypeListExpression)Paragraph{STARTSWITH(SW)};Here, the rule matches on a Paragraph annotation, if it starts with small written word.
2.7.26. TOTALCOUNT
The TOTALCOUNT condition counts the annotations of the passed type within the whole document and stores the amount in an optionally passed numerical variable. The condition evaluates true, if the amount is within the passed interval. If no interval is passed, the condition always evaluates true.
TOTALCOUNT(Type(,NumberExpression,NumberExpression)?(,NumberVariable)?)Paragraph{TOTALCOUNT(Keyword,1,10,var)->MARK(KeywordParagraph)};Here, the amount of Keyword annotations within the whole document is calculated and stored in the variable 'var'. If one to ten Keywords were counted, the Paragraph is marked with a KeywordParagraph annotation.
2.7.27. VOTE
The VOTE condition counts the annotations of the given two types within the window of the matched annotation and evaluates true, if it finds more annotations of the first type.
VOTE(TypeExpression,TypeExpression)Paragraph{VOTE(FirstName,LastName)};Here, this rule fires, if a paragraph contains more firstnames than lastnames.
2.8. Actions
2.8.1. ADD
The ADD action adds all the elements of the passed RutaExpressions to a given list. For example, this expressions could be a string, an integer variable or a list. For a complete overview on UIMA Ruta expressions see Section 2.6.
ADD(ListVariable,(RutaExpression)+)Document{->ADD(list, var)};In this example, the variable 'var' is added to the list 'list'.
2.8.2. ADDFILTERTYPE
The ADDFILTERTYPE action adds its arguments to the list of filtered types, which restrict the visibility of the rules.
ADDFILTERTYPE(TypeExpression(,TypeExpression)*)Document{->ADDFILTERTYPE(CW)};After applying this rule, capitalized words are invisible additionally to the previously filtered types.
2.8.3. ADDRETAINTYPE
The ADDRETAINTYPE action adds its arguments to the list of retained types, which extend the visibility of the rules.
ADDRETAINTYPE(TypeExpression(,TypeExpression)*)Document{->ADDRETAINTYPE(MARKUP)};After applying this rule, markup is visible additionally to the previously retained types.
2.8.4. ASSIGN
The ASSIGN action assigns the value of the passed expression to a variable of the same type.
ASSIGN(BooleanVariable,BooleanExpression)ASSIGN(NumberVariable,NumberExpression)ASSIGN(StringVariable,StringExpression)ASSIGN(TypeVariable,TypeExpression)Document{->ASSIGN(amount, (amount/2))};In this example, the value of the variable 'amount' is divided in half.
2.8.5. CALL
The CALL action initiates the execution of a different script file or script block. Currently, only complete script files are supported.
CALL(DifferentFile)CALL(Block)Document{->CALL(NamedEntities)};Here, a script 'NamedEntities' for named entity recognition is executed.
2.8.6. CLEAR
The CLEAR action removes all elements of the given list. If the list was initialized as it was declared, then it is reset to its initial value.
CLEAR(ListVariable)Document{->CLEAR(SomeList)};This rule clears the list 'SomeList'.
2.8.7. COLOR
The COLOR action sets the color of an annotation type in the modified view, if the rule has fired. The background color is passed as the second parameter. The font color can be changed by passing a further color as a third parameter. The supported colors are: black, silver, gray, white, maroon, red, purple, fuchsia, green, lime, olive, yellow, navy, blue, aqua, lightblue, lightgreen, orange, pink, salmon, cyan, violet, tan, brown, white and mediumpurple.
COLOR(TypeExpression,StringExpression(, StringExpression
(, BooleanExpression)?)?)Document{->COLOR(Headline, "red", "green", true)};This rule colors all Headline annotations in the modified view. Thereby, the background color is set to red, font color is set to green and all 'Headline' annotations are selected when opening the modified view.
2.8.8. CONFIGURE
The CONFIGURE action can be used to configure the analysis engine of the given namespace (first parameter). The parameters that should be configured with corresponding values are passed as name-value pairs.
CONFIGURE(AnalysisEngine(,StringExpression = Expression)+)ENGINE utils.HtmlAnnotator;
Document{->CONFIGURE(HtmlAnnotator, "onlyContent" = false)};The former rule changes the value of configuration parameter “onlyContent” to false and reconfigure the analysis engine.
2.8.9. CREATE
The CREATE action is similar to the MARK action. It also annotates the matched text fragments with a type annotation, but additionally assigns values to a chosen subset of the type’s feature elements.
CREATE(TypeExpression(,NumberExpression)*
(,StringExpression = Expression)+)Paragraph{COUNT(ANY,0,10000,cnt)->CREATE(Headline,"size" = cnt)};This rule counts the number of tokens of type ANY in a Paragraph annotation and assigns the counted value to the int variable 'cnt'. If the counted number is between 0 and 10000, a Headline annotation is created for this Paragraph. Moreover, the feature named 'size' of Headline is set to the value of 'cnt'.
2.8.10. DEL
The DEL action deletes the matched text fragments in the modified view. For removing annotations see UNMARK.
DELName{->DEL};This rule deletes all text fragments that are annotated with a Name annotation.
2.8.11. DYNAMICANCHORING
The DYNAMICANCHORING action turns dynamic anchoring on or off (first parameter) and assigns the anchoring parameters penalty (second parameter) and factor (third parameter).
DYNAMICANCHORING(BooleanExpression
(,NumberExpression(,NumberExpression)?)?)Document{->DYNAMICANCHORING(true)};The above mentioned example activates dynamic anchoring.
2.8.12. EXEC
The EXEC action initiates the execution of a different script file or analysis engine on the complete input document, independent from the matched text and the current filtering settings. If the imported component (DifferentFile) refers to another script file, it is applied on a new representation of the document: the complete text of the original CAS with the default filtering settings of the UIMA Ruta analysis engine. If it refers to an external analysis engine, then it is applied on the complete document. The optional, first argument is is a string expression, which specifies the view the component should be applied on. The optional, third argument is a list of types, which should be reindexed by Ruta (not UIMA itself).
|
Note
|
Annotations created by the external analysis engine are not accessible for UIMA Ruta rules in the same script. The types of these annotations need to be provided in the second argument in order to be visible to the Ruta rules. |
EXEC((StringExpression,)? DifferentFile(, TypeListExpression)?)ENGINE NamedEntities;
Document{->EXEC(NamedEntities, {Person, Location})};Here, an analysis engine for named entity recognition is executed once on the complete document and the annotations of the types Person and Location (and all subtypes) are reindexed in UIMA Ruta. Without this list of types, the annotations are added to the CAS, but cannot be accessed by Ruta rules.
2.8.13. FILL
The FILL action fills a chosen subset of the given type’s feature elements.
FILL(TypeExpression(,StringExpression = Expression)+)Headline{COUNT(ANY,0,10000,tokenCount)
->FILL(Headline,"size" = tokenCount)};Here, the number of tokens within an Headline annotation is counted and stored in variable 'tokenCount'. If the number of tokens is within the interval [0;10000], the FILL action fills the Headline’s feature 'size' with the value of 'tokenCount'.
2.8.14. FILTERTYPE
This action filters the given types of annotations. They are now ignored by rules. Expressions are not yet supported. This action is related to RETAINTYPE (see Section 2.8.35).
|
Note
|
The visibility of types is calculated using three lists: A list “default” for the initially filtered types, which is specified in the configuration parameters of the analysis engine, the list “filtered”, which is specified by the FILTERTYPE action, and the list “retained”, which is specified by the RETAINTYPE action. For determining the actual visibility of types, list “filtered” is added to list “default” and then all elements of list “retained” are removed. The annotations of the types in the resulting list are not visible. Please note that the actions FILTERTYPE and RETAINTYPE replace all elements of the respective lists and that RETAINTYPE overrides FILTERTYPE. |
FILTERTYPE((TypeExpression(,TypeExpression)*))?Document{->FILTERTYPE(SW)};This rule filters all small written words in the input document. They are further ignored by every rule.
Document{->FILTERTYPE};Here, the the action (without parentheses) specifies that no additional types should be filtered.
2.8.15. GATHER
This action creates a complex structure: an annotation with features. The optionally passed indexes (NumberExpressions after the TypeExpression) can be used to create an annotation that spans the matched information of several rule elements. The features are collected using the indexes of the rule elements of the complete rule.
GATHER(TypeExpression(,NumberExpression)*
(,StringExpression = NumberExpression)+)DECLARE Annotation A;
DECLARE Annotation B;
DECLARE Annotation C(Annotation a, Annotation b);
W{REGEXP("A")->MARK(A)};
W{REGEXP("B")->MARK(B)};
A B{-> GATHER(C, 1, 2, "a" = 1, "b" = 2)};Two annotations A and B are declared and annotated. The last rule creates an annotation C spanning the elements A (index 1 since it is the first rule element) and B (index 2) with its features 'a' set to annotation A (again index 1) and 'b' set to annotation B (again index 2).
2.8.16. GET
The GET action retrieves an element of the given list dependent on a given strategy.
| Strategy | Functionality |
|---|---|
dominant |
finds the most occurring element |
GET(ListExpression, Variable, StringExpression)Document{->GET(list, var, "dominant")};In this example, the element of the list 'list' that occurs most is stored in the variable 'var'.
2.8.17. GETFEATURE
The GETFEATURE action stores the value of the matched annotation’s feature (first paramter) in the given variable (second parameter).
GETFEATURE(StringExpression, Variable)Document{->GETFEATURE("language", stringVar)};In this example, variable 'stringVar' will contain the value of the feature 'language'.
2.8.18. GETLIST
This action retrieves a list of types dependent on a given strategy.
| Strategy | Functionality |
|---|---|
Types |
get all types within the matched annotation |
Types:End |
get all types that end at the same offset as the matched annotation |
Types:Begin |
get all types that start at the same offset as the matched annotation |
GETLIST(ListVariable, StringExpression)Document{->GETLIST(list, "Types")};Here, a list of all types within the document is created and assigned to list variable 'list'.
2.8.19. GREEDYANCHORING
The GREEDYANCHORING action turns greedy anchoring on or off. If the first parameter is set to true, then start positions already matched by the same rule element will be ignored. This situation occurs mostly for rules that start with a quantifier. The second optional parameter activates greedy acnhoring for the complete rule. Later rule matches are only possible after previous matches.
GREEDYANCHORING(BooleanExpression(,BooleanExpression)?)Document{->GREEDYANCHORING(true, true)};
ANY+;
CW CW;The above mentioned example activates dynamic anchoring and the second rule will then only match once since the next positions, e.g., the second token, are already covered by the first attempt. The third rule will not match on capitalized word that have benn already considered by previous matches of the rule.
2.8.20. LOG
The LOG action writes a log message.
LOG(StringExpression)Document{->LOG("processed")};This rule writes a log message with the string "processed".
2.8.21. MARK
The MARK action is the most important action in the UIMA Ruta system. It creates a new annotation of the given type. The optionally passed indexes (NumberExpressions after the TypeExpression) can be used to create an annotation that spanns the matched information of several rule elements.
MARK(TypeExpression(,NumberExpression)*)Freeline Paragraph{->MARK(ParagraphAfterFreeline,1,2)};This rule matches on a free line followed by a Paragraph annotation and annotates both in a single ParagraphAfterFreeline annotation. The two numerical expressions at the end of the mark action state that the matched text of the first and the second rule elements are joined to create the boundaries of the new annotation.
2.8.22. MARKFAST
The MARKFAST action creates annotations of the given type (first parameter), if an element of the passed list (second parameter) occurs within the window of the matched annotation. Thereby, the created annotation does not cover the whole matched annotation. Instead, it only covers the text of the found occurrence. The third parameter is optional. It defines, whether the MARKFAST action should ignore the case, whereby its default value is false. The optional fourth parameter specifies a character threshold for the ignorence of the case. It is only relevant, if the ignore-case value is set to true. The last parameter is set to true by default and specifies whether whitespaces in the entries of the dictionary should be ignored. For more information on lists see Section 2.5.3. Additionally to external word lists, string lists variables can be used.
MARKFAST(TypeExpression,ListExpression(,BooleanExpression
          (,NumberExpression,(BooleanExpression)?)?)?)
MARKFAST(TypeExpression,StringListExpression(,BooleanExpression
(,NumberExpression,(BooleanExpression)?)?)?)WORDLIST FirstNameList = 'FirstNames.txt';
DECLARE FirstName;
Document{-> MARKFAST(FirstName, FirstNameList, true, 2)};This rule annotates all first names listed in the list 'FirstNameList' within the document and ignores the case, if the length of the word is greater than 2.
2.8.23. MARKFIRST
The MARKFIRST action annotates the first token (basic annotation) of the matched annotation with the given type.
MARKFIRST(TypeExpression)Document{->MARKFIRST(First)};This rule annotates the first token of the document with the annotation First.
2.8.24. MARKLAST
The MARKLAST action annotates the last token of the matched annotation with the given type.
MARKLAST(TypeExpression)Document{->MARKLAST(Last)};This rule annotates the last token of the document with the annotation Last.
2.8.25. MARKONCE
The MARKONCE action has the same functionality as the MARK action, but creates a new annotation only, if each part of the matched annotation is not yet part of the given type.
MARKONCE(NumberExpression,TypeExpression(,NumberExpression)*)Freeline Paragraph{->MARKONCE(ParagraphAfterFreeline,1,2)};This rule matches on a free line followed by a Paragraph and annotates both in a single ParagraphAfterFreeline annotation, if no part is not already annotated with ParagraphAfterFreeline annotation. The two numerical expressions at the end of the MARKONCE action state that the matched text of the first and the second rule elements are joined to create the boundaries of the new annotation.
2.8.26. MARKSCORE
The MARKSCORE action is similar to the MARK action. It also creates a new annotation of the given type, but only if it is not yet existing. The optionally passed indexes (parameters after the TypeExpression) can be used to create an annotation that spanns the matched information of several rule elements. Additionally, a score value (first parameter) is added to the heuristic score value of the annotation. For more information on heuristic scores see Section 2.16 .
MARKSCORE(NumberExpression,TypeExpression(,NumberExpression)*)Freeline Paragraph{->MARKSCORE(10,ParagraphAfterFreeline,1,2)};This rule matches on a free line followed by a paragraph and annotates both in a single ParagraphAfterFreeline annotation. The two number expressions at the end of the mark action indicate that the matched text of the first and the second rule elements are joined to create the boundaries of the new annotation. Additionally, the score '10' is added to the heuristic threshold of this annotation.
2.8.27. MARKTABLE
The MARKTABLE action creates annotations of the given type (first parameter), if an element of the given column (second parameter) of a passed table (third parameter) occures within the window of the matched annotation. Thereby, the created annotation does not cover the whole matched annotation. Instead, it only covers the text of the found occurrence. Optionally the MARKTABLE action is able to assign entries of the given table to features of the created annotation. For more information on tables see Section 2.5.3. Additionally, several configuration parameters are possible. (See example.)
MARKTABLE(TypeExpression, NumberExpression, TableExpression
          (,BooleanExpression, NumberExpression,
          StringExpression, NumberExpression)?
(,StringExpression = NumberExpression)+)WORDTABLE TestTable = 'TestTable.csv';
DECLARE Annotation Struct(STRING first);
Document{-> MARKTABLE(Struct, 1, TestTable,
true, 4, ".,-", 2, "first" = 2)};In this example, the whole document is searched for all occurrences of the entries of the first column of the given table 'TestTable'. For each occurrence, an annotation of the type Struct is created and its feature 'first' is filled with the entry of the second column. Moreover, the case of the word is ignored if the length of the word exceeds 4. Additionally, the chars '.', ',' and '-' are ignored, but maximally two of them.
2.8.28. MATCHEDTEXT
The MATCHEDTEXT action saves the text of the matched annotation in a passed String variable. The optionally passed indexes can be used to match the text of several rule elements.
MATCHEDTEXT(StringVariable(,NumberExpression)*)Headline Paragraph{->MATCHEDTEXT(stringVariable,1,2)};The text covered by the Headline (rule element 1) and the Paragraph (rule element 2) annotation is saved in variable 'stringVariable'.
2.8.29. MERGE
The MERGE action merges a number of given lists. The first parameter defines, if the merge is done as intersection (false) or as union (true). The second parameter is the list variable that will contain the result.
MERGE(BooleanExpression, ListVariable, ListExpression, (ListExpression)+)Document{->MERGE(false, listVar, list1, list2, list3)};The elements that occur in all three lists will be placed in the list 'listVar'.
2.8.30. REMOVE
The REMOVE action removes lists or single values from a given list.
REMOVE(ListVariable,(Argument)+)Document{->REMOVE(list, var)};In this example, the variable 'var' is removed from the list 'list'.
2.8.31. REMOVEDUPLICATE
This action removes all duplicates within a given list.
REMOVEDUPLICATE(ListVariable)Document{->REMOVEDUPLICATE(list)};Here, all duplicates within the list 'list' are removed.
2.8.32. REMOVEFILTERTYPE
The REMOVEFILTERTYPE action removes its arguments from the list of filtered types, which restrict the visibility of the rules.
REMOVEFILTERTYPE(TypeExpression(,TypeExpression)*)Document{->REMOVEFILTERTYPE(W)};After applying this rule, words are possibly visible again depending on the current filtering settings.
2.8.33. REMOVERETAINTYPE
The REMOVEFILTERTYPE action removes its arguments from the list of retained types, which extend the visibility of the rules.
REMOVERETAINTYPE(TypeExpression(,TypeExpression)*)Document{->REMOVERETAINTYPE(W)};After applying this rule, words are possibly not visible anymore depending on the current filtering settings.
2.8.34. REPLACE
The REPLACE action replaces the text of all matched annotations with the given StringExpression. It remembers the modification for the matched annotations and shows them in the modified view (see Section 2.17).
REPLACE(StringExpression)FirstName{->REPLACE("first name")};This rule replaces all first names with the string 'first name'.
2.8.35. RETAINTYPE
The RETAINTYPE action retains the given types. This means that they are now not ignored by rules. This action is related to FILTERTYPE (see Section 2.8.14).
|
Note
|
The visibility of types is calculated using three lists: A list “default” for the initially filtered types, which is specified in the configuration parameters of the analysis engine, the list “filtered”, which is specified by the FILTERTYPE action, and the list “retained”, which is specified by the RETAINTYPE action. For determining the actual visibility of types, list “filtered” is added to list “default” and then all elements of list “retained” are removed. The annotations of the types in the resulting list are not visible. Please note that the actions FILTERTYPE and RETAINTYPE replace all elements of the respective lists and that RETAINTYPE overrides FILTERTYPE. |
RETAINTYPE((TypeExpression(,TypeExpression)*))?Document{->RETAINTYPE(SPACE)};Here, all spaces are retained and can be matched by rules.
Document{->RETAINTYPE};Here, the the action (without parentheses) specifies that no types should be retained.
2.8.36. SETFEATURE
The SETFEATURE action sets the value of a feature of the matched complex structure.
SETFEATURE(StringExpression,Expression)Document{->SETFEATURE("language","en")};Here, the feature 'language' of the input document is set to English.
2.8.37. SHIFT
The SHIFT action can be used to change the offsets of an annotation. The two number expressions, which point the rule elements of the rule, specify the new offsets of the annotation. The annotations that will be modified have to start or end at the match of the rule element of the action if the boolean option is set to true. By default, only the matched annotation of the given type will be modified. In either way, this means that the action has to be placed at a matching condition, which will be used to specify the annotations to be changed.
SHIFT(TypeExpression,NumberExpression,NumberExpression,BooleanExpression?)Author{-> SHIFT(Author,1,2)} PM;In this example, an annotation of the type “Author” is expanded in order to cover the following punctuation mark.
W{STARTSWITH(FS) -> SHIFT(FS, 1, 2, true)} W+ MARKUP;In this example, an annotation of the type “FS” that consists mostly of words is shrinked by removing the last MARKUP annotation.
2.8.38. SPLIT
The SPLIT action is able to split the matched annotation for each occurrence of annotation of the given type. There are three additional parameters: The first one specifies if complete annotations of the given type should be used to split the matched annotations. If set to false, then even the boundary of an annotation will cause splitting. The third (addToBegin) and fourth (addToEnd) argument specify if the complete annotation (for splitting) will be added to the begin or end of the split annotation. The latter two are only utilized if the first one is set to true.. If omitted, the first argument is true and the other two arguments are false by default.
SPLIT(TypeExpression(,BooleanExpression,
(BooleanExpression, BooleanExpression)? )?Sentence{-> SPLIT(PERIOD, true, false, true)};In this example, an annotation of the type “Sentence” is split for each occurrence of a period, which is added to the end of the new sentence.
2.8.39. TRANSFER
The TRANSFER action creates a new feature structure and adds all compatible features of the matched annotation.
TRANSFER(TypeExpression)Document{->TRANSFER(LanguageStorage)};Here, a new feature structure “LanguageStorage” is created and the compatible features of the Document annotation are copied. E.g., if LanguageStorage defined a feature named 'language', then the feature value of the Document annotation is copied.
2.8.40. TRIE
The TRIE action uses an external multi tree word list to annotate the matched annotation and provides several configuration parameters.
TRIE((String = (TypeExpression|{TypeExpression,StringExpression,
          Expression}))+,ListExpression,BooleanExpression,NumberExpression,
BooleanExpression,NumberExpression,StringExpression)Document{->TRIE("FirstNames.txt" = FirstName, "Companies.txt" = Company,
'Dictionary.mtwl', true, 4, false, 0, ".,-/")};Here, the dictionary 'Dictionary.mtwl' that contains word lists for first names and companies is used to annotate the document. The words previously contained in the file 'FirstNames.txt' are annotated with the type FirstName and the words in the file 'Companies.txt' with the type Company. The case of the word is ignored, if the length of the word exceeds 4. The edit distance is deactivated. The cost of an edit operation can currently not be configured by an argument. The last argument additionally defines several chars that will be ignored.
Document{->TRIE("FirstNames.txt" = {A, "a", "first"}, "LastNames.txt" =
          {B, "b", true}, "CompleteNames.txt" = {C, "c", 6},
          list1, true, 4, false, 0, ":")};
Here, the dictionary 'list1' is applied on the document. Matches originated in dictionary 'FirstNames.txt' result in annotations of type A wheras their features 'a' are set to 'first'. The other two dictionaries create annotations of type 'B' and 'C' for the corresponding dictionaries with a boolean feature value and a integer feature value.
2.8.41. TRIM
The TRIM action changes the offsets on the matched annotations by removing annotations, whose types are specified by the given parameters.
TRIM(TypeExpression ( , TypeExpression)*)TRIM(TypeListExpression)Keyword{-> TRIM(SPACE)};This rule removes all spaces at the beginning and at the end of Keyword annotations and thus changes the offsets of the matched annotations.
2.8.42. UNMARK
The UNMARK action removes the annotation of the given type overlapping the matched annotation. There are two additional configurations: If additional indexes are given, then the span of the specified rule elements are applied, similar the the MARK action. If instead a boolean is given as an additional argument, then all annotations of the given type are removed that start at the matched position.
UNMARK(AnnotationExpression)UNMARK(TypeExpression)UNMARK(TypeExpression (,NumberExpression)*)UNMARK(TypeExpression, BooleanExpression)Headline{->UNMARK(Headline)};Here, the Headline annotation is removed.
CW ANY+? QUESTION{->UNMARK(Headline,1,3)};Here, all Headline annotations are removed that start with a capitalized word and end with a question mark.
CW{->UNMARK(Headline,true)};Here, all Headline annotations are removed that start with a capitalized word.
Complex{->UNMARK(Complex.inner)};Here, the annotation stored in the feature inner will be removed.
2.8.43. UNMARKALL
The UNMARKALL action removes all the annotations of the given type and all of its descendants overlapping the matched annotation, except the annotation is of at least one type in the passed list.
UNMARKALL(TypeExpression, TypeListExpression)Annotation{->UNMARKALL(Annotation, {Headline})};Here, all annotations except from headlines are removed.
2.9. Robust extraction using filtering
Rule based or pattern based information extraction systems often suffer from unimportant fill words, additional whitespace and unexpected markup. The UIMA Ruta System enables the knowledge engineer to filter and to hide all possible combinations of predefined and new types of annotations. The visibility of tokens and annotations is modified by the actions of rule elements and can be conditioned using the complete expressiveness of the language. Therefore the UIMA Ruta system supports a robust approach to information extraction and simplifies the creation of new rules since the knowledge engineer can focus on important textual features.
|
Note
|
The visibility of types is calculated using three lists: A list “default” for the initially filtered types, which is specified in the configuration parameters of the analysis engine, the list “filtered” , which is specified by the FILTERTYPE action, and the list “retained” , which is specified by the RETAINTYPE action. For determining the actual visibility of types, list “filtered” is added to list “default” and then all elements of list “retained” are removed. The annotations of the types in the resulting list are not visible. Please note that the actions FILTERTYPE and RETAINTYPE replace all elements of the respective lists and that RETAINTYPE overrides FILTERTYPE. |
If no rule action changed the configuration of the filtering settings, then the default filtering configuration ignores whitespaces and markup. Look at the following rule:
"Dr" PERIOD CW CW;Using the default setting, this rule matches on all four lines of this input document:
Dr. Joachim Baumeister
Dr . Joachim      Baumeister
Dr. <b><i>Joachim</i> Baumeister</b>
Dr.JoachimBaumeister
To change the default setting, use the “FILTERTYPE” or “RETAINTYPE” action. For example if markups should no longer be ignored, try the following example on the above mentioned input document:
Document{->RETAINTYPE(MARKUP)};
"Dr" PERIOD CW CW;
You will see that the third line of the previous input example will no longer be matched.
To filter types, try the following rules on the input document:
Document{->FILTERTYPE(PERIOD)};
"Dr" CW CW;
Since periods are ignored here, the rule will match on all four lines of the example.
Notice that using a filtered annotation type within a rule prevents this rule from being executed. Try the following:
Document{->FILTERTYPE(PERIOD)};
"Dr" PERIOD CW CW;
You will see that this matches on no line of the input document since the second rule uses the filtered type PERIOD and is therefore not executed.
2.10. Wildcard #
The wildcard \# is a special matching condition of a rule element, which does not match itself but uses the next rule element to determine its match.
It’s behavior is similar to a generic rule element with a reluctant, not restricted quantifier like ANY+? but it much more efficient since no additional annotations have to be matched.
The functionality of the wildcard is illustrated with following examples:
PERIOD #{-> Sentence} PERIOD;In this example, everything in between two periods is annotated with an annotation of the type Sentence.
This rule is much more efficient than a rule like PERIOD ANY+{-PARTOF(PERIOD)} PERIOD; since it only navigated in the index of PERIOD annotations and does not match on all tokens.
The wildcard is a normal matching condition and can be used as any other matching condition.
If the sentence should include the period, the rule would look like:
PERIOD (# PERIOD){-> Sentence};This rule creates only annotations after a period. If the wildcard is used as an anchor of the rule, e.g., is the first rule element and no manual anchor is specified, then it starts to match at the beginning of the document or current window.
(# PERIOD){-> Sentence};This rule creates a Sentence annotation starting at the begin of the document ending with the first period. If the rule elements are switched, the result is quite different because of the starting anchor of the rule:
(PERIOD #){-> Sentence};Here, one annotation of the type Sentence is create for each PERIOD annotation starting with the period and ending at the end of the document. Currently, optional rule elements after wildcards are not optional.
2.11. Optional match _
The optional match \_ is a special matching condition of a rule element, which does not require any annotations or a textual span in general to match.
The functionality of the optional match is illustrated with following examples:
PERIOD{-> SentenceEnd} _{-PARTOF(CW)};In this example, an annotation of the type SentenceEnd is created for each PERIOD annotation, if it is followed by something that is not part of a CW.
This is also fulfilled for the last PERIOD annotation in a document that ends with a period.
2.12. Label expressions
Rule elements can be extended with labels, which introduce a new local variable storing one or multiple annotations - the annotations matched by the matching condition of the rule element.
The name of the variable is the short identifier before the colon in front of the matching condition, e.g., in sw:SW, SW is the matching condition and sw is the name of the local variable.
The variable will be assigned when the rule element tries to match (also when it fails after all) and can be utilized in all other language elements afterwards.
The functionality of the label expressions is illustrated with following examples:
sw1:SW sw2:SW{sw1.end=sw2.begin};This rule matches on two consecutive small-written words, but matches only if there is no space in between them. Label expression can also be used across Section 2.14.
2.13. Blocks
There are different types of blocks in UIMA Ruta. Blocks aggregate rules or even other blocks and may serve as more complex control structures. They are even able to change the rule behavior of the contained rules.
2.13.1. BLOCK
BLOCK provides a simple control structure in the UIMA Ruta language:
-
Conditioned statements
-
Loops with restriction of the matching window
-
Procedures
Declaration of a block:
BlockDeclaration   -> "BLOCK" "(" Identifier ")" RuleElementWithCA
                                            "{" Statements "}"
RuleElementWithCA      ->  TypeExpression QuantifierPart?
                                            "{" Conditions?  Actions? "}"
A block declaration always starts with the keyword “BLOCK” , followed by the identifier of the block within parentheses. The “RuleElementType” -element is a UIMA Ruta rule that consists of exactly one rule element. The rule element has to be a declared annotation type.
|
Note
|
The rule element in the definition of a block has to define a condition/action part, even if that part is empty ( “{}” ). |
Through the rule element a new local document is defined, whose scope is the related block.
So if you use Document within a block, this always refers to the locally limited document.
BLOCK(ForEach) Paragraph{} {
    Document{COUNT(CW)}; // Here "Document" is limited to a Paragraph;
               // therefore the rule only counts the CW annotations
               // within the Paragraph
}
A block is always executed when the UIMA Ruta interpreter reaches its declaration. But a block may also be called from another position of the script. See Section 2.13.1.3
Conditioned statements
A block can use common UIMA Ruta conditions to condition the execution of its containing rules.
Examples:
DECLARE Month;

BLOCK(EnglishDates) Document{FEATURE("language", "en")} {
    Document{->MARKFAST(Month,'englishMonthNames.txt')};
    //...
}

BLOCK(GermanDates) Document{FEATURE("language", "de")} {
    Document{->MARKFAST(Month,'germanMonthNames.txt')};
    //...
}
The example is explained in detail in Section 1.4 .
Loops with restriction of the matching window
A block can be used to execute the containing rules on a sequence of similar text passages, therefore representing a “foreach” like loop.
Examples:
DECLARE SentenceWithNoLeadingNP;
BLOCK(ForEach) Sentence{} {
    Document{-STARTSWITH(NP) -> MARK(SentenceWithNoLeadingNP)};
}
The example is explained in detail in Section 1.4.
This construction is especially useful, if you have a set of rules, which has to be executed continuously on the same part of an input document. Let us assume that you have already annotated your document with Paragraph annotations. Now you want to count the number of words within each paragraph and, if the number of words exceeds 500, annotate it as BigParagraph. Therefore, you wrote the following rules:
DECLARE BigParagraph;
INT numberOfWords;
Paragraph{COUNT(W,numberOfWords)};
Paragraph{IF(numberOfWords > 500) -> MARK(BigParagraph)};
This will not work.
The reason for this is that the rule, which counts the number of words within a Paragraph is executed on all Paragraphs before the last rule which marks the Paragraph as BigParagraph is even executed once.
When reaching the last rule in this example, the variable numberOfWords holds the number of words of the last Paragraph in the input document, thus, annotating all Paragraphs either as BigParagraph or not.
To solve this problem, use a block to tie the execution of this rules together for each Paragraph:
DECLARE BigParagraph;
INT numberOfWords;
BLOCK(IsBig) Paragraph{} {
  Document{COUNT(W,numberOfWords)};
  Document{IF(numberOfWords > 500) -> MARK(BigParagraph)};
}
Since the scope of the Document is limited to a Paragraph within the block, the rule, which counts the words is only executed once before the second rule decides, if the Paragraph is a BigParagraph. Of course, this is done for every Paragraph in the whole document.
Procedures
Blocks can be used to introduce procedures to the UIMA Ruta scripts. To do this, declare a block as before. Let us assume, you want to simulate a procedure
public int countAmountOfTypesInDocument(Type type){
    int amount = 0;
    for(Token token : Document) {
      if(token.isType(type)){
        amount++;
      }
    }
    return amount;
}

public static void main() {
  int amount = countAmountOfTypesInDocument(Paragraph));
}
which counts the number of the passed type within the document and returns the counted number. This can be done in the following way:
BOOLEAN executeProcedure = false;
TYPE type;
INT amount;

BLOCK(countNumberOfTypesInDocument) Document{IF(executeProcedure)} {
    Document{COUNT(type, amount)};
}

Document{->ASSIGN(executeProcedure, true)};
Document{->ASSIGN(type, Paragraph)};
Document{->CALL(MyScript.countNumberOfTypesInDocument)};
The boolean variable executeProcedure is used to prohibit the execution of the block when the interpreter first reaches the block since this is no procedure call.
The block can be called by referring to it with its name, preceded by the name of the script the block is defined in.
In this example, the script is called MyScript.ruta.
2.13.2. FOREACH
The syntax of the FOREACH block is very similar to the common BLOCK construct, but the execution of the contained rules can lead to other results. the execution of the rules is, however, different. Here, all contained rules are applied on each matched annotation consecutively. In a BLOCK construct, each rule is applied within the window of each matched annotation. The differences can be summarized with:
-
The FOREACH does not restrict the window for the contained rules. The rules are able to match on the complete document, or at least within the window defined by previous BLOCK definitions.
-
The Identifier of the FORACH block (the part within the parentheses) declares a new local annotation variable. The match annotations of the head rule are assign to this variable for each loop.
-
It is expected that the local variable is part of each rule within the FOREACH block. The start anchor of each rule is set to the rule element that contains the annotation as a matching condition. If not another start anchor is defined before the variable.
-
An additional optional boolean parameter specifies the direction of the matching process. With the default value
true, the loop will start with the first annotation continuing with the following annotations. If set to false, the loop will start with the last annotation continuing with the previous annotations.
The following example illustrates the syntax and semantic of the FOREACH block:
FOREACH(num, true) NUM{}{
    num{-> SpecialNum} CW;
    SW{-> T5} num{-> SpecialNum};
}
The first line specifies that the FOREACH block iterates over all annotations of the type NUM and assigns each matched annotation to a new local variable named num.
The block contains two rules.
Both rules start their matching process with the rule element with the matching condition num, meaning that they match directly on the annotation match by the head rule.
While the first rule validates if there is a capitalized word following the number, the second rule validates that the is a small written word before the number.
Thus, this construct annotates number efficiently with annotations of the type SpecialNum dependent on their surrounding.
2.14. Inlined rules
A rule element can have a few optional parts, e.g., the quantifier or the curly brackets with conditions and actions. After the part with the conditions and actions, the rule element can also contain an optional part with inlined rules. These rules are applied in the context of the rule element similar to the rules within a block construct: The rules will try to match within the window specified by the current match of the rule element. There are two types of inlined rules. If the curly brackets start with the symbol “→” , the inlined rules will only be applied for successful matches of the surrounding rule. This behavior is very similar to the block construct. However, there are also some differences, e.g., inlined rules do not specify a namespace, may not contain declarations and cannot be called by other rules. If the curly brackets start with the symbol “←” , then the inlined rules are interpreted as some sort of condition. The surrounding rules will only match, if one of the inlined rules was successfully applied. A rule element may be extended with several inlined rule blocks of the same type. The functionality introduced by inlined rules is illustrated with a few examples:
Sentence{} -> {NUM{-> NumBeforeWord} W;};
Sentence{-> SentenceWithNumBeforeWord} <- {NUM W;};
The first rule in this example matches on each “Sentence” annotation and applies the inlined rule within each matched sentence. The inlined rule matches on numbers followed by a word and annotates the number with an annotation of the type “NumBeforeWord” . The second rule matches on each sentence and applies the inlined rule within each sentence. Note that the inlined rule contains no actions. The rule matches only successfully on a sentence if one of the inlined rules was successfully applied. In this case, the sentence is only annotated with an annotation of the type “SentenceWithNumBeforeWord” , if the sentence contains a number followed by a word.
Document.language == "en"{} -> {
  PERIOD #{} <- {
      COLON COLON % COMMA COMMA;
    }
    PERIOD{-> SpecialPeriod};
}
This examples combines both types of inlined rules. First, the rule matches on document annotations with the language feature set to “en” . Only for those documents, the first inner rule is applied. The inner rule matches on everything between two period, but only if the text span between the period fulfills two conditions: There must be two successive colons and two successive commas within the window of the matched part of the wildcard. Only if these constraints are fulfilled, then the last period is annotated with the type “SpecialPeriod” .
2.15. Macros for conditions and actions
UIMA Ruta supports the specification of macros for conditions and action. Macros allow the aggregation of these elements. Rule can then refer to the name of the macro in order to include the aggregated conditions or actions. The syntax of macros is specified in Section 2.1 . The functionality is illustrated with the following example:
CONDITION CWorPERIODor(TYPE t) = OR(IS(CW),IS(PERIOD),IS(t));
ACTION INC(VAR INT i, INT inc) = ASSIGN(i,i+inc);
INT counter = 0;
ANY{CWorPERIODor(Bold)->INC(counter,1)};
The first line in this example declares a new macro condition with the name “CWorPERIODor” with one annotation type argument named “t” . The condition is fulfilled if the matched text is either a CW annotation, a PERIOD annotation or an annotation of the given type t. The second line declares a new macro action with the name “INC” and two integer arguments “i” and “inc” . The keyword “VAR” indicated that the first argument should be treated as a variable meaning that the actions of the macro can assign new values to the given argument. Else only the value of the argument would be accessible to the actions. The action itself just contains an ASSIGN action, which add the second argument to the variable given in the first argument. The rule in line 4 finally matches on each annotation of the type ANY and validates if the matched position is either a CW, a PERIOD or an annotation of the type Bold. If this is the case, then value of the variable counter defined in line 3 is incremented by 1.
2.16. Heuristic extraction using scoring rules
Diagnostic scores are a well known and successfully applied knowledge formalization pattern for diagnostic problems. Single known findings valuate a possible solution by adding or subtracting points on an account of that solution. If the sum exceeds a given threshold, then the solution is derived. One of the advantages of this pattern is the robustness against missing or false findings, since a high number of findings is used to derive a solution. The UIMA Ruta system tries to transfer this diagnostic problem solution strategy to the information extraction problem. In addition to a normal creation of a new annotation, a MARKSCORE action can add positive or negative scoring points to the text fragments matched by the rule elements. The current value of heuristic points of an annotation can be evaluated by the SCORE condition, which can be used in an additional rule to create another annotation. In the following, the heuristic extraction using scoring rules is demonstrated by a short example:
Paragraph{CONTAINS(W,1,5)->MARKSCORE(5,Headline)};
Paragraph{CONTAINS(W,6,10)->MARKSCORE(2,Headline)};
Paragraph{CONTAINS(Emph,80,100,true)->MARKSCORE(7,Headline)};
Paragraph{CONTAINS(Emph,30,80,true)->MARKSCORE(3,Headline)};
Paragraph{CONTAINS(CW,50,100,true)->MARKSCORE(7,Headline)};
Paragraph{CONTAINS(W,0,0)->MARKSCORE(-50,Headline)};
Headline{SCORE(10)->MARK(Realhl)};
Headline{SCORE(5,10)->LOG("Maybe a headline")};
In the first part of this rule set, annotations of the type paragraph receive scoring points for a headline annotation, if they fulfill certain CONTAINS conditions. The first condition, for example, evaluates to true, if the paragraph contains one word up to five words, whereas the fourth conditions is fulfilled, if the paragraph contains thirty up to eighty percent of emph annotations. The last two rules finally execute their actions, if the score of a headline annotation exceeds ten points, or lies in the interval of five to ten points, respectively.
2.17. Modification
There are different actions that can modify the input document, like DEL, COLOR and REPLACE. However, the input document itself can not be modified directly. A separate engine, the Modifier.xml, has to be called in order to create another CAS view with the (default) name "modified". In that document, all modifications are executed.
The following example shows how to import and call the Modifier.xml engine. The example is explained in detail in Section 1.4 .
ENGINE utils.Modifier;
Date{-> DEL};
MoneyAmount{-> REPLACE("<MoneyAmount/>")};
Document{-> COLOR(Headline, "green")};
Document{-> EXEC(Modifier)};
2.18. External resources
Imagine you have a set of documents containing many different first names.
(as example we use a short list, containing the first names “Frank” , “Peter” , “Jochen” and “Martin” ) If you like to annotate all of them with a “FirstName” annotation, then you could write a script using the rule ("Frank" | "Peter" | "Jochen" | "Martin"){→MARK(FirstName)};. This does exactly what you want, but not very handy.
If you like to add new first names to the list of recognized first names you have to change the rule itself every time.
Moreover, writing rules with possibly hundreds of first names is not really practically realizable and definitely not efficient, if you have the list of first names already as a simple text file.
Using this text file directly would reduce the effort.
UIMA Ruta provides, therefore, two kinds of external resources to solve such tasks more easily: WORDLISTs and WORDTABLEs.
2.18.1. WORDLISTs
A WORDLIST is a list of text items. There are three different possibilities of how to provide a WORDLIST to the UIMA Ruta system.
The first possibility is the use of simple text files, which contain exactly one list item per line. For example, a list "FirstNames.txt" of first names could look like this:
Frank
Peter
Jochen
Martin
First names within a document containing any number of these listed names, could be annotated by using Document{→MARKFAST(FirstName, 'FirstNames.txt')}; , assuming an already declared type FirstName.
To make this rule recognizing more first names, add them to the external list.
You could also use a WORLIST variable to do the same thing as follows, which is preferable:
WORDLIST FirstNameList = 'FirstNames.txt';
DECLARE FirstName;
Document{->MARKFAST(FirstName, FirstNameList)};
Another possibility compared to the plain text files to provide WORDLISTs is the use of compiled “tree word list” s.
The file ending for this is “.twl” A tree word list is similar to a trie.
It is a XML-file that contains a tree-like structure with a node for each character.
The nodes themselves refer to child nodes that represent all characters that succeed the character of the parent node.
For single word entries the resulting complexity is O(m*log(n)) instead of O(m*n) for simple text files.
Here m is the amount of basic annotations in the document and n is the amount of entries in the dictionary.
To generate a tree word list, see Section 3.11 . A tree word list is used in the same way as simple word lists, for example Document{→MARKFAST(FirstName, 'FirstNames.twl')}; .
A third kind of usable WORDLISTs are “multi tree word list” s. The file ending for this is “.mtwl” . It is generated from several ordinary WORDLISTs given as simple text files. It contains special nodes that provide additional information about the original file. These kind of WORDLIST is useful, if several different WORDLISTs are used within a UIMA Ruta script. Using five different lists results in five rules using the MARKFAST action. The documents to annotate are thus searched five times resulting in a complexity of 5*O(m*log(n)) With a multi tree word list this can be reduced to about O(m*log(5*n)). To generate a multi tree word list, see Section 3.11 To use a multi tree word list UIMA Ruta provides the action TRIE. If for example two word lists “FirstNames.txt” and “LastNames.txt” have been merged in the multi tree word list “Names.mtwl” , then the following rule annotates all first names and last names in the whole document:
WORDLIST Names = 'Names.mtwl';
Declare FirstName, LastName;
Document{->TRIE("FirstNames.txt" = FirstName, "LastNames.txt" = LastName,
    Names, false, 0, false, 0, "")};
Only if the wordlist is explicitly declared with WORDLIST, then also a StringExpression including variables can be applied to specify the file:
STRING package ="my/package/";
WORDLIST FirstNameList = "" + package + "FirstNames.txt';
DECLARE FirstName;
Document{->MARKFAST(FirstName, FirstNameList)};
2.18.2. WORDTABLEs
WORDLISTs have been used to annotate all occurrences of any list item in a document with a certain type.
Imagine now that each annotation has features that should be filled with values dependent on the list item that matched.
This can be achieved with WORDTABLEs.
Let us, for example, assume we want to annotate all US presidents within a document.
Moreover, each annotation should contain the party of the president as well as the year of his inauguration.
Therefore we use an annotation type DECLARE Annotation PresidentOfUSA(STRING party, INT yearOfInauguration). To achieve this, it is recommended to use WORDTABLEs.
A WORDTABLE is simply a comma-separated file (.csv), which actually uses semicolons for separation of the entries. For our example, such a file named “presidentsOfUSA.csv” could look like this:
Bill Clinton;democrats;1993
George W. Bush;republicans;2001
Barack Obama;democrats;2009
To annotate our documents we could use the following set of rules:
WORDTABLE presidentsOfUSA = 'presidentsOfUSA.csv';
DECLARE Annotation PresidentOfUSA(STRING party, INT yearOfInauguration);
Document{->MARKTABLE(PresidentOfUSA, 1, presidentsOfUSA, "party" = 2,
		"yearOfInauguration" = 3)};
Only if the wordtable is explicitly declared with WORDTABLE, then also a StringExpression including variables can be applied to specify the file:
STRING package ="my/package/";
WORDTABLE presidentsOfUSA = "" + package + "presidentsOfUSA.csv";
By default, whitespaces are removed by activating the parameter “dictRemoveWS” for WORDLIST and WORDTABLE when the dictionary is loaded. In the special case when whitespace are relevant, e.g., specific patterns of whitespaces need to be detected by the dictionary lookup, then the analysis engine needs to be configured differently.
2.19. Simple Rules based on Regular Expressions
The UIMA Ruta language includes, additionally to the normal rules, a simplified rule syntax for processing regular expressions. These simple rules consist of two parts separated by “→” : The left part is the regular expression (flags: DOTALL and MULTILINE), which may contain capturing groups. The right part defines, which kind of annotations should be created for each match of the regular expression. If a type is given without a group index, then an annotation of that type is created for the complete regular expression match, which corresponds to group 0. Each type can be extended with additional feature assignments, which store the value of the given expression in the feature specified by the given StringExpression. However, if the expression refers to a number (NumberExpression), then the match of the corresponding capturing group is applied. These simple rules can be restricted to match only within certain annotations using the BLOCK construct, and ignore all filtering settings.
RegExpRule        -> StringExpression "->" GroupAssignment
                     ("," GroupAssignment)* ";"
GroupAssignment   -> TypeExpression FeatureAssignment?
                     | NumberEpxression "=" TypeExpression
                       FeatureAssignment?
FeatureAssignment -> "(" StringExpression "=" Expression
                      ("," StringExpression "=" Expression)* ")"
The following example contains a simple rule, which is able to create annotations of two different types. It creates an annotation of the type “T1” for each match of the complete regular expression and an annotation of the type “T2” for each match of the first capturing group.
"A(.*?)C" -> T1, 1 = T2;2.20. Language Extensions
The UIMA Ruta language can be extended with external blocks, actions, conditions, type functions, boolean functions, string functions and number functions. The block constructs are able to introduce new rule matching paradigms. The other extensions provide atomic elements to the language, e.g., a condition that evaluates project-specific properties. An exemplary implementation of each kind of extension can be found in the project “ruta-ep-example-extensions” and a simple UIMA Ruta project, which uses these extensions, is located at “ExtensionsExample” . Both projects are part of the source release of UIMA ruta and are located in the “example-projects” folder.
2.20.1. Provided Extensions
The UIMA Ruta language already provides extensions besides the exemplary elements. The project ruta-core-ext contains the implementation for the analysis engine and the project ruta-ep-core-ext contains the integration in the UIMA Ruta Workbench.
DOCUMENTBLOCK
This additional block construct applies the contained statements/rules on the complete document independent of previous windows and restrictions. It resets the matching context, but otherwise behaves like a normal BLOCK.
BLOCK(ex) NUM{}{
  DOCUMENTBLOCK W{}{
    // do something with the words
  }
}
The example contains two blocks. The first block iterates over all numbers (NUM). The second block resets the match context and matches on all words (W), for every previously matched number.
ONLYFIRST
This additional block construct applies the contained statements/rules only until the first one was successfully applied. The following example provides an overview of the syntax:
ONLYFIRST Document{}{
  Document{CONTAINS(Keyword1) -> Doc1};
  Document{CONTAINS(Keyword2) -> Doc2};
  Document{CONTAINS(Keyword3) -> Doc3};
}
The block contains three rules each evaluating if the document contains a specific annotation of the type Keyword1/2/3. If the first rule is able to match, then the other two rules will not try to apply. Straightforwardly, if the first rule failed to match and the second rules is able to match, then the third rule will not try to be applied.
ONLYONCE
Rules within this block construct will stop after the first successful match. The following example provides an overview of the syntax:
ONLYONCE Document{}{
  CW{-> FirstCW};
  NUM+{-> FirstNumList};
}
The block contains two rules. The first rule will annotate the first capitalized word of the document with the type FirstCW. All further possible matches will be skipped. The second rule will annotate the first sequence of numbers with the type FirstNumList. The greedy behavior of the quantifiers is not changed by the ONLYONCE block.
Stringfunctions
In order to manipulate Strings in variables a bunch of Stringfunctions have been added. They will all be presented with a short example demonstrating their use.
firstCharToUpperCase(IStringExpression expr)
STRING s;
STRINGLIST sl;
SW{-> MATCHEDTEXT(s), ADD(sl, firstCharToUpperCase(s))};
CW{INLIST(sl) -> Test};
This example declares a STRING and a STRINGLIST. Afterwards for every small-written word, the according word with a capital first Character is added to the STRINGLIST. This might be helpful in German Named-Entity-Recognition where you will encounter "der blonde Junge…" and "der Blonde", both map to the same entity. Applied to the word "blonde" you can then also track the second appearance of that Person. In the last line a rule marks all words in the STRINGLIST as a Test Annotation.
replaceFirst(IStringExpression expr, IStringExpressionsearchTerm,IStringExpressionreplacement)
STRING s;
STRINGLIST sl;
CW{-> MATCHEDTEXT(s), ADD(sl, replaceFirst(s,"e","o"))};
CW{INLIST(sl) -> Test};
This example declares a STRING and a STRINGLIST. Next every capital Word CW is added to the STRINGLIST, however the first "e" is going to be replaced by "o". Afterwards all instances of the STRINGLIST are matched with all present CWs and annotated as a Test Annotation if a match occurs.
replaceAll(IStringExpression expr, IStringExpressionsearchTerm,IStringExpressionreplacement)
STRING s;
STRINGLIST sl;
CW{-> MATCHEDTEXT(s), ADD(sl, replaceAll(s,"e","o"))};
CW{INLIST(sl) -> Test};
This example declares a STRING and a STRINGLIST. Next every capital Word CW is added to the STRINGLIST, however similar to the above example at first there is going to be a replacement. This time all "e"`s are going to be replaced by "o"`s. Afterwards all instances of the STRINGLIST are matched with all present CWs and annotated as a Test Annotation if a match occurs.
substring(IStringExpression expr, INumberExpression from,INumberExpression to)
STRING s;
STRINGLIST sl;
CW{-> MATCHEDTEXT(s), ADD(sl, substring(s,0,9))};
SW{INLIST(sl) -> Test};
This example declares a STRING and a STRINGLIST. Imagine you found the word "Alexanderplatz" but you only want to continue with the word "Alexander". This snippet shows how this can be done by using the Stringfunctions in RUTA. If a word has less character than specified in the arguments, nothing will be executed.
toLowerCase(IStringExpression expr)
STRING s;
STRINGLIST sl;
CW{-> MATCHEDTEXT(s), ADD(sl, toLowerCase(s))};
SW{INLIST(sl) -> Test};
This example declares a STRING and a STRINGLIST. A problem you might encounter is that you want to know whether the first word of a sentence is really a noun.(Again more or less german related) By using this function you could add all words that start a sentence(which usually means a capitalized word) to a list as in this example. Then test if it also appears within the text but this time as lowercase. As a result you could change its POS-Tag.
toUpperCase(IStringExpression expr)
STRING s;
STRINGLIST sl;
CW{-> MATCHEDTEXT(s), ADD(sl, toUpperCase(s))};
SW{INLIST(sl) -> T1};
This example declares a STRING and a STRINGLIST. A typical scenario for its use might be Named-Entity-Recognition. This time you want to find all organizations given an input document. At first you might track-down all fully capitalized words. As a second step you can use this function and iterate over all CW insances and compare the found instance with all the uppercase organizations that were found before.
contains(IStringExpression expr,IStringExpression contains)
w:W{contains(w.ct, "er")-> Test};If you want to find all words that contain a given charactersequence. Assume again you are in a NER-Task you found the token "Alexanderplatz" using this function you can track down the names that are part of a given token. This example uses a BLOCK to iterate over each word and then assigns whether the text of that word contains the given char-sequence. If so it is annotated as a Test annotation.
endsWith(IStringExpression expr,IStringExpression expr)
w:W{endsWith(w.ct, "str")-> Test};Assume you found the suffix "str" as a strong indicator whether a given token represents location (a street) by using this function you can now easily identify all of those words, given a valid suffix.
startsWith(IStringExpression expr,IStringExpression expr)
w:W{startsWith(w.ct, "sprech")-> Test};Given a stem of a word you want to mark every instance that was possibly derived from that stem. If you decide to use that function you can detect all those words in 1 line and in a next step mark all of them as an Annotationtype of choice.
equals(IStringExpression expr,IStringExpression expr) and equalsIgnoreCase(expr,expr)
STRING s;
STRING s2 = "Kenny";
BOOLEAN a;
BLOCK(forEACH) W{}{
    W{->MATCHEDTEXT(s), ASSIGN(a,equals(s,s2))};
    W{->MATCHEDTEXT(s), ASSIGN(a,equalsIgnoreCase(s,s2))};
    W{a ->Test};
}
These functions check whether both arguments are equal in terms of the text of the token that they contain.
2.20.2. Adding new Language Elements
The extension of the UIMA Ruta language is illustrated using an example on how to add a new condition. Other language elements can be specified straightforwardly by using the corresponding interfaces and extensions.
Three classes need to be implemented for adding a new condition that also is resolved in the UIMA Ruta Workbench:
-
An implementation of the condition extending AbstractRutaCondition.
-
An implementation of IRutaConditionExtension, which provides the condition implementation to the engine.
-
An implementation of IIDEConditionExtension, which provides the condition for the UIMA Ruta Workench.
The exemplary project provides implementation of all possible language elements. This project contains the implementations for the analysis engine and also the implementation for the UIMA Ruta Workbench, and is therefore an Eclipse plugin (mind the pom file).
Concerning the ExampleCondition condition extension, there are four important spots/classes:
-
ExampleCondition.java provides the implementation of the new condition, which evaluates dates.
-
ExampleConditionExtension.java provides the extension for the analysis engine. It knows the name of the condition, its implementation, can create new instances of that condition, and is able to verbalize the condition for the explanation components.
-
ExampleConditionIDEExtension provides the syntax check for the editor and the keyword for syntax coloring.
-
The plugin.xml defines the extension for the Workbench:
<extension point="org.apache.uima.ruta.ide.conditionExtension">
  <condition
    class="org.apache.uima.ruta.example.extensions.
      ExampleConditionIDEExtension"
    engine="org.apache.uima.ruta.example.extensions.
      ExampleConditionExtension">
  </condition>
</extension>
If the UIMA Ruta Workbench is not used or the rules are only applied in UIMA pipelines, only the ExampleCondition and ExampleConditionExtension are needed, and org.apache.uima.ruta.example.extensions.ExampleConditionExtension needs to be added to the additionalExtensions parameter of your UIMA Ruta analysis engine (descriptor).
Adding new conditions using Java projects in the same workspace has not been tested yet, but at least the Workbench support will be missing due to the inclusion of extensions using the extension point mechanism of Eclipse.
2.21. Internal indexing and reindexing
UIMA Ruta, or to be more precise the main analysis engine RutaEngine, creates, stores and updates additional indexing information directly in the CAS. This indexing is not related to the annotation indexes of UIMA itself. The internal indexing provides additional information, which is only utilized by the Ruta rules. This section provides an overview on why and how it is integrated in UIMA Ruta, and how Ruta can be configured in order to optimize its performance.
2.21.1. Why additional indexing?
The internal indexing plays a an essential role in different parts of functionality within Ruta. The need for the indexing is motivated by two main and important features.
Ruta provides different language elements like conditions, which are fulfilled depending on some investigation of the CAS annotation indexes. There are several conditions like PARTOF, which require many index operations in the worst case. Here, potentially the complete index needs to be iterated in order to validate if a specific annotation is part of another annotation of a specific type. This check needs to be performed for each considered annotation, for each rule match and for each rule where a PARTOF condition is used. Without additional internal indexing, Ruta would be too slow to actually be useful. With this feature, the process is just a fast lookup. This situation applies also for many other language elements and conditions like STARTSWITH and ENDSWITH.
A second necessity is the coverage-based visibility concept of Ruta. Annotations and any text spans are invisible if their begin or end is covered by some invisible annotation, i.e., an annotation of a type that is configured to be invisible. This is a powerful feature that enables many different engineering approaches and makes the rules more maintainable as well. For a (reasonably fast) implementation of this feature, it is necessary to know for each position, if it is covered by annotations of specific types.
The internal indexing comes, however, at some costs. The indexing requires time and memory. The information needs to be collected and/or updated for every Ruta script (RutaEngine) in a pipeline. This may be expensive operation-wise, if the scripts consist of many annotations to be checked. Straightforward, the storage of this information at potentially all text positions requires a lot memory. Nevertheless, the advantages outweigh the disadvantages considerably.
2.21.2. How is it stored, created and updated?
The internal indexing refers to three types of information that is additionally stored:
-
All annotations of all relevant types that begin at a position.
-
All annotations of all relevant types that end at a position.
-
All types of annotations that cover a position.
The information is stored in additional annotations of the type RutaBasic, which provides by implementation, and not by features, additional fields for these three kinds of information. RutaBasic types provide a complete disjunct partitioning of the document. They begin and end at every position where an annotation starts and ends. This also includes, for examples, one RutaBasic for each SPACE annotation, registering which annotation start and end at these offsets. They are automatically created and also extended if new smaller annotations are added. Their initial creation is called “indexing” and their updating, if RutaBasics are available, while other Java analysis engines potentially added or removed annotations, is called “reindexing”.
There are several configuration parameters (see parameters with INDEX and REINDEX in their name) that can influence what types and annotations are indexed and reindexed. In the default configuration, all annotations are indexed, but only new annotations are reindexed (ReindexUpdateMode ADDITIVE). This means that if an analysis engine in between two RutaEngine removes some annotations, the second RutaEngine will not be up to date. A rule which relies on the internal indexing will match differently for these annotations, e.g., a PARTOF condition is still fulfilled although the annotation is not present in the UIMA indexes anymore. This problem can be avoided (if necessary) either by switching to a more costly ReindexUpdateMode COMPLETE, or by updating the internal indexing directly in the Java analysis engine by using the class RutaBasicUtils.
2.21.3. How to optimize the performance?
The are many different options and possibilities to optimize the runtime performance and memory footprint of a Ruta script, by configuring the RutaEngine. The most useful configuration, however, depends on the actual situation: How much information is available about the pipeline and the types of annotations and their update operations? In the following, a selection of optimizations are discussed.
If there is a RutaEngine in a pipeline, and either the previous analysis engine was also a RutaEngine or it is known that the analysis engines before (until the last RutaEngine) did not modify any (relevant) annotations, then the ReindexUpdateMode NONE can be applied, which simply skips the internal reindexing. This can improve the runtime performance.
The configuration parameters indexOnly can be restricted to relevant types. The parameter indexSkipTypes can be utilized to specify types of annotations that are not relevant. These types can include more technical annotations for metadata, logging or debug information. Thus, the set of types that need to be considered for internal indexing can be restricted, which makes the indexing faster and requires less memory.
An extension to this is the parameter indexOnlyMentionedTypes/reindexOnlyMentionedTypes. Here, the relevant types are collected using the actual script: the types that are actually used in the rules and thus their internal indexing needs to be up to date. This can increase the indexing speed. This feature is highlighted in the following example: Considering a larger pipeline with many annotations of different types, and also with many modifications since the last RutaEngine, a script with one rule does not require much reindexing, except the exclusive types used in this rule.
3. Apache UIMA Ruta Workbench
The Apache UIMA Ruta Workbench, which is made available as an Eclipse-plugin, offers a powerful environment for creating and working on UIMA Ruta projects. It provides two main perspectives and several views to develop, run, debug, test and evaluate UIMA Ruta rules in a comfortable way, supporting many of the known Eclipse features, e.g., auto-completion. Moreover, it makes the creation of dictionaries like tree word lists easy and supports machine learning methods, which can be used within a knowledge engineering process. The following chapter starts with the installation of the workbench, followed by a description of all its features.
3.1. Installation
Do the installation of the UIMA Ruta Workbench as follows:
-
Download, install and start Eclipse. The Eclipse version currently supported by UIMA Ruta is given on the webpage of the project. This is normally the latest version of Eclipse, which can be obtained from the eclipse.org download site.
-
Add the Apache UIMA update site ( http://www.apache.org/dist/uima/eclipse-update-site/ ) to the available software sites in your Eclipse installation. Click on “Help → Install New Software”. This opens the install wizard, which can be seen in [_figure.ugr.tools.ruta.workbench.install.update]
-
Select or enter the Apache UIMA update site (http://www.apache.org/dist/uima/eclipse-update-site/ )in field “Work with:” and press “Enter”.
-
Select “Apache UIMA Ruta” and (if not yet installed) “Apache UIMA Eclipse tooling and runtime support” by clicking into the related checkbox.
-
Also select “Contact all update sites during install to find required software `" and click on "`Next”.
-
On the next page, click “Next” again. Now, the license agreement site is displayed. To install UIMA Ruta read the license and choose “I accept the …” if you agree to it. Then, click on “Finish”
-
Eclipse update site image::images/tools/ruta/workbench/install/update.png[Eclipse update site.]
Now, UIMA Ruta is going to be installed. After the successful installation, switch to the UIMA Ruta perspective. To get an overview, see Section 3.2.
|
Note
|
It is sometimes necessary to increase to available PermGenSpace by adding |
Several times within this chapter we use a UIMA Ruta example project to illustrate the use of the UIMA Ruta Workbench. The “ExampleProject” project is part of the source release of UIMA Ruta (example-projects folder).
To import this project into the workbench do “File → Import… `" . Select "`Existing Projects into Workspace” under “General” . Select the “ExampleProject” directory in your file system as root directory and click on “Finish” . The example project is now available in your workspace.
3.2. UIMA Ruta Workbench Overview
The UIMA Ruta Workbench provides two main perspectives.
-
The “UIMA Ruta perspective”, which provides the main functionality for working on UIMA Ruta projects. See Section 3.4.
-
The “Explain perspective”, which provides functionality primarily used to explain how a set of rules are executed on input documents. See Section 3.5.
The following image shows the UIMA Ruta perspective.
-
The UIMA Ruta perspective. image::images/tools/ruta/workbench/overview/screenshot_ruta_perspective_.png[The UIMA Ruta perspective.]
As you can see, the UIMA Ruta perspective provides an editor for editing documents, e.g., UIMA Ruta scripts, and several views for different other tasks. The Script Explorer, for example, helps to manage your UIMA Ruta projects.
The following Table 6 lists all available UIMA Ruta views:
| View | Detailed description |
|---|---|
Annotation Test |
See Section 3.8.1 |
Applied Rules |
See Section 3.5.1 |
Check Annotations |
See Section 3.10 |
Covering Rules |
See Section 3.5.5 |
Created By |
See Section 3.5.7 |
Failed Rules |
See Section 3.5.2 |
False Negative |
See Section 3.8.1 |
False Positive |
See Section 3.8.1 |
Matched Rules |
See [_figure.ugr.tools.ruta.workbench.explain_perspective.matched_and_failed_rules] |
Rule Elements |
See Section 3.5.3 |
Rule List |
See Section 3.5.6 |
Statistics |
See Section 3.5.8 |
Ruta Query |
See Section 3.7 |
TextRuler |
See Section 3.9 |
TextRuler Results |
See Section 3.9 |
True Positive |
See Section 3.8.1 |
The following Table 7 lists all UIMA Ruta wizards:
| Wizard | Detailed description |
|---|---|
Create UIMA Ruta project |
See Section 3.3.1 |
3.3. UIMA Ruta Projects
UIMA Ruta projects used within the UIMA Ruta Workbench need to have a certain folder structure. The parts of this folder structure are explained in Table 8. To create a UIMA Ruta project it is recommended to use the provided wizard, explained in Section 3.3.1. If this wizard is used, the required folder structure is automatically created.
| Folder | Description |
|---|---|
|
Source folder for UIMA Ruta scripts and packages. |
|
Build folder for UIMA components. Analysis engines and type systems are created automatically from the related script files. |
|
Folder that contains the files that will be processed when launching a UIMA Ruta script. Such input files could be plain text, HTML or xmiCAS files. |
|
Folder that contains the resulting xmiCAS files. One xmiCAS file is generated for each associated document in the input folder. |
|
Default folder for word lists, dictionaries and tables. |
|
Folder for test-driven development. |
Figure 2 shows a project, newly created with the wizard.
3.3.1. UIMA Ruta create project wizard
To create a new UIMA Ruta project, switch to UIMA Ruta perspective and click “File → New → UIMA Ruta Project”. This opens the corresponding wizard.
Figure 3 shows the start page of the wizard.
To create a simple UIMA Ruta project, enter a project name for your project and click “Finish”. This will create everything you need to start.
Other possible settings on this page are the desired location of the project, the interpreter to use and the working set you wish to work on, all of them are self-explaining.
Figure 4 shows the second page of the wizard.
3.4. UIMA Ruta Perspective
The UIMA Ruta perspective is the main view to manage UIMA Ruta projects. There are several views associated with the UIMA Ruta perspective: Annotation Test, Annotation Browser, Selection, TextRuler and Ruta Query. Since Annotation Test, TextRuler and Ruta Query have a stand-alone functionality. They are explained in separate sections.
To make it possible to reproduce all of the examples used below, switch to the UIMA Ruta Explain perspective within your Eclipse workbench. Import the UIMA Ruta example project and open the main UIMA Ruta script file 'Main.ruta'. Now press the 'Run' button (green arrow) and wait for the end of execution. Open the resulting xmiCAS file 'Test1.txt.xmi', which you can find in the output folder.
3.4.1. Annotation Browser
The Annotation Browser can be used to view the annotations created by the execution of a UIMA Ruta project. If an xmiCAS file is opened and active in the editor, the related annotations are shown in this view.
The result of the execution of the UIMA Ruta example project is shown in Figure 5. You can see that there are 5 annotations of 5 different types in the document. Highlighting of certain types can be controlled by the checkboxes in the tree view. The names of the types are abbreviated by their package constituents. Full type names are provided by tooltips and can be copied into the clipboard by hitting 'ctrl + c'. This can be especially useful to paste a type name into the Query View.
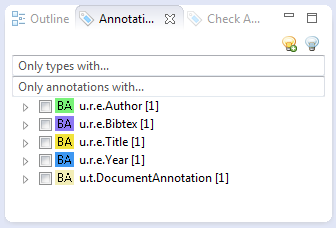
Moreover, this view has two possible filters. Using the “Only types with…”-filter leads to a list containing only those types that contain the entered text. The “Only annotations with…”-filter leads to an analogous list. Both list filters can be quickly activated by hitting the return key.
Type highlighting can be reset by the action represented by a switched-off light bulb at the top of the view. The light bulb that is turned on sets all types visible in the tree view of the page highlighted in the CAS editor.
The offsets of selected annotations can be modified with ctrl + u (reduce begin), ctrl + i (increase begin), ctrl + o (reduce end), and ctrl + p (increase end).
The user can choose whether parent types are displayed using the preference page “UIMA Cas Editor → Cas Editor Views”.
3.4.2. Selection
The Selection view is very similar to the Annotation Browser view, but only shows annotations that affect a specific text passage. To get such a list, click on any position in the opened xmiCAS document or select a certain text passage.
If you select the text passage 2008, the Selection view will be generated as shown in Figure 6.
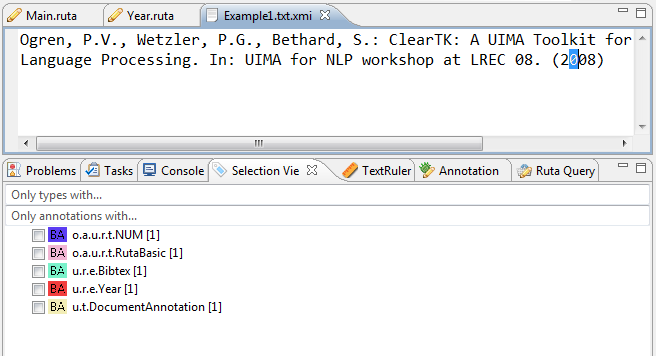
The Selection view has the same filtering and modification options as described in Annotation Browser view.
3.5. UIMA Ruta Explain Perspective
Writing new rules is laborious, especially if the newly written rules do not behave as expected. The UIMA Ruta system is able to record the application of each single rule and block in order to provide an explanation of the rule inference and a minimal debugging functionality. The information about the application of the rules itself is stored in the resulting xmiCAS output file, if the parameters of the executed engine are configured correctly. The simplest way to generate these explanation information is to click on the common 'Debug' button (looks like a green bug) while having the UIMA Ruta script file you want to debug active in your editor. The current UIMA Ruta file will then be executed on the text files in the input directory and xmiCAS are created in the output directory containing the additional UIMA feature structures describing the rule inference. To show the newly created execution information, you can either open the Explain perspective or open the necessary views separately and arrange them as you like. There are eight views that display information about the execution of the rules: Applied Rules, Covering Rules, Created By, Failed Rules, Matched Rules, Rule Elements, Rule List and Statistics. All of theses views are further explained in detail, using the UIMA Ruta example project for examples.
To make it possible to reproduce all of the examples used below, switch to the UIMA Ruta Explain perspective within your Eclipse workbench. Import the UIMA Ruta example project and open the main Ruta script file 'Main.ruta'. Now press the 'Debug' button and wait for the end of execution. Open the resulting xmiCAS file 'Test1.txt.xmi', which you can find in the output folder.
3.5.1. Applied Rules
The Applied Rules view displays structured information about all rules that tried to apply to the input documents.
The structure is as follows: if BLOCK constructs were used in the executed Ruta file, the rules contained in that block will be represented as child node in the tree of the view. Each Ruta file is a BLOCK construct itself and named after the file. The root node of the view is, therefore, always a BLOCK containing the rules of the executed UIMA Ruta script. Additionally, if a rule calls a different Ruta file, then the root block of that file is the child of the calling rule.
If you double-click on one of the rules, the related script file is opened within the editor and the rule itself is selected.
Section 3.5 shows the whole rule hierarchy resulting from the UIMA Ruta example project. The root of the whole hierarchy is the BLOCK associated to the 'Main.ruta' script. On the next level, the rules called by the 'Main.ruta' script are listed. Since there is a call to each of the script files 'Year.ruta', 'Author.ruta' and 'Title.ruta', these are included into the hierarchy, each forming their own block.
The following image shows the UIMA Ruta Applied Rules view.
-
Applied Rules view image::images/tools/ruta/workbench/explain/applied_rules_view.png[Applied Rules view.]
Besides the hierarchy, the view shows how often a rule tried to match in total and how often it succeeded.
This is shown in brackets at the beginning of each rule entry.
The Applied Rules view tells us that the rule NUM{REGEXP("19..|20..") → MARK(Year)}; within script 'Year.ruta' tried to match twice but only succeeded once.
After this information, the rule itself is given.
Notice that each rule is given with all the parameters it has been executed.
Have a look at rule entry `[1/1]Document{→MARKFAST(FirstName,FirstNameList,false,0,true)} ` within BLOCK Author.
The rule obviously has been executed with five parameters.
If you double-click on this rule, you will get to the rule in the script file 'Author.ruta'. It shows the rule as follows: Document{→ MARKFAST(FirstName, FirstNameList)};.
This means the last three parameters have been default values used to execute the rule.
Additionally, some profiling information, giving details about the absolute time and the percentage of total execution time the rule needed, is added at the end of each rule entry.
The selection (single-click) of a rule in this view will directly change the information visualized in the views Failed Rules and Matched Rules.
3.5.2. Matched Rules and Failed Rules
If a rule is selected (single-click) in the Applied Rules view, then the Matched Rules view displays all instances (text passages) on which the rule matched. On the contrary, the Failed Rules view shows the instances on which the rule tried but failed to match.
Select rule [2/3]Name{-PARTOF(NameListPart)} NameLinker[1,2]{→ MARK(NameListPart,1,2)}; within BLOCK Author. [_figure.ugr.tools.ruta.workbench.explain_perspective.matched_and_failed_rules] shows the text passages this rule tried to match on.
One did not succeed.
It is displayed within the Failed Rules view.
Two succeeded and are shown in the Matched Rules view.
The following image shows the UIMA Ruta Applied Rules view.
-
The views Matched Rules and Failed Rules image::images/tools/ruta/workbench/explain/matched_and_failed.png[The views Matched Rules and Failed Rules.]
The selection (single-click) of one of the text passages in either Matched Rules view or Failed Rules view will directly change the information visualized in the Rule Elements view.
3.5.3. Rule Elements
If you select one of the listed instances in the Matched or Failed Rules view, then the Rule Elements view contains a listing of the rule elements and their conditions belonging to the related rule used on the specific text passage. There is detailed information available on what text passage each rule element did or did not match and which condition did or did not evaluate true.
Within the Rule Elements view, each rule element generates its own explanation hierarchy. On the root level, the rule element itself is given. An apostrophe at the beginning of the rule element indicates that this rule was the anchor for the rule execution. On the next level, the text passage on which the rule element tried to match on is given. The last level explains, why the rule element did or did not match. The first entry on this level tells, if the text passage is of the requested annotation type. If it is, a green hook is shown in front of the requested type. Otherwise, a red cross is shown. In the following the rule conditions and their evaluation on the given text passage are shown.
In the previous example, select the listed instance Bethard, S..
The Rule Elements view shows the related explanation displayed in Figure 7.
The following image shows the UIMA Ruta Rule Elements view.
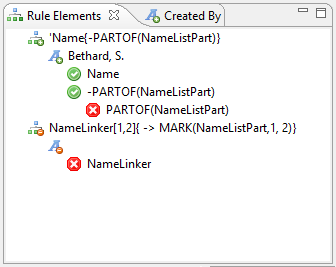
As you can see, the first rule element Name{-PARTOF(NameListPart)} matched on the text passage Bethard, S. since it is firstly annotated with a “Name” annotation and secondly it is not part of an annotation “NameListPart”.
However, as this first text passage is not followed by a “NameLinker” annotation the whole rule fails.
3.5.4. Inlined Rules
The Inlined Rules view provides additional information about the blocks of rules that are inlined as condition or as actions. The view is automatically updated if a element in a different view is selected, which contains inlined rules. This includes the Rule Elements view, the Matched View and the Failed View. If a rule apply in the Applied Rules View contains only a single rule match and this match, then the Inlined Rules View is also updated. If a rule apply in the Inlined Rules View is selected, then the Matched Rules View and the Failed Rules View is updated with the matched of this inlined rule.
This view is not by default included in the perspective, but needs to be added manually, e.g., by using the Quick Access near the perspectives.
3.5.5. Covering Rules
This views is very similar to the Applied Rules view, but displays only rules and blocks under a given selection. If the user clicks on any position in the xmiCAS document, a Covering Rules view is generated containing only rule elements that affect that position in the document. The Matched Rules, Failed Rules and Rule Elements views only contain match information of that position.
3.5.6. Rule List
This views is very similar to the Applied Rules view and the Covering Rules view, but displays only rules and NO blocks under a given selection. If the user clicks on any position in the xmiCAS document, a list of rules that matched or tried to match on that position in the document is generated within the Rule List view. The Matched Rules, Failed Rules and Rule Elements views only contain match information of that position. Additionally, this view provides a text field for filtering the rules. Only those rules remain that contain the entered text.
3.5.7. Created By
The Created By view tells you which rule created a specific annotation. To get this information, select an annotation in the Annotation Browser. After doing this, the Created By view shows the related information.
To see how this works, use the example project and go to the Annotation view. Select the “d.u.e.Year” annotation “(2008)”. The Created By view displays the information, shown in Figure 8. You can double-click on the shown rule to jump to the related document “Year.ruta”.
The following image shows the UIMA Ruta Created By view.
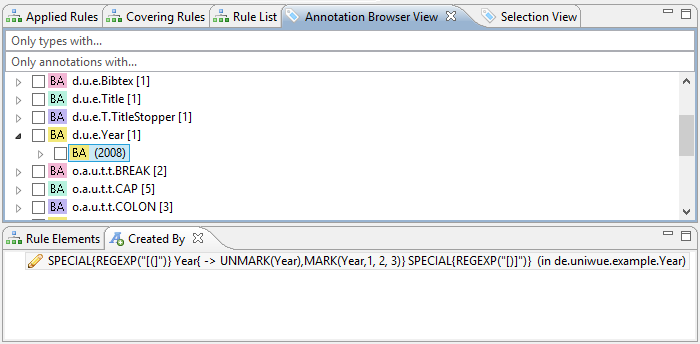
3.5.8. Statistics
The Statistics view displays profiling information for the used conditions and actions of the UIMA Ruta language. Three numbers are given for each element: The total time of execution, the amount of executions and the average time per execution.
The following image shows the UIMA Ruta Statistics view generated form the UIMA Ruta example project.
-
The Statistics view image::images/tools/ruta/workbench/explain/statistics.png[The Statistics view.]
3.6. UIMA Ruta CDE perspective
The UIMA Ruta CDE (Constraint-Driven Evaluation) provides some views and functionality to investigate and evaluate a set of annotated documents using domain and background knowledge formalized as constraints and UIMA Ruta rules. Figure 9 provides an overview of the perspective. Its views are described in the following.
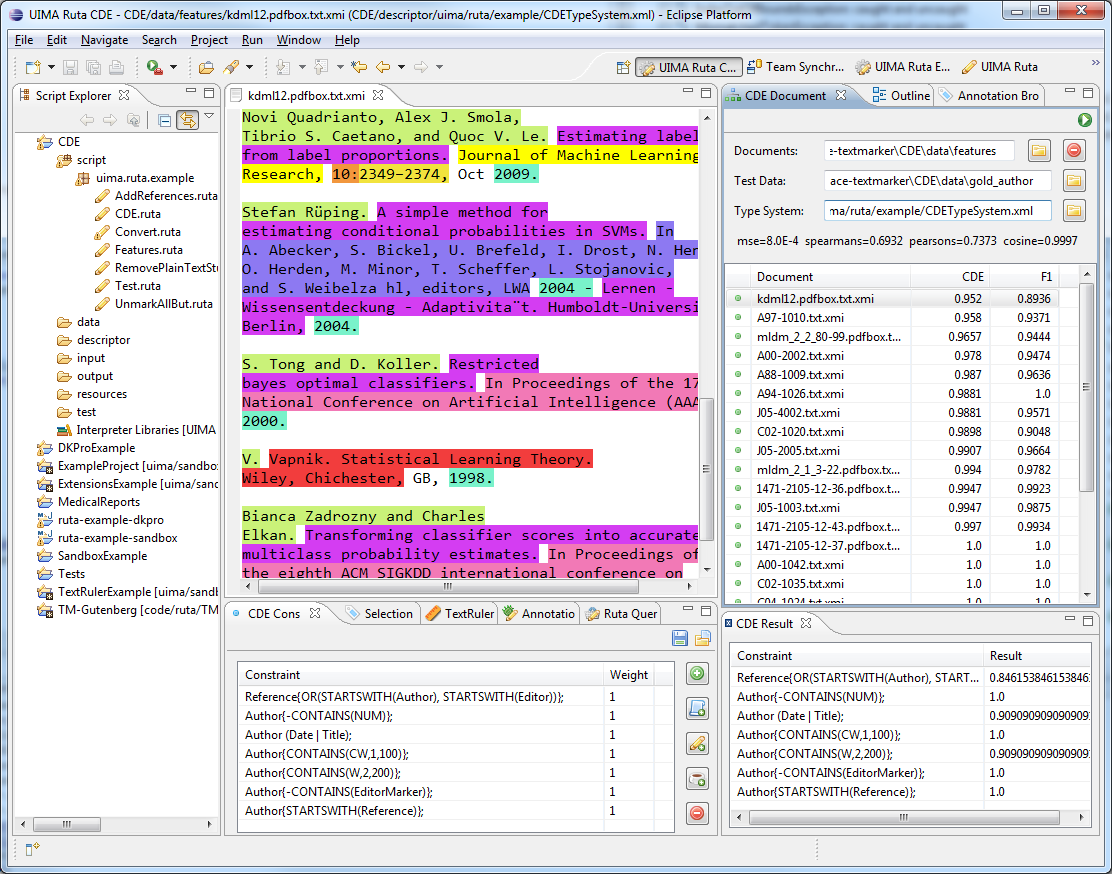
3.6.1. CDE Documents view
This view provides the general functionality to specify, which set of documents should be evaluated. The green start button in the toolbar starts the evaluation process with the given configuration specified in the different views. The text field “Documents” specifies the set of documents that have been annotated by an arbitrary model or set of rules. These xmiCAS documents can contain additional annotations, which are used by the simple rule-based constraints. The text field “Test Data” specifies an optional folder with gold standard documents. These documents can be applied for comparing the resulting CDE value to an F1 score. The text field “Type System” refers to a type system descriptor, which defines all types that are needed for the evaluation. Each text field is sensitive to drag and drop. The use can select a folder in the script explorer and drag and drop it on the text field. Directly below the text fields, the values of different evaluation measures are given comparing the resulting CDE value to the F1 score. These values are of course only available, if annotated gold standard data is specified in the text field “Test Data”.
The table at the bottom of the view contains all documents that are inspected. The intervals specifying the color of the icon of each documents dependent of the CDE result can be set in the preference page. If the evaluation has finished, then the CDE value is displayed and additionally the F1 score, if available. The table is sortable. A double-click on a documents opens it in the CAS Editor.
3.6.2. CDE Constraints view
This view specifies the currently applied constraints and their weights. This list is used to calculate the overall CDE value of one document: the average of the weighted sum. The buttons in the toolbar of the view export and import the constraint using a simple xml format. The buttons in the right part of the view can modify the list of the constraints. Currently, three types of constraints are supported: Simple UIMA Ruta rules, a list of simple UIMA Ruta rules and word distribution constraints. All constraints return a value between 0 and 1. The constraints based on UIMA Ruta rules return the ratio how often the rule was applied to how often the rules tried to apply. The rule “Author{STARTSWITH(Reference)};”, for example, returns 1, if all author annotations start with a reference annotation. The word distribution constraints refer to a txt file in which each line has the format “"Proceedings":Booktitle 0.95, Journal 0.05” specifying the distribution of the word proceedings concerning the interesting annotations. If no quotes are given for the first term, then the term is interpreted as an annotation type. The result value is currently calculated by using the cosine similarity of the expected and observed frequencies.
3.7. Ruta Query View
With the Query View, the UIMA Ruta language can be used to write queries on a set of documents. A query is simply a set of UIMA Ruta rules. Each query returns a list of all text passages the query applies to. For example, if you have a set of annotated documents containing a number of Author annotations, you could use the Query View to get a list of all the author names associated with these annotations. The set of relevant files can be restricted by a regular expression over the file names, e.g., "files_0[0-9]\\.xmi".
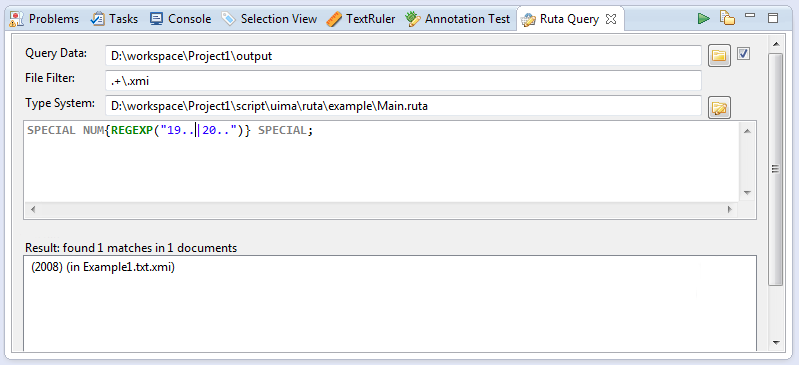
Use the Query view as follows:
-
The field “Query Data” specifies the folder containing the documents on which the query should be executed. You can either click on the button next to the field to specify the folder by browsing through the file system or you can drag and drop a folder directly into the field. If the checkbox is activated, all subfolders are included.
-
The field “Type System” has to contain a type system or a UIMA Ruta script that specifies all types that are used in the query. You can either click on the button next to the field to specify the type system by browsing through the file system or you can drag and drop a type system directly into the field.
-
The query in form of one or more UIMA Ruta rules is specified in the text field in the middle of the view.
-
After pressing the start button, the query is started. The results are subsequently displayed in the bottom text field.
The resulting list consists of all text passages the query applied to. Above the text field, information about the entire number of matches and the number of different documents the query applied to is given. Each item in the list shows both the matched text passage and in brackets the document related to the text passage. By double-clicking on one of the listed items, the related document is opened in the editor and the matched text passage is selected. If the related document is already open you can jump to another matched text passage within the the same document with one click on the listed item. Of course, this text passage is selected. By clicking on the export button, a list of all matched text passaged is showed in a separate window. For further usage, e.g. as a list of authors in another UIMA Ruta project, copy the content of this window to another text file.
The screenshot shows an example where a rule is used to find occurrences of years within brackets in the input file of the UIMA Ruta example. After pressing the run button the result list contains all occurrences. Recognize that the rule does not create any annotation. The list lists all rule matches, not the created annotations.
3.8. Testing
The UIMA Ruta Workbench comes bundled with its own testing environment that allows you to test and evaluate UIMA Ruta scripts. It provides full back-end testing capabilities and allows you to examine test results in detail.
To test the quality of a written UIMA Ruta script, the testing procedure compares a previously annotated gold standard file with the resulting xmiCAS file created by the selected UIMA Ruta script. As a product of the testing operation a new xmiCAS file will be created, containing detailed information about the test results. The evaluators compare the offsets of annotations and, depending on the selected evaluator, add true positive, false positive or false negative annotations for each tested annotation to the resulting xmiCAS file. Afterwards precision, recall and f1-score are calculated for each test file and each type in the test file. The f1-score is also calculated for the whole test set. The testing environment consists of four views: Annotation Test, True Positive, False Positive and False Negative. The Annotation Test view is by default associated with the UIMA Ruta perspective.
|
Note
|
There are two options for choosing the types that should be evaluated, which is specified by the preference “Use all types”. If this preference is activated (by default), then the user has to selected the types using the toolbar in the view. There are button for selecting the included and excluded types. If this preference is deactivated, then only the types present in the current test document are evaluated. This can result in missing false positive, if the an annotation of a specific type was created by the rules and no annotation of this type is present in the test document. |
Figure 11 shows the script explorer. Every UIMA Ruta project contains a folder called “test”. This folder is the default location for the test-files. In the folder each script file has its own subfolder with a relative path equal to the scripts package path in the “script” folder. This folder contains the test files. In every scripts test folder, you will also find a result folder where the results of the tests are saved. If you like to use test files from another location in the file system, the results will be saved in the “temp” subfolder of the project’s test folder. All files in the temp folder will be deleted once Eclipse is closed.
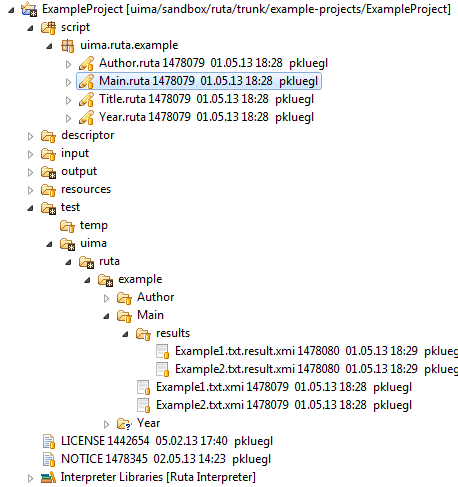
3.8.1. Usage
This section describes the general proceeding when using the testing environment.
Currently, the testing environment has no own perspective associated to it. It is recommended to start within the UIMA Ruta perspective. There, the Annotation Test view is open by default. The True Positive, False Positive and False Negative views have to be opened manually: "`Window → Show View → True Positive/False Positive/False Negative `".
To explain the usage of the UIMA Ruta testing environment, the UIMA Ruta example project is used again. Open this project. Firstly, one has to select a script for testing: UIMA Ruta will always test the script, that is currently open and active in the script editor. So, open the “Main.ruta” script file of the UIMA Ruta example project. The next figure. shows the Annotation Test view after doing this.
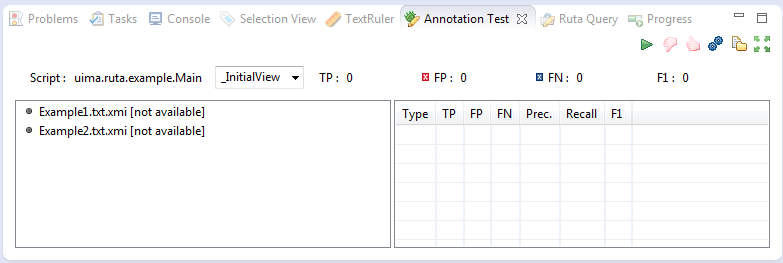
All control elements that are needed for the interaction with the testing environment are located here. At the top right, there is the buttons bar. At the top left of the view the name of the script that is going to be tested is shown. It is always equal to the script active in the editor. Below this, the test list is located. This list contains the different files for testing. Right next to the name of the script file you can select the desired view. Right to this you get statistics over all ran tests: the number of all true positives (TP), false positives (FP) and false negatives (FN). In the field below, you will find a table with statistic information for a single selected test file. To change this view, select a file in the test list field. The table shows a total TP, FP and FN information, as well as precision, recall and f1-score for every type as well as for the whole file.
There is also an experimental feature to extend the classpath during testing, which allows to evaluate scripts that call analysis engines in the same workspace. Therefore, you have to toggle the button in the toolbar of the view.
Next, you have to add test files to your project.
A test file is a previously annotated xmiCAS file that can be used as a golden standard for the test.
You can use any xmiCAS file.
The UIMA Ruta example project already contains such test files.
These files are listed in the Annotation Test view.
Try do delete these files by selecting them and clicking on Del.
Add these files again by simply dragging them from the Script Explorer into the test file list.
A different way to add test-files is to use the “Load all test files from selected folder” button (green plus). It can be used to add all xmiCAS files from a selected folder.
Sometimes it is necessary to create some annotations manually: To create annotations manually, use the “Cas Editor” perspective delivered with the UIMA workbench.
The testing environment supports different evaluators that allow a sophisticated analysis of the behavior of a UIMA Ruta script. The evaluator can be chosen in the testing environment’s preference page. The preference page can be opened either through the menu or by clicking on the “Select evaluator” button (blue gear wheels) in the testing view’s toolbar. Clicking the button will open a filtered version of the UIMA Ruta preference page. The default evaluator is the "Exact CAS Evaluator", which compares the offsets of the annotations between the test file and the file annotated by the tested script. To get an overview of all available evaluators, see Section 3.8.2
This preference page (see Figure 13) offers a few options that will modify the plug-ins general behavior. For example, the preloading of previously collected result data can be turned off. An important option in the preference page is the evaluator you can select. On default the "exact evaluator" is selected, which compares the offsets of the annotations, that are contained in the file produced by the selected script with the annotations in the test file. Other evaluators will compare annotations in a different way.
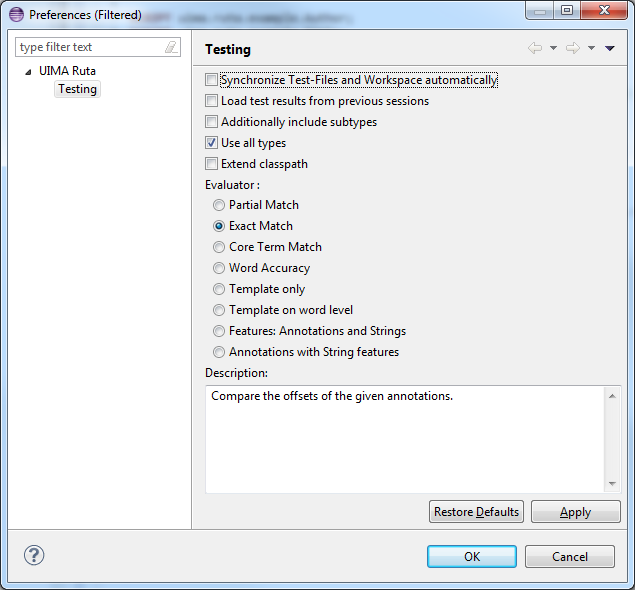
During a test-run it might be convenient to disable testing for specific types like punctuation or tags. The “Select excluded types” button (white exclamation in a red disk) will open a dialog (see Figure 14) where all types can be selected that should not be considered in the test.
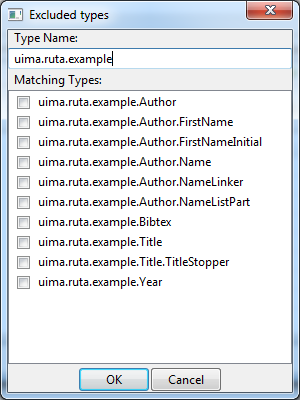
A test-run can be started by clicking on the start button. Do this for the UIMA Ruta example project. Figure 15 shows the results.

The testing main view displays some information on how well the script did after every test run. It will display an overall number of true positive, false positive and false negatives annotations of all result files as well as an overall f1-score. Furthermore, a table will be displayed that contains the overall statistics of the selected test file as well as statistics for every single type in the test file. The information displayed are true positives, false positives, false negatives, precision, recall and f1-measure.
The testing environment also supports the export of the overall data in form of a comma-separated table. Clicking the “export data” button will open a dialog window that contains this table. The text in this table can be copied and easily imported into other applications.
When running a test, the evaluator will create a new result xmiCAS file and will add new true positive, false positive and false negative annotations. By clicking on a file in the test-file list, you can open the corresponding result xmiCAS file in the CAS Editor. While displaying the result xmiCAS file in the CAS Editor, the True Positive, False Positive and False Negative views allow easy navigation through the new tp, fp and fn annotations. The corresponding annotations are displayed in a hierarchic tree structure. This allows an easy tracing of the results within the testing document. Clicking on one of the annotations in those views will highlight the annotation in the CAS Editor. Opening “test1.result.xmi” in the UIMA Ruta example project changes the True Positive view as shown in Figure 16. Notice that the type system, which will be used by the CAS Editor to open the evaluated file, can only be resolved for the tested script, if the test files are located in the associated folder structure that is the folder with the name of the script. If the files are located in the temp folder, for example by adding the files to the list of test cases by drag and drop, other strategies to find the correct type system will be applied. For UIMA Ruta projects, for example, this will be the type system of the last launched script in this project.
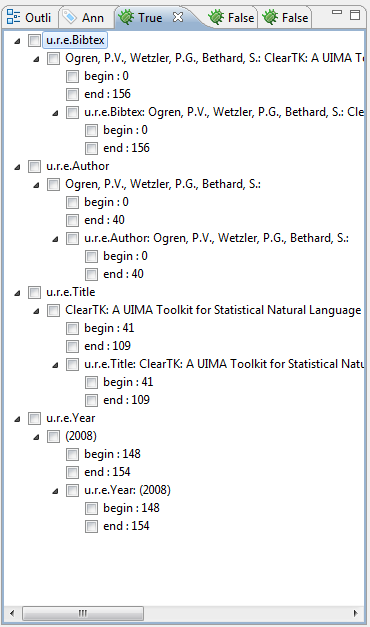
3.8.2. Evaluators
When testing a CAS file, the system compared the offsets of the annotations of a previously annotated gold standard file with the offsets of the annotations of the result file the script produced. Responsible for comparing annotations in the two CAS files are evaluators. These evaluators have different methods and strategies implemented for comparing the annotations. Also, an extension point is provided that allows easy implementation of new evaluators.
Exact Match Evaluator: The Exact Match Evaluator compares the offsets of the annotations in the result and the golden standard file. Any difference will be marked with either a false positive or false negative annotations.
Partial Match Evaluator: The Partial Match Evaluator compares the offsets of the annotations in the result and golden standard file. It will allow differences in the beginning or the end of an annotation. For example, "corresponding" and "corresponding " will not be annotated as an error.
Core Match Evaluator: The Core Match Evaluator accepts annotations that share a core expression. In this context, a core expression is at least four digits long and starts with a capitalized letter. For example, the two annotations "L404-123-421" and "L404-321-412" would be considered a true positive match, because "L404" is considered a core expression that is contained in both annotations.
Word Accuracy Evaluator: Compares the labels of all words/numbers in an annotation, whereas the label equals the type of the annotation. This has the consequence, for example, that each word or number that is not part of the annotation is counted as a single false negative. For example in the sentence: "Christmas is on the 24.12 every year." The script labels "Christmas is on the 12" as a single sentence, while the test file labels the sentence correctly with a single sentence annotation. While, for example, the Exact CAS Evaluator is only assigning a single False Negative annotation, Word Accuracy Evaluator will mark every word or number as a single false negative.
Template Only Evaluator: This Evaluator compares the offsets of the annotations and the features, that have been created by the script. For example, the text "Alan Mathison Turing" is marked with the author annotation and "author" contains 2 features: "FirstName" and "LastName". If the script now creates an author annotation with only one feature, the annotation will be marked as a false positive.
Template on Word Level Evaluator: The Template On Word Evaluator compares the offsets of the annotations. In addition, it also compares the features and feature structures and the values stored in the features. For example, the annotation "author" might have features like "FirstName" and "LastName". The authors name is "Alan Mathison Turing" and the script correctly assigns the author annotation. The feature assigned by the script are "Firstname : Alan", "LastName : Mathison", while the correct feature values are "FirstName Alan" and "LastName Turing". In this case, the Template Only Evaluator will mark an annotation as a false positive, since the feature values differ.
3.9. TextRuler
Apache UIMA Ruta TextRuler is a framework for supervised rule induction included in the UIMA Ruta Workbench. It provides several configurable algorithms, which are able to learn new rules based on given labeled data. The framework was created in order to support the user by suggesting new rules for the given task. The user selects a suitable learning algorithm and adapts its configuration parameters. Furthermore, the user engineers a set of annotation-based features, which enable the algorithms to form efficient, effective and comprehensive rules. The rule learning algorithms present their suggested rules in a new view, in which the user can either copy the complete script or single rules to a new script file, where the rules can be further refined.
This section gives a short introduction about the included features and learners, and how to use the framework to learn UIMA Ruta rules. First, the available rule learning algorithms are introduced in Section 3.9.1. Then, the user interface and the usage is explained in Section 3.9.2 and Section 4.5 illustrates the usage with an exemplary UIMA Ruta project.
3.9.1. Included rule learning algorithms
This section gives a short description of the rule learning algorithms, which are provided in the UIMA Ruta TextRuler framework.
LP2
|
Note
|
This rule learner is an experimental implementation of the ideas and algorithms published in: F. Ciravegna. (LP)2, Rule Induction for Information Extraction Using Linguistic Constraints. Technical Report CS-03-07, Department of Computer Science, University of Sheffield, Sheffield, 2003. |
This algorithms learns separate rules for the beginning and the end of a single slot, which are later combined in order to identify the targeted annotation. The learning strategy is a bottom-up covering algorithm. It starts by creating a specific seed instance with a window of w tokens to the left and right of the target boundary and searches for the best generalization. Additional context rules are induced in order to identify missing boundaries. The current implementation does not support correction rules. The TextRuler framework provides two versions of this algorithm: LP2 (naive) is a straightforward implementation with limited expressiveness concerning the resulting Ruta rules. LP2 (optimized) is an improved version with a dynamic programming approach and is providing better results in general. The following parameters are available. For a more detailed description of the parameters, please refer to the implementation and the publication.
-
Context Window Size (to the left and right)
-
Best Rules List Size
-
Minimum Covered Positives per Rule
-
Maximum Error Threshold
-
Contextual Rules List Size
WHISK
|
Note
|
This rule learner is an experimental implementation of the ideas and algorithms published in: Stephen Soderland, Claire Cardie, and Raymond Mooney. Learning Information Extraction Rules for Semi-Structured and Free Text. In Machine Learning, volume 34, pages 233-272, 1999. |
WHISK is a multi-slot method that operates on all three kinds of documents and learns single- or multi-slot rules looking similar to regular expressions. However, the current implementation only support single slot rules. The top-down covering algorithm begins with the most general rule and specializes it by adding single rule terms until the rule does not make errors anymore on the training set. The TextRuler framework provides two versions of this algorithm: WHISK (token) is a naive token-based implementation. WHISK (generic) is an optimized and improved implementation, which is able to refer to arbitrary annotations and also supports primitive features. The following parameters are available. For a more detailed description of the parameters, please refer to the implementation and the publication.
-
Parameters Window Size
-
Maximum Error Threshold
-
PosTag Root Type
-
Considered Features (comma-separated) - only WHISK (generic)
TraBaL
|
Note
|
This rule learner is an implementation of the ideas and algorithms published in: Benjamin Eckstein, Peter Kluegl, and Frank Puppe. Towards Learning Error-Driven Transformations for Information Extraction. Workshop Notes of the LWA 2011 - Learning, Knowledge, Adaptation, 2011. |
The TraBal rule learner induces rules that try to correct annotations error and relies on two set of documents. A set of documents with gold standard annotation and an additional set of annotated documents with the same text that possibly contain erroneous annotations, for which correction rules should be learnt. First, the algorithm compares the two sets of documents and identifies the present errors. Then, rules for each error are induced and extended. This process can be iterated in order to incrementally remove all errors. The following parameters are available. For a more detailed description of the parameters, please refer to the implementation and the publication.
-
Number of times, the algorithm iterates.
-
Number of basic rules to be created for one example.
-
Number of optimized rules to be created for one example.
-
Maximum number of iterations, when optimizing rules.
-
Maximum allowed error rate.
-
Correct features in rules and conditions. (not yet available)
KEP
The name of the rule learner KEP (knowledge engineering patterns) is derived from the idea that humans use different engineering patterns to write annotation rules. This algorithms implements simple rule induction methods for some patterns, such as boundary detection or annotation-based restriction of the window. The results are then combined in order to take advantage of the combination of the different kinds of induced rules. Since the single rules are constructed according to how humans engineer the annotations rules, the resulting rule set should resemble more a handcrafted rule set. Furthermore, by exploiting the synergy of the patterns, solutions for some annotation are much simpler. The following parameters are available. For a more detailed description of the parameters, please refer to the implementation.
-
Maximum number of “Expand Rules”
-
Maximum number of “Infiller Rules”
3.9.2. The TextRuler view
The TextRuler view is normally located in the lower center of the UIMA Ruta perspective and is the main user interface to configure and start the rule learning algorithms. The view consists of four parts (cf. Figure 17): The toolbar contains buttons for starting (green button) and stopping (red button) the learning process, and one button that opening the preference page (blue gears) for configuring the rule induction algorithms cf. Figure 18. The upper part of the view contains text fields for defining the set of utilized documents. “Training Data” points to the absolute location of the folder containing the gold standard documents. “Additional Data” points to the absolute location of documents that can be additionally used by the algorithms. These documents are currently only needed by the TraBal algorithm, which tries to learn correction rules for the error in those documents. “Test Data” is not yet available. Finally, “Preprocess Script” points to the absolute location of a UIMA Ruta script, which contains all necessary types and can be applied on the documents before the algorithms start in order to add additional annotations as learning features. The preprocessing can be skipped. All text fields support drag and drop: the user can drag a file in the script explorer and drop it in the respective text field. In the center of the view, the target types, for which rule should be induced, can be specified in the “Information Types” list. The list “Featured Feature Types” specify the filtering settings, but it is discourage to change these settings. The user is able to drop a simple text file, which contains a type with complete namespace in each line, to the “Information Types” list in order to add all those types. The lower part of the view contains the list of available algorithms. All checked algorithms will be started, if the start button in the toolbar of the view is pressed. When the algorithms are started, they display their current action after their name, and a result view with the currently induced rules is displayed in the right part of the perspective.
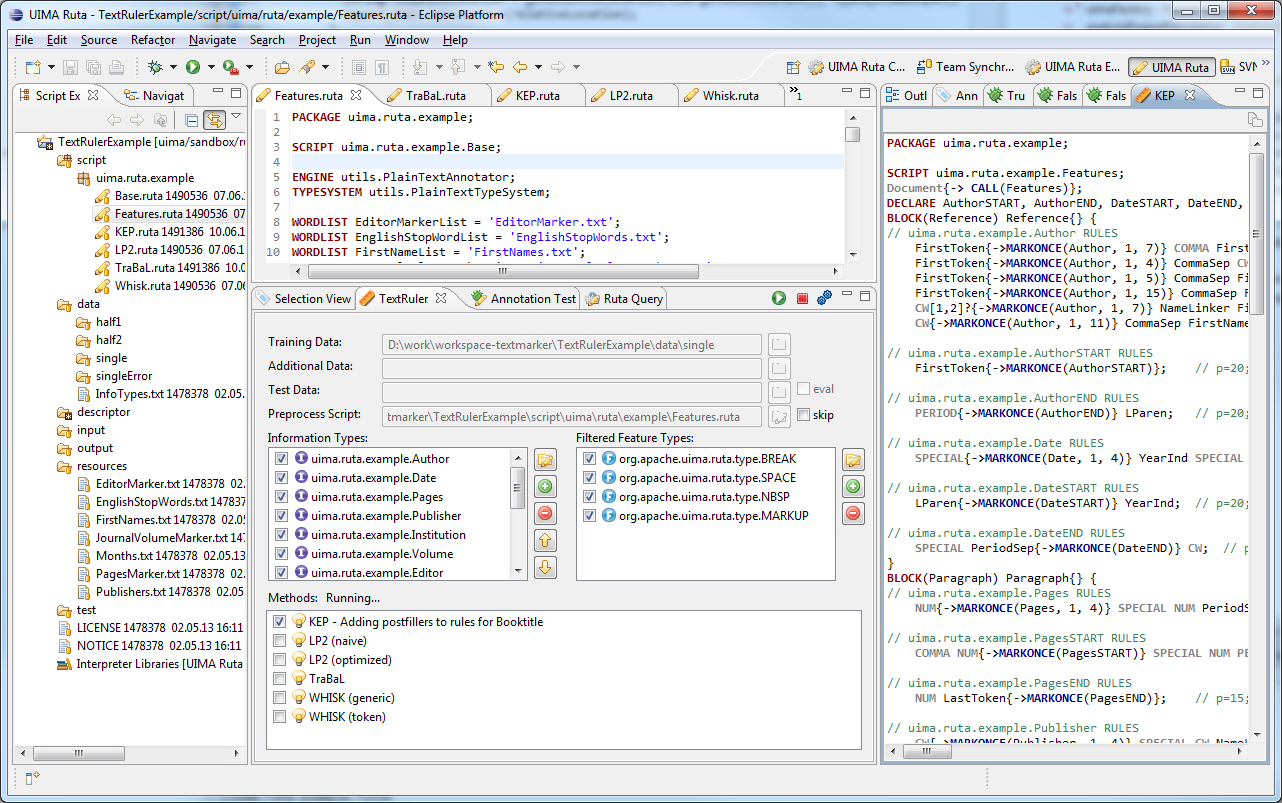
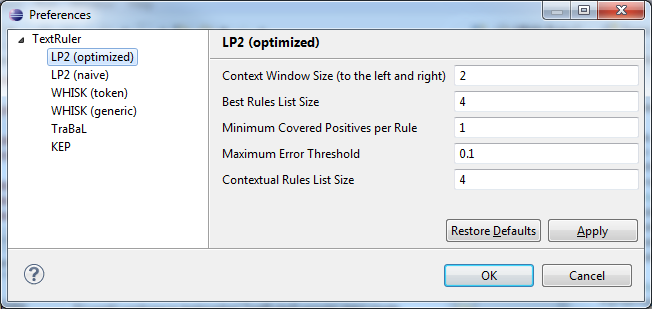
3.10. Check Annotations view
The Check Annotations view provides functionality to quickly validate a set of annotations in different documents. The user can specify two folders with xmiCAS files: One folder contains the documents with annotations that should be validated. The other folder is used to store the validated annotations. The view enables a rapid navigation between the documents and their annotations of the selected types can easily be accepted or rejected. Figure 19 provides an screenshot of the view. Its parts are described in the following.
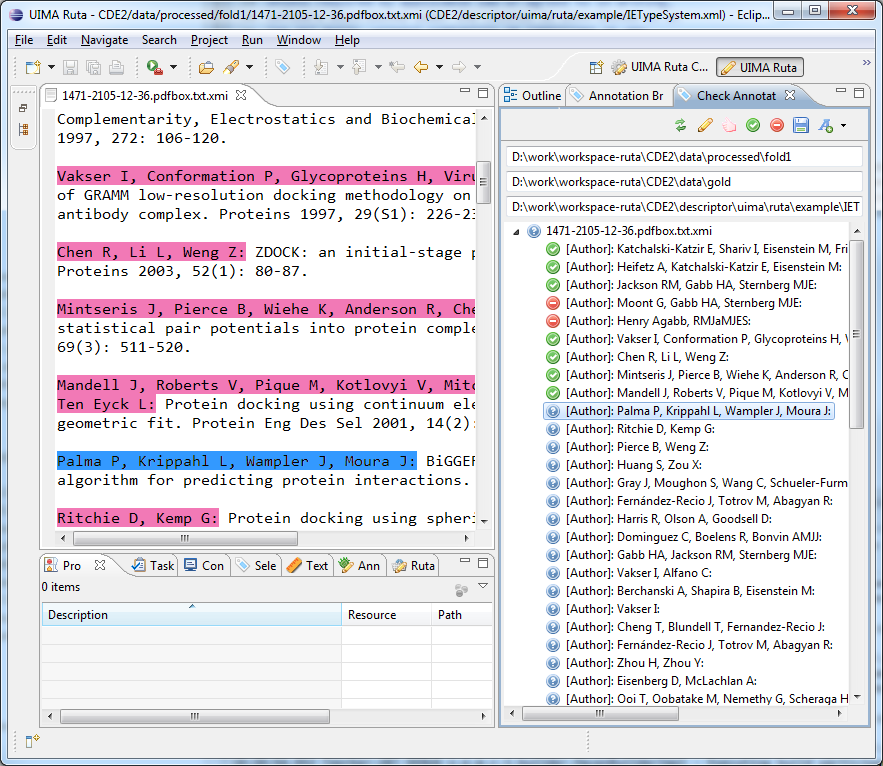
The view provides three text fields: the absolute location of the folder with the source documents, which contain the annotations to be validated, the absolute location of the gold folder, where the accepted annotations will be stored, and the absolute location of the type system that contains all necessary types. The toolbar of the view provides seven buttons: the first one updates the set of documents and their annotations in the main part of the view. This is necessary, e.g., if the selected types change or if the annotations in the documents change. The second button opens a dialog for choosing the types that need to be checked. Only annotations of those types will be displayed and can be accepted or rejected. If features need to be checked together with the annotations of a type, these features have to be selected in this dialog too. Features are shown as sub-nodes of the annotation nodes. By default, only annotations that have been checked are transferred from the original document to the according gold document. To also transfer annotations of some type unchecked, these types have to be chosen in another dialog, which is opened with the third button. The fourth and fifth button accept/reject the currently selected annotation. Only accepted annotations will be stored in the gold folder. An annotation can also be accepted with the key binding “ctrl+4” and rejected with the key binding “ctrl+5”. If an annotation is processed, then the next annotation is automatically selected and a new CAS Editor is opened if necessary. The sixth button adds the currently accepted annotations, as well as the annotations of a type selected in the unchecked dialog, to the corresponding file in the gold folder and additionally extends an file “data.xml”, which remembers what types have already been checked in each documents. Annotations of these types will not show up again in the main part of the view. With the last button, the user can select the annotation mode of the CAS editor. The choice is restricted to the currently selected types. If an annotation is missing in the source documents, then the user can manually add this annotation in the CAS Editor. The new annotation will be added as accepted to the list of annotations in the main part of the view. By right-clicking on an annotation node in the view’s tree viewer, a dialog opens to change the type of an annotation. Right-clicking on a feature node opens another dialog to change the feature’s value.
3.11. Creation of Tree Word Lists
Tree word lists are external resources, which can be used to annotate all occurrences of list items in a document with a given annotation type, very fast. For more details on their use, see Section 2.18. Since simple tree and multi tree word lists have to be compiled the UIMA Ruta Workbench provides an easy way to compile them from ordinary text files. These text files have to containing one item per line, for example, like in the following list of first names:
Frank
Peter
Jochen
Martin
To compile a simple tree word list from a text file, right-click on the text file in UIMA Ruta script explorer. The resulting menu is shown in Figure 20.
When hovering over UIMA Ruta item you can choose “Convert to TWL”. Click on it and a tree word list with the same name as the original file is generated in the same folder.
You can also generate several tree word lists at once. To do so, just select multiple files and then right-click and do the same like for a single list. You will get one tree word list for every selected file.
To generate a multi tree work list, select all files, which should be generated into the multi tree word list. Again right-click and select “Convert to Multi TWL” under item UIMA Ruta. A multi tree word list named “generated.mtwl” will be created.
The preferences page provides the option to remove white spaces when generating the word lists.
3.12. Apply a UIMA Ruta script to a folder
The UIMA Ruta Workbench makes it possible to apply a UIMA Ruta script to any folder of the workspace. Select a folder in the script explorer, right-click to open the context menu and select the menu entry UIMA Ruta. There are three options to apply a UIMA Ruta script to the files of the selected folder, cf. Figure 21.
-
Quick Ruta applies the UIMA Ruta script that is currently opened and focused in the UIMA Ruta editor to all suitable files in the selected folder. Files of the type “xmi” will be adapted and a new xmi-file will be created for other files like txt-files.
-
Quick Ruta (remove basics) is very similar to the previous menu entry, but removes the annotations of the type “RutaBasic” after processing a CAS.
-
Quick Ruta (no xmi) applies the UIMA Ruta script, but does not change nor create an xmi-file. This menu entry can, for example, be used in combination with an imported XMIWriter Analysis Engine, which stores the result of the script in a different folder depending on the execution of the rules.
4. Apache UIMA Ruta HowTos
This chapter contains a selection of some use cases and HowTos for UIMA Ruta.
4.1. Apply UIMA Ruta Analysis Engine in plain Java
Let us assume that the reader wrote the UIMA Ruta rules using the UIMA Ruta Workbench, which already creates correctly configured descriptors. In this case, the following java code can be used to apply the UIMA Ruta script.
File specFile = new File("pathToMyWorkspace/MyProject/descriptor/"+
    "my/package/MyScriptEngine.xml");
XMLInputSource in = new XMLInputSource(specFile);
ResourceSpecifier specifier = UIMAFramework.getXMLParser().
    parseResourceSpecifier(in);
// for import by name... set the datapath in the ResourceManager
AnalysisEngine ae = UIMAFramework.produceAnalysisEngine(specifier);
CAS cas = ae.newCAS();
cas.setDocumentText("This is my document.");
ae.process(cas);|
Note
|
The UIMA Ruta Analysis Engine utilizes type priorities. If the CAS object is not created using the UIMA Ruta Analysis Engine descriptor by other means, then please provide the necessary type priorities for a valid execution of the UIMA Ruta rules. |
If the UIMA Ruta script was written, for example, with a common text editor and no configured descriptors are yet available, then the following java code can be used, which, however, is only applicable for executing single script files that do not import additional components or scripts. In this case the other parameters, e.g., “additionalScripts”, need to be configured correctly.
URL aedesc = RutaEngine.class.getResource("BasicEngine.xml");
XMLInputSource inae = new XMLInputSource(aedesc);
ResourceSpecifier specifier = UIMAFramework.getXMLParser().
    parseResourceSpecifier(inae);
ResourceManager resMgr = UIMAFramework.newDefaultResourceManager();
AnalysisEngineDescription aed = (AnalysisEngineDescription) specifier;
TypeSystemDescription basicTypeSystem = aed.getAnalysisEngineMetaData().
    getTypeSystem();

Collection<TypeSystemDescription> tsds =
    new ArrayList<TypeSystemDescription>();
tsds.add(basicTypeSystem);
// add some other type system descriptors
// that are needed by your script file
TypeSystemDescription mergeTypeSystems = CasCreationUtils.
    mergeTypeSystems(tsds);
aed.getAnalysisEngineMetaData().setTypeSystem(mergeTypeSystems);
aed.resolveImports(resMgr);

AnalysisEngine ae = UIMAFramework.produceAnalysisEngine(aed,
    resMgr, null);
File scriptFile = new File("path/to/file/MyScript.ruta");
ae.setConfigParameterValue(RutaEngine.PARAM_SCRIPT_PATHS,
    new String[] { scriptFile.getParentFile().getAbsolutePath() });
String name = scriptFile.getName().substring(0,
    scriptFile.getName().length() - 5);
ae.setConfigParameterValue(RutaEngine.PARAM_MAIN_SCRIPT, name);
ae.reconfigure();
CAS cas = ae.newCAS();
cas.setDocumentText("This is my document.");
ae.process(cas);
There is also a convenience implementation for applying simple scripts, which do not introduce new types. The following java code applies a simple rule “T1 SW{→ MARK(T2)};” on the given CAS. Note that the types need to be already defined in the type system of the CAS.
Ruta.apply(cas, "T1 SW{-> MARK(T2)};");4.2. Integrating UIMA Ruta in an existing UIMA Annotator
This section provides a walk-through tutorial on integrating Ruta in an existing UIMA annotator. In our artificial example we will use Ruta rules to post-process the output of a Part-of-Speech tagger. The POS tagger is a UIMA annotator that iterates over sentences and tokens and updates the posTag field of each Token with a part of speech. For example, given this text …
The quick brown fox receives many bets.
The fox places many bets.
The fox gets up early.
The rabbit made up this story.
... it assigns the posTag JJ (adjective) to the token "brown" , the posTag NN (common noun) to the token "fox" and the tag VBZ (verb, 3rd person singular present) to the token "receives" in the first sentence.
We have noticed that the tagger sometimens fails to disambiguate NNS (common noun plural) and VBZ tags, as in the second sentence. The word "up" also seems to confuse the tagger, which always assigns it an RB (adverb) tag, even when it is a particle (RP) following a verb, as in the third and fourth sentences:
The|DT quick|JJ brown|JJ fox|NN receives|VBZ many|JJ bets|NNS .|.
The|DT fox|NN places|NNS many|JJ bets|NNS .|.
The|DT fox|NN gets|VBZ up|RB early|RB .|.
The|DT rabbit|NN made|VBD up|RB this|DT story|NN .|.
Let’s imagine that after applying every possible approach available in the POS tagging literature, our tagger still generates these and some other errors. We decide to write a few Ruta rules to post-process the output of the tagger.
4.2.1. Adding Ruta to our Annotator
The POS tagger is being developed as a Maven-based project. Since Ruta maven artifacts are available on Maven Central, we add the following dependency to the project’s pom.xml. The functionalities described in this section require a version of Ruta equal to or greater than 2.1.0.
<dependency>
  <groupId>org.apache.uima</groupId>
  <artifactId>ruta-core</artifactId>
  <version>[2.0.2,)</version>
</dependency>
We also take care that the Ruta basic typesystem is loaded when our annotator is initialized. The Ruta typesystem descriptors are available from ruta-core/src/main/resources/org/apache/uima/ruta/engine/
4.2.2. Developing Ruta rules and applying them from inside Java code
We are now ready to write some rules. The ones we develop for fixing the two errors look like this:
Token.posTag =="NN" Token.posTag=="NNS"{-> Token.posTag="VBZ"}
    Token.posTag=="JJ";
Token{REGEXP(Token.posTag, "VB(.?)")}
    Token.posTag=="RB"{REGEXP("up")-> Token.posTag="RP"};
That is, we change a Token’s NNS tag to VBZ, if it is surrounded by a Token tagged as NN and a Token tagged as JJ. We also change an RB tag for an "up" token to RP, if "up" is preceded by any verbal tag (VB, VBZ, etc.) matched with the help of the REGEXP condition.
We test our rules in the Ruta Workbench and see that they indeed fix most of our problems. We save those and some more rules in a text file src/main/resources/ruta.txt.
We declare the file with our rules as an external resource and we load it during initialization. Here’s a way to do it using uimaFIT:
/**
 * Ruta rules for post-processing the tagger's output
 */
public static final String RUTA_RULES_PARA = "RutaRules";
ExternalResource(key = RUTA_RULES_PARA, mandatory=false)
...
File rutaRulesF = new File((String)
    aContext.getConfigParameterValue(RUTA_RULES_PARA));
After our CAS has been populated with posTag annotations from the main algorithm, we post-process the CAS using Ruta.apply():
String rutaRules = org.apache.commons.io.FileUtils.readFileToString(
    rutaRulesF, "UTF-8");
Ruta.apply(cas,  rutaRules);
We are now happy to see that the final output of our annotator now looks much better:
The|DT quick|JJ brown|JJ fox|NN receives|VBZ many|JJ bets|NNS .|.
The|DT fox|NN places|VBZ many|JJ bets|NNS .|.
The|DT fox|NN gets|VBZ up|RP early|RB .|.
The|DT rabbit|NN made|VBD up|RP this|DT story|NN .|.
4.3. UIMA Ruta Maven Plugin
UIMA Ruta provides a maven plugin for building analysis engine and type system descriptors for rule scripts.
Additionally, this maven plugin is able able to compile word list (gazetteers) to the more efficient structures, tree word list and multi tree word list.
The usage and configuration is shortly summarized in the following.
An exemplary maven project for UIMA Ruta is given here: https://github.com/apache/uima-ruta/tree/master/example-projects/ruta-maven-example
4.3.1. generate goal
The generate goal can be utilized to create xml descriptors for the UIMA Ruta script files. Its usage and configuration is summarized in the following example:
<plugin>
<groupId>org.apache.uima</groupId>
<artifactId>ruta-maven-plugin</artifactId>
<version>3.0.1</version>
<configuration>

 <!-- This is a exemplary configuration, which explicitly specifies the
  default configuration values if not mentioned otherwise. -->

 <!--
 The following parameter is optional and should only be specified
 if the structure (e.g., classpath/resources) of the project requires it.

 A FileSet specifying the UIMA Ruta script files that should be built.

 If this parameter is not specified, then all UIMA Ruta script files
 in the output directory (e.g., target/classes) of the project will
 be built.

 default value: none
 <scriptFiles>
   <directory>${basedir}/some/folder</directory>
   <includes>
     <include>*.ruta</include>
   </includes>
 </scriptFiles>
 -->

 <!-- The directory where the generated type system descriptors will
  be written stored. -->
 <!-- default value: ${project.build.directory}/generated-sources/
   ruta/descriptor -->
 <typeSystemOutputDirectory>${project.build.directory}/generated-sources/
   ruta/descriptor</typeSystemOutputDirectory>

 <!-- The directory where the generated analysis engine descriptors will
  be stored. -->
 <!-- default value: ${project.build.directory}/generated-sources/ruta/
   descriptor -->
 <analysisEngineOutputDirectory>${project.build.directory}/
  generated-sources/ruta/descriptor</analysisEngineOutputDirectory>

 <!-- The template descriptor for the generated type system.
  By default the descriptor of the maven dependency is loaded. -->
 <!-- default value: none -->
 <!-- not used in this example <typeSystemTemplate>...
   </typeSystemTemplate> -->

 <!-- The template descriptor for the generated analysis engine.
   By default the descriptor of the maven dependency is loaded. -->
 <!-- default value: none -->
 <!-- not used in this example <analysisEngineTemplate>...
   </analysisEngineTemplate> -->

 <!-- Script paths of the generated analysis engine descriptor. -->
 <!-- default value: none -->
 <scriptPaths>
  <scriptPath>${basedir}/src/main/ruta/</scriptPath>
 </scriptPaths>

 <!-- Descriptor paths of the generated analysis engine descriptor. -->
 <!-- default value: none -->
 <descriptorPaths>
  <descriptorPath>${project.build.directory}/generated-sources/ruta/
   descriptor</descriptorPath>
 </descriptorPaths>

 <!-- Resource paths of the generated analysis engine descriptor. -->
 <!-- default value: none -->
 <resourcePaths>
  <resourcePath>${basedir}/src/main/resources/</resourcePath>
  <resourcePath>${project.build.directory}/generated-sources/ruta/
   resources/</resourcePath>
 </resourcePaths>

 <!-- Suffix used for the generated type system descriptors. -->
 <!-- default value: Engine -->
 <analysisEngineSuffix>Engine</analysisEngineSuffix>

 <!-- Suffix used for the generated analysis engine descriptors. -->
 <!-- default value: TypeSystem -->
 <typeSystemSuffix>TypeSystem</typeSystemSuffix>

 <!-- Source file encoding. -->
 <!-- default value: ${project.build.sourceEncoding} -->
 <encoding>UTF-8</encoding>

 <!-- Type of type system imports. false = import by location. -->
 <!-- default value: false -->
 <importByName>false</importByName>

 <!-- Option to resolve imports while building. -->
 <!-- default value: false -->
 <resolveImports>false</resolveImports>

 <!-- Amount of retries for building dependent descriptors. Default value
  -1 leads to three retires for each script. -->
  <!-- default value: -1 -->
 <maxBuildRetries>-1</maxBuildRetries>

 <!-- List of packages with language extensions -->
 <!-- default value: none -->
 <extensionPackages>
  <extensionPackage>org.apache.uima.ruta</extensionPackage>
 </extensionPackages>

 <!-- Add UIMA Ruta nature to .project -->
 <!-- default value: false -->
 <addRutaNature>true</addRutaNature>


 <!-- Buildpath of the UIMA Ruta Workbench (IDE) for this project -->
 <!-- default value: none -->
 <buildPaths>
  <buildPath>script:src/main/ruta/</buildPath>
  <buildPath>descriptor:target/generated-sources/ruta/descriptor/
  </buildPath>
  <buildPath>resources:src/main/resources/</buildPath>
 </buildPaths>

</configuration>
<executions>
 <execution>
  <id>default</id>
  <phase>process-classes</phase>
  <goals>
   <goal>generate</goal>
  </goals>
 </execution>
</executions>
</plugin>
The configuration parameters for this goal either define the build behavior, e.g., where the generated descriptor should be placed or which suffix the files should get, or the configuration of the generated analysis engine descriptor, e.g., the values of the configuration parameter scriptPaths. However, there are also other parameters: addRutaNature and buildPaths. Both can be utilized to configure the current Eclipse project (due to the missing m2e connector). This is required if the functionality of the UIMA Ruta Workbench, e.g., syntax checking or auto-completion, should be available in the maven project. If the parameter addRutaNature is set to true, then the UIMA Ruta Workbench will recognize the project as a script project. Only then, the buildpath of the UIMA Ruta project can be configured using the buildPaths parameter, which specifies the three important source folders of the UIMA Ruta project. In normal UIMA Ruta Workbench projects, these are script, descriptor and resources.
4.3.2. twl goal
The twl goal can be utilized to create .twl files from .txt files. Its usage and configuration is summarized in the following example:
<plugin>
<groupId>org.apache.uima</groupId>
<artifactId>ruta-maven-plugin</artifactId>
<version>3.0.1</version>
<configuration></configuration>
<executions>
<execution>
 <id>default</id>
 <phase>process-classes</phase>
 <goals>
  <goal>twl</goal>
 </goals>
 <configuration>
  <!-- This is a exemplary configuration, which explicitly specifies
   the default configuration values if not mentioned otherwise. -->

  <!-- Compress resulting tree word list. -->
  <!-- default value: true -->
  <compress>true</compress>

  <!-- Remove white spaces when generating word list. -->
  <!-- default value: true -->
  <dictRemoveWS>true</dictRemoveWS>

  <!-- The source files for the tree word list. -->
  <!-- default value: none -->
  <inputFiles>
   <directory>${basedir}/src/main/resources</directory>
   <includes>
    <include>*.txt</include>
   </includes>
  </inputFiles>

  <!-- The directory where the generated tree word lists will be
    written to.-->
  <!-- default value: ${project.build.directory}/generated-sources/
    ruta/resources/ -->
  <outputDirectory>${project.build.directory}/generated-sources/ruta/
    resources/</outputDirectory>

  <!-- Source file encoding. -->
  <!-- default value: ${project.build.sourceEncoding} -->
  <encoding>UTF-8</encoding>

 </configuration>
</execution>
</executions>
</plugin>
4.3.3. mtwl goal
The mtwl goal can be utilized to create a .mtwl file from multiple .txt files. Its usage and configuration is summarized in the following example:
<plugin>
<groupId>org.apache.uima</groupId>
<artifactId>ruta-maven-plugin</artifactId>
<version>3.0.1</version>
<configuration></configuration>
<executions>
<execution>
 <id>default</id>
 <phase>process-classes</phase>
 <goals>
  <goal>mtwl</goal>
 </goals>
 <configuration>
  <!-- This is a exemplary configuration, which explicitly specifies
   the default configuration values if not mentioned otherwise. -->

  <!-- Compress resulting tree word list. -->
  <!-- default value: true -->
  <compress>true</compress>

  <!-- Remove white spaces when generating word list. -->
  <!-- default value: true -->
  <dictRemoveWS>true</dictRemoveWS>

  <!-- The source files for the multi tree word list. -->
  <!-- default value: none -->
  <inputFiles>
   <directory>${basedir}/src/main/resources</directory>
   <includes>
    <include>*.txt</include>
   </includes>
  </inputFiles>

  <!-- The directory where the generated tree word list will be
    written to. -->
  <!-- default value: ${project.build.directory}/generated-sources/ruta/
    resources/generated.mtwl -->
  <outputFile>${project.build.directory}/generated-sources/ruta/resources/
    generated.mtwl</outputFile>

  <!-- Source file encoding. -->
  <!-- default value: ${project.build.sourceEncoding} -->
  <encoding>UTF-8</encoding>

 </configuration>
</execution>
</executions>
</plugin>
4.4. UIMA Ruta Maven Archetype
UIMA Ruta provides a maven archetype for creating maven projects that preconfigured for building UIMA Ruta scripts with maven and contain already a minimal example with a unit test, which can be utilized as a starting point.
A UIMA Ruta project are created with following command using the the archetype (in one line):
mvn archetype:generate
    -DarchetypeGroupId=org.apache.uima
    -DarchetypeArtifactId=ruta-maven-archetype
    -DarchetypeVersion=<ruta-version>
    -DgroupId=<package>
    -DartifactId=<project-name>
The placeholders need to be replaced with the corresponding values. This could look like:
mvn archetype:generate -DarchetypeGroupId=org.apache.uima
    -DarchetypeArtifactId=ruta-maven-archetype -DarchetypeVersion=3.0.1
    -DgroupId=my.domain -DartifactId=my-ruta-project
Using the archetype in Eclipse to create a project may result in some missing replacements of variables and thus to broken projects. Using the archetype on command line is recommended.
In the creation process, several properties need to be defined. Their default values can be accepted by simply pressing the return key. After the project was created successfully, switch to the new folder and enter 'mvn install'. Now, the UIMA Ruta project is built: the descriptors for the UIMA Ruta script are created, the wordlist is compiled to a MTWL file, and the unit test verifies the overall functionality.
4.5. Induce rules with the TextRuler framework
This section gives a short example how the TextRuler framework is applied in order to induce annotation rules. We refer to the screenshot in Figure 17 for the configuration and are using the exemplary UIMA Ruta project “TextRulerExample”, which is part of the source release of UIMA Ruta. After importing the project into your workspace, please rebuild all UIMA Ruta scripts in order to create the descriptors, e.g., by cleaning the project.
In this example, we are using the “KEP” algorithm for learning annotation rules for identifying Bibtex entries in the reference section of scientific publications:
-
Select the folder “single” and drag and drop it to the “Training Data” text field. This folder contains one file with correct annotations and serves as gold standard data in our example.
-
Select the file “Feature.ruta” and drag and drop it to the “Preprocess Script” text field. This UIMA Ruta script knows all necessary types, especially the types of the annotations we try the learn rules for, and additionally it contains rules that create useful annotations, which can be used by the algorithm in order to learn better rules.
-
Select the file “InfoTypes.txt” and drag and drop it to the “Information Types” list. This specifies the goal of the learning process, which types of annotations should be annotated by the induced rules, respectively.
-
Check the checkbox of the “KEP” algorithm and press the start button in the toolbar fo the view.
-
The algorithm now tries to induce rules for the targeted types. The current result is displayed in the view “KEP Results” in the right part of the perspective.
-
After the algorithms finished the learning process, create a new UIMA Ruta file in the “uima.ruta.example” package and copy the content of the result view to the new file. Now, the induced rules can be applied as a normal UIMA Ruta script file.
4.6. HTML annotations in plain text
The following script provides an example how to process HTML files with UIMA Ruta in order to get plain text documents that still contain information about the HTML tags in form of annotations. The analysis engine descriptor HtmlViewWriter is identical to the common ViewWriter, but additionally specifies a type system. More information about different options to configure the conversion can be found in here.
PACKAGE uima.ruta.example;

ENGINE utils.HtmlAnnotator;
ENGINE utils.HtmlConverter;
ENGINE HtmlViewWriter;
TYPESYSTEM utils.HtmlTypeSystem;
TYPESYSTEM utils.SourceDocumentInformation;

Document{-> RETAINTYPE(SPACE,BREAK)};
Document{-> EXEC(HtmlAnnotator)};

Document { -> CONFIGURE(HtmlConverter, "inputView" = "_InitialView",
    "outputView" = "plain"),
      EXEC(HtmlConverter)};

Document{ -> CONFIGURE(HtmlViewWriter, "inputView" = "plain",
    "outputView" = "_InitialView", "output" = "/../converted/"),
    EXEC(HtmlViewWriter)};
4.7. Sorting files with UIMA Ruta
The following script provides an example how to utilize UIMA Ruta for sorting files.
ENGINE utils.XMIWriter;
TYPESYSTEM utils.SourceDocumentInformation;

DECLARE Pattern;

// some rule-based pattern
(NUM SPECIAL NUM SPECIAL NUM){-> Pattern};

Document{CONTAINS(Pattern)->CONFIGURE(XMIWriter,
  "Output" = "../with/"), EXEC(XMIWriter)};
Document{-CONTAINS(Pattern)->CONFIGURE(XMIWriter,
  "Output" = "../without/"), EXEC(XMIWriter)};
4.8. Converting XML documents with UIMA Ruta
The following script provides an example how to process XML files in order to retain only the text content. the removed XML elements should, howver, be available as annotations. This script can therefore be applied to create xmiCAS files from text document annotated with XML tags. The analysis engine descriptor TEIViewWriter is identical to the common ViewWriter, but additionally specifies a type system.
ENGINE utils.HtmlAnnotator;
TYPESYSTEM utils.HtmlTypeSystem;
ENGINE utils.HtmlConverter;
ENGINE TEIViewWriter;
TYPESYSTEM utils.SourceDocumentInformation;

DECLARE PersName, LastName, FirstName, AddName;

Document{->EXEC(HtmlAnnotator, {TAG})};
Document{-> RETAINTYPE(MARKUP,SPACE)};
TAG.name=="PERSNAME"{-> PersName};
TAG.name=="SURNAME"{-> LastName};
TAG.name=="FORENAME"{-> FirstName};
TAG.name=="ADDNAME"{-> AddName};
Document{-> RETAINTYPE};

Document { -> CONFIGURE(HtmlConverter, "inputView" = "_InitialView",
    "outputView" = "plain", "skipWhitespaces" = false),
      EXEC(HtmlConverter)};

Document{ -> CONFIGURE(TEIViewWriter, "inputView" = "plain", "outputView" =
    "_InitialView", "output" = "/../converted/"),
    EXEC(TEIViewWriter)};