UIMA comes with many examples for the different UIMA
components and artifacts that can be created. All
these examples are explained and used in the UIMA
documentation when the specific components or
artifacts are introduced. The UIMA analysis example
that we want to use now is a combination of some of
these example components that shows a basic document
analysis using UIMA.
To run the UIMA analysis example, we use the UIMA
DocumentAnalyzer tooling that comes with the UIMA
SDK. The tool can run UIMA analysis components (also
know as annotators) on a given set of text documents
and shows the result of the analysis run at the end.
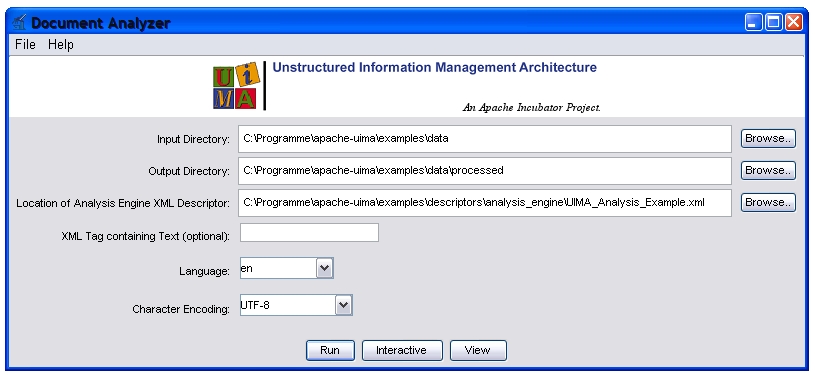
To start the UIMA DocumentAnalyzer, start the
documentAnalyzer.sh
(or for Windows .bat) file located in the
bin
subdirectory of your UIMA installation. The
DocumentAnalyzer window pops up where the following
values must be set to run the UIMA analysis example:
Input Directory:
<UIMA_HOME>/examples/data
Output Directory:
<UIMA_HOME>/examples/data/processed
AE XML Descriptor:
<UIMA_HOME>/examples/descriptors/analysis_engine/UIMA_Analysis_Example.xml
Replace <UIMA_HOME> above with the path of your
Apache UIMA installation directory. In the sample
screenshot below, the Apache UIMA installation
directory was "C:\programme\apache-uima".
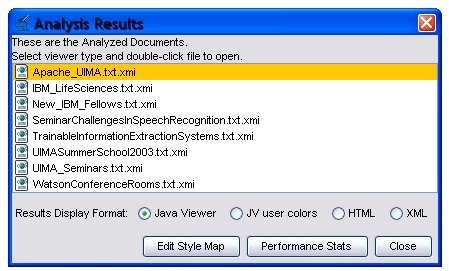
To analyze the doccuments, click the "Run" button,
which should, after a brief pause, pop up an
"Analyzed Results" window.
To display the analysis results for one of the
documents, just double-click the desired document.
The important one for the UIMA analysis example is
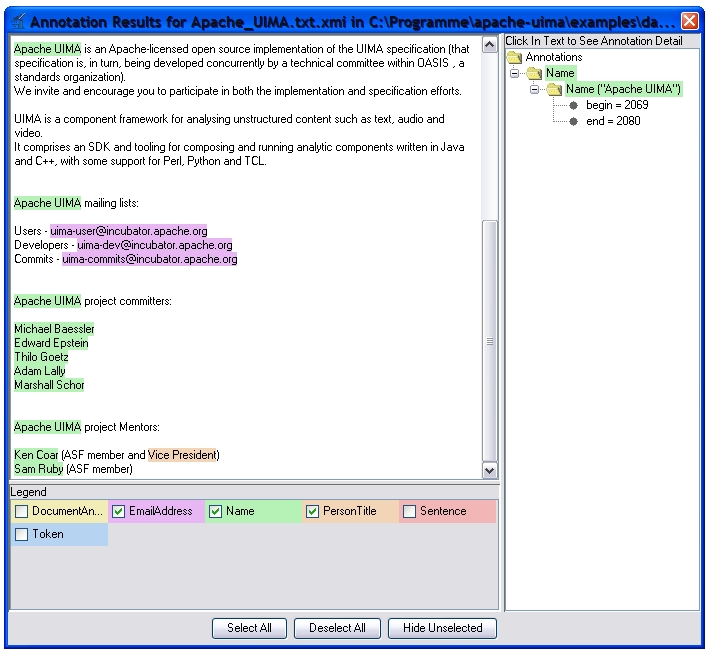
the Apache_UIMA.xmi file. When you open this
document from the result list, you will see
different kind of annotations such as:
- EmailAddress annotations
- Name annotations
- PersonTitle annotations
- Sentence annotations
- Token annotations
When selecting the check-box for those annotations
the highlighting in the text for those annotations
can be turned on or off.
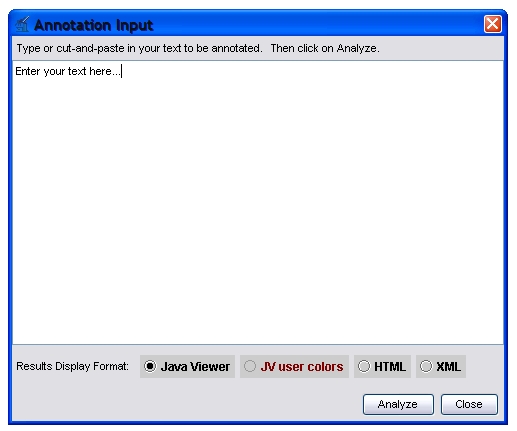
This concludes the exercise. You may wish to
experiment by submitting text of your own for
analysis. To do that you can use the
DocumentAnalyzer in the interactive mode. Just click
the "Interactive" button instead of the "Run" button
when you have entered the settings for the analysis
example as seen in the screenshot above.
After clicking the "Interactive" button to following
screen is displayed where you can enter your text.
When clicking the "Analyze" button your text will be
analyzed and you will see the analysis results in
the annotation view in the same way as for the
example above.


 Getting Started: Installing the Apache UIMA Java Framework and SDK, and Running Examples